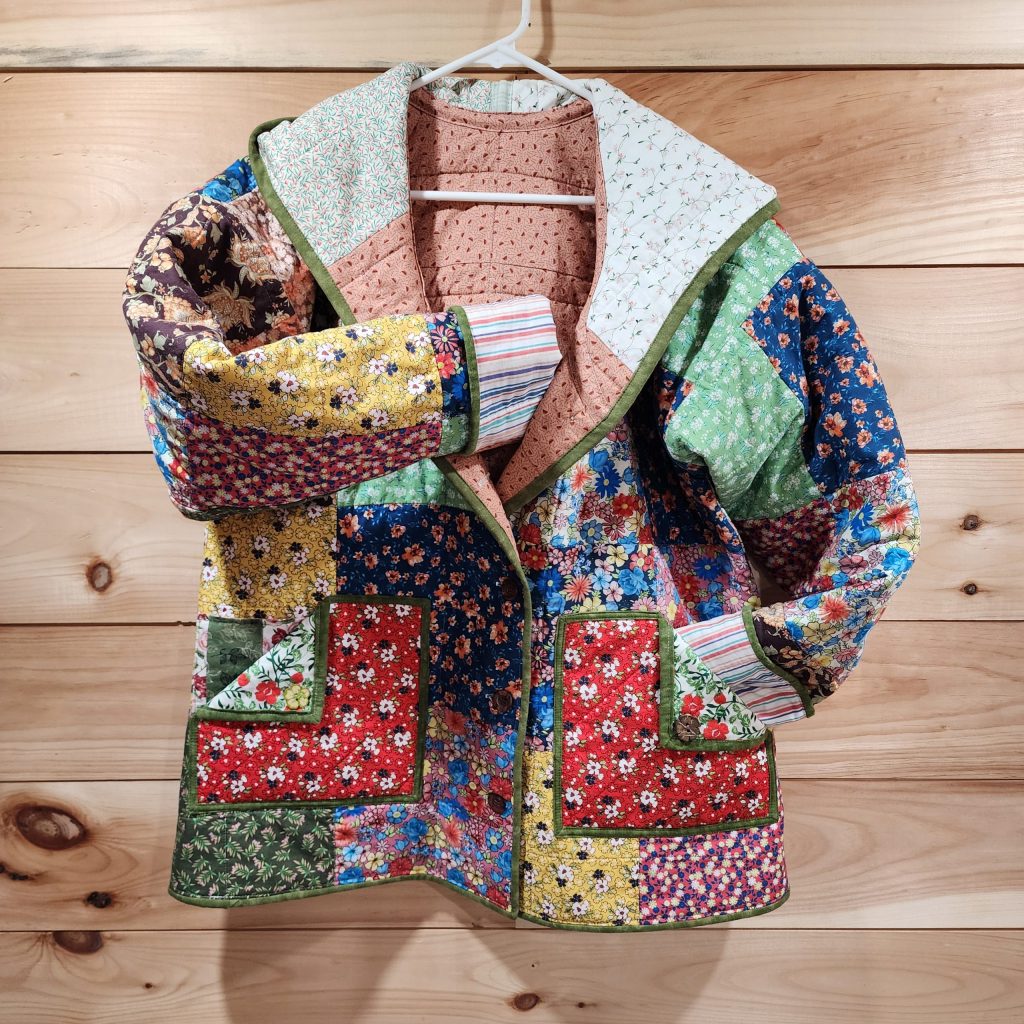
Quick View of the 10 Easy Steps
- Select a jacket pattern.
- Select the quilt pattern.
- Select the fabrics.
- Measure your pattern pieces.
- Create “mini quilts”.
- Wash and dry your mini quilts.
- Cut out your jacket pieces from your mini quilts.
- Sew your jacket.
- Bind the raw edges around the jacket front, bottom and sleeves.
- Add desired embellishments.
- Select or create a jacket pattern. Choose a pattern with as few pieces as possible or create a simple jacket pattern with the following pieces:
- Front
- Back
- Sleeve
- Collar or hood
- Select the quilt pattern for your quilted pieces. You can go very simple and use one fabric for the main part and a second for the backing. You could use individual squares sewn together, or use detailed quilt blocks with or without sashing.
- Select the fabrics. You will need approximately 5 yards of fabrics. Amount of each will vary depending on your quilting pattern. If you want a variety of fabrics, choose 16-20 fat quarters. Always make sure you have some extra on hand in case of mistakes or miscalculations.
- Measure your pattern pieces at the widest and longest points to determine each pattern piece’s width and height. Add about 6% for shrinkage if using unwashed fabric. Write these measurements down in the following manner with the width first and the length second. The number in parentheses before the width and length is for the quantity of each you need. You will need at least two fronts, two sleeves, one back, one hood (or collar) and one or two pockets depending on your pattern.
- Create “mini quilts” in each size stated above based on your quilt pattern from #2 above. As you create the “mini quilts” tops, keep your pattern piece handy and think about the placement of your quilt blocks or squares and where they will fall in the finished jacket. For your two fronts and sleeves, you can create mirror pieces, completely different pieces, or complementary pieces. On the jacket back, you can feature a special quilt block or fabric piece. Be creative and have fun. Back and bat each mini quilt top just like a real quilt. You do not need to bind the edges as you would a finished quilt. However, you should either serge or stitch around them. Serging is the best choice. Second best is to use a zig zag stitch letting it overlap the raw edges. Third best is a straight stitch all around. When you are done, you will have a mini quilt for each part of your jacket.
- Wash your mini quilts in lukewarm water and tumble dry. This will allow shrinkage to occur before you make your jacket. It also gives your quilted pieces that nice crinkly quilty look and feel. Include a piece of the backing material that you can use for your seam binding. Remove your mini quilts and backing from the dryer immediately after the dryer stops and make sure your pieces are completely dry. Lay your pieces flat.
- Using your pattern and the correct mini quilt for each pattern piece, cut out your jacket pieces from your mini quilts. Remember to cut the quantity you need of each pattern piece and to cut the second one in REVERSE. In other words, cut one front with the pattern face up, then cut the second front with the pattern face down so you have a left front and a right front with your quilt pattern on the correct side of each. The same for your sleeves. Transfer any pattern markings that you need to the cut pieces.
- Follow your sewing directions to sew your jacket. As you sew, finish each seam. First, trim the seam to ¼ inch. Then finish it with a piece of seam tape or a serger. For a nice, finished look, use boughten or handmade seam tape and bind each seam. A single piece centered over the seam overlapping the raw seam edges and stitched down on both sides creates a very professional finish.
- Once your jacket is sewn, make quilt binding and finish the raw edges down the fronts and bottom of the jacket and at the cuffs. Make sure there are no raw edges left showing when you are done.
- Add any final embellishments such as buttons and button holes or decorative touches you desire.
Congratulations! You just completed your quilt jacket!