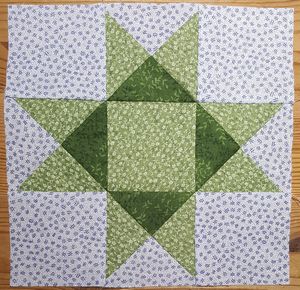
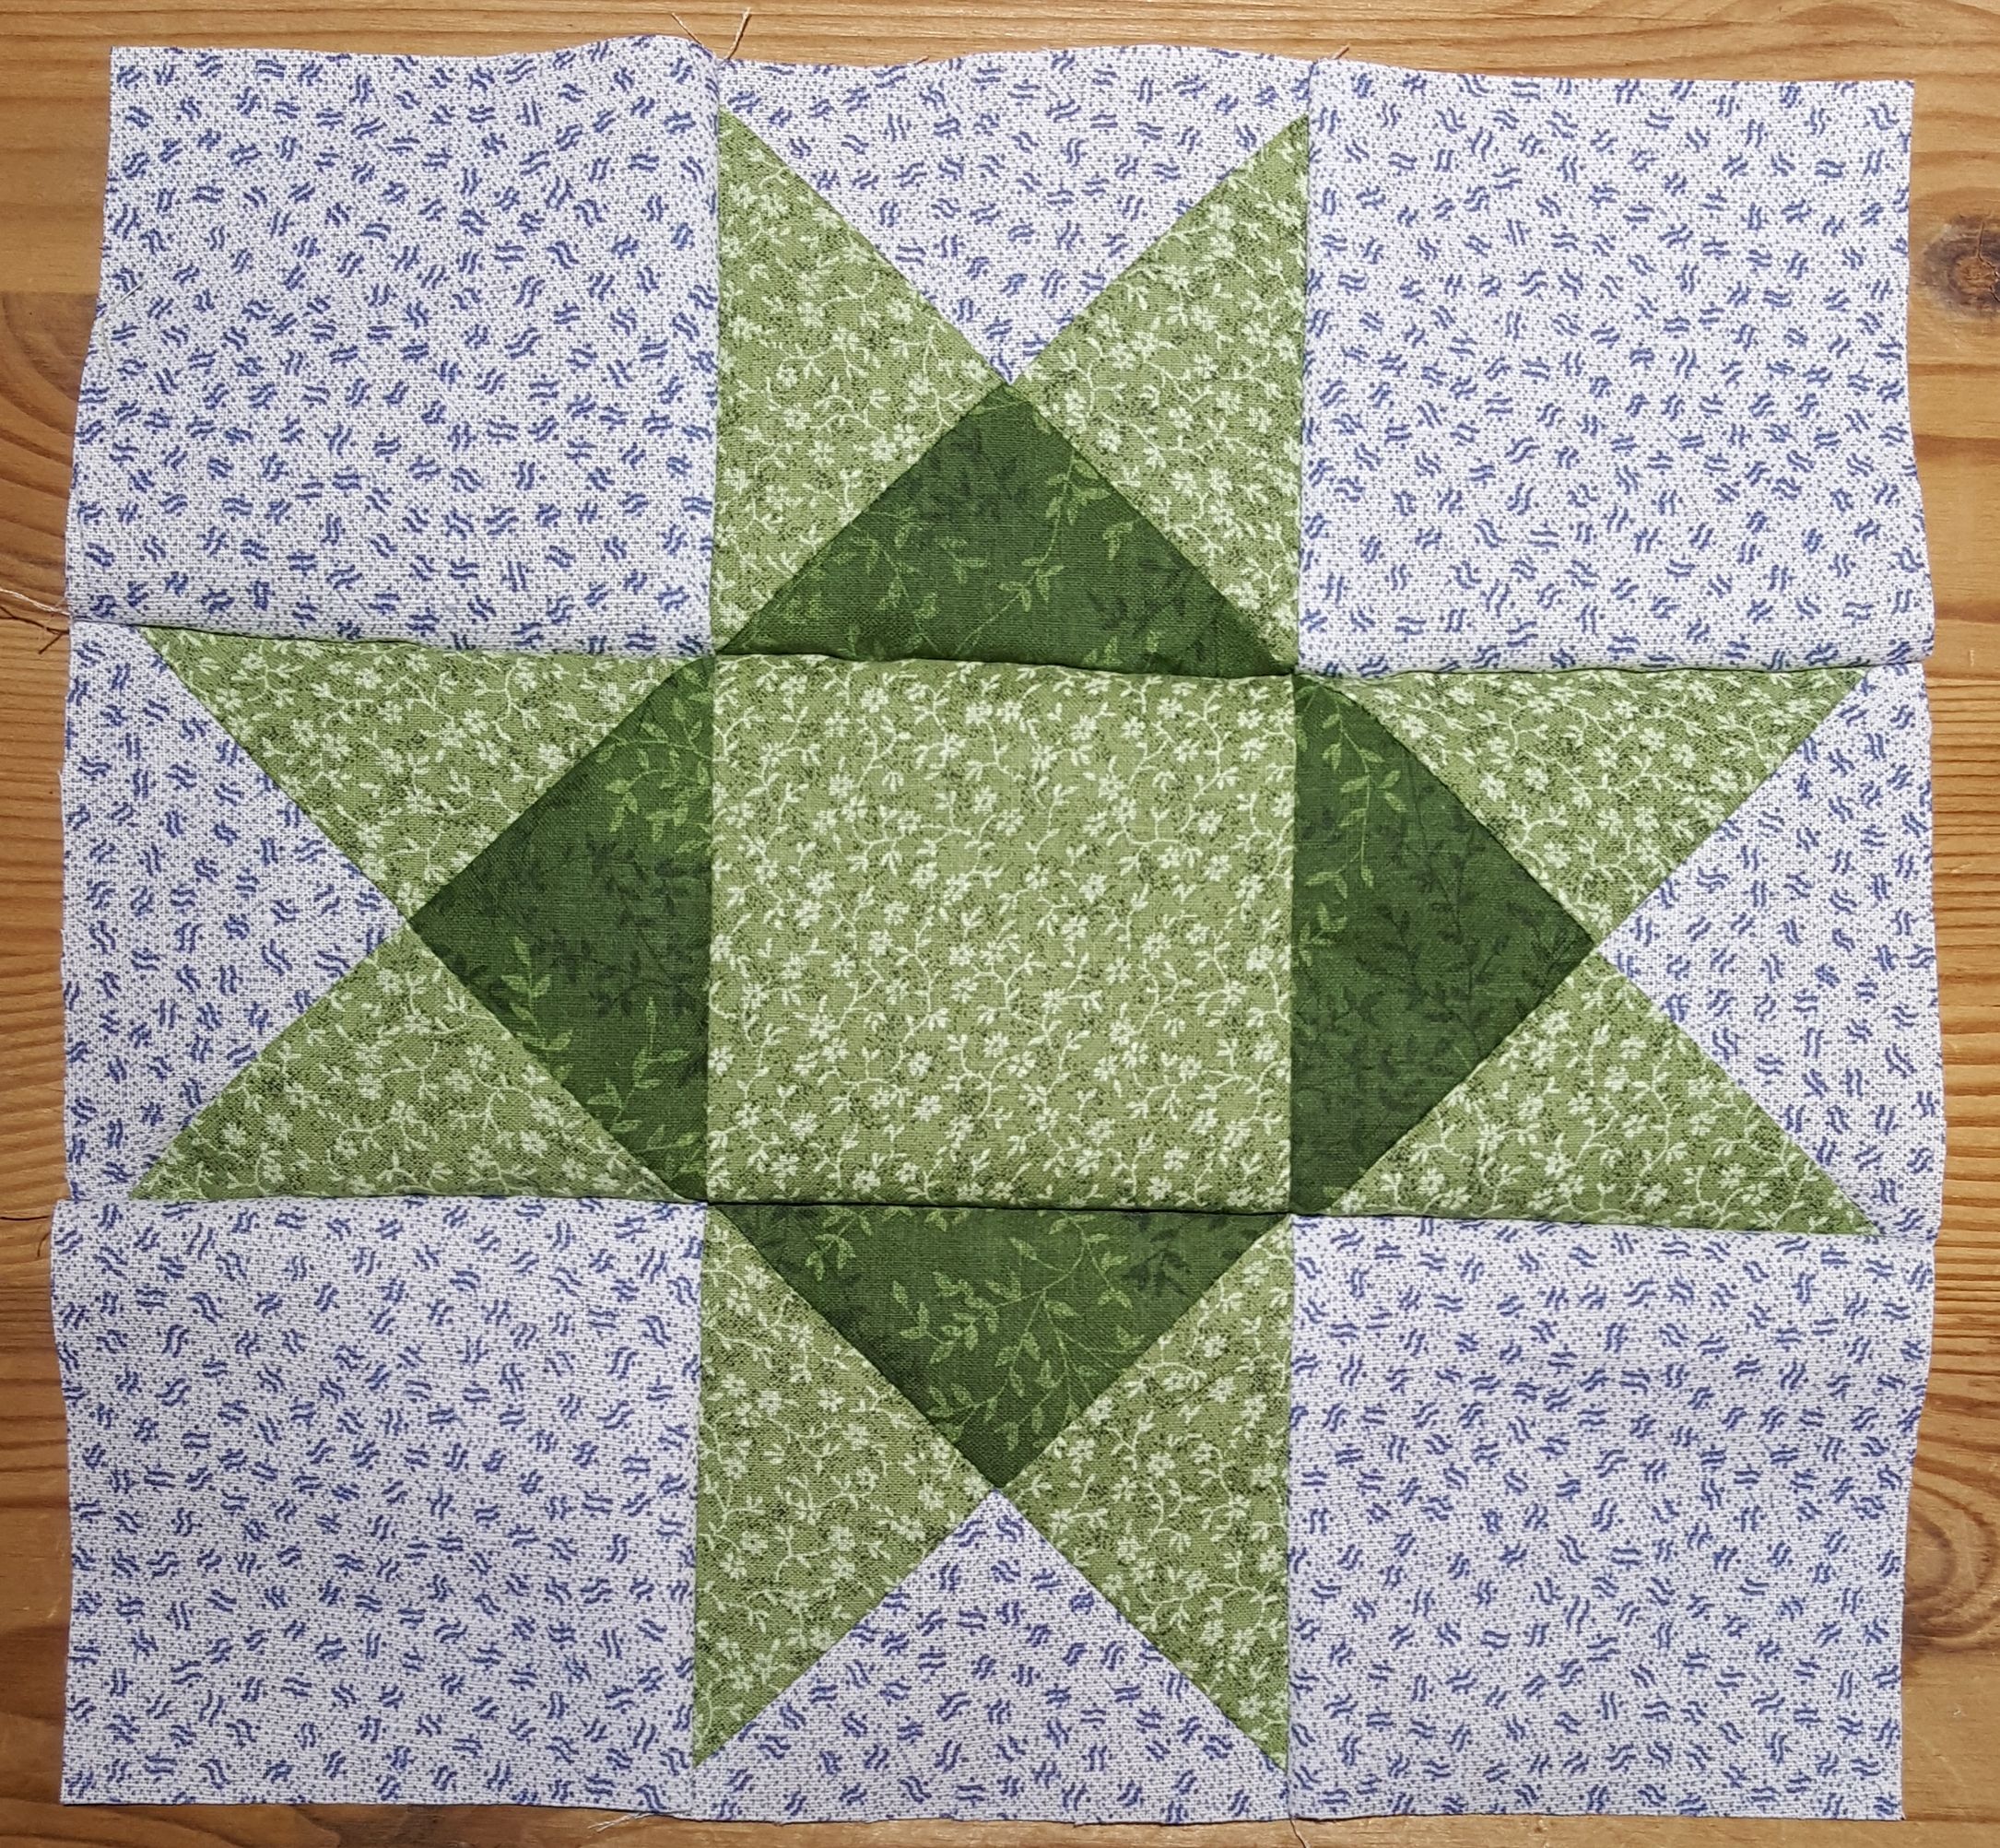
This is a visual guide to making a 9-inch Ohio Star quilt block using actual photos from making one 9-inch Ohio Star block.
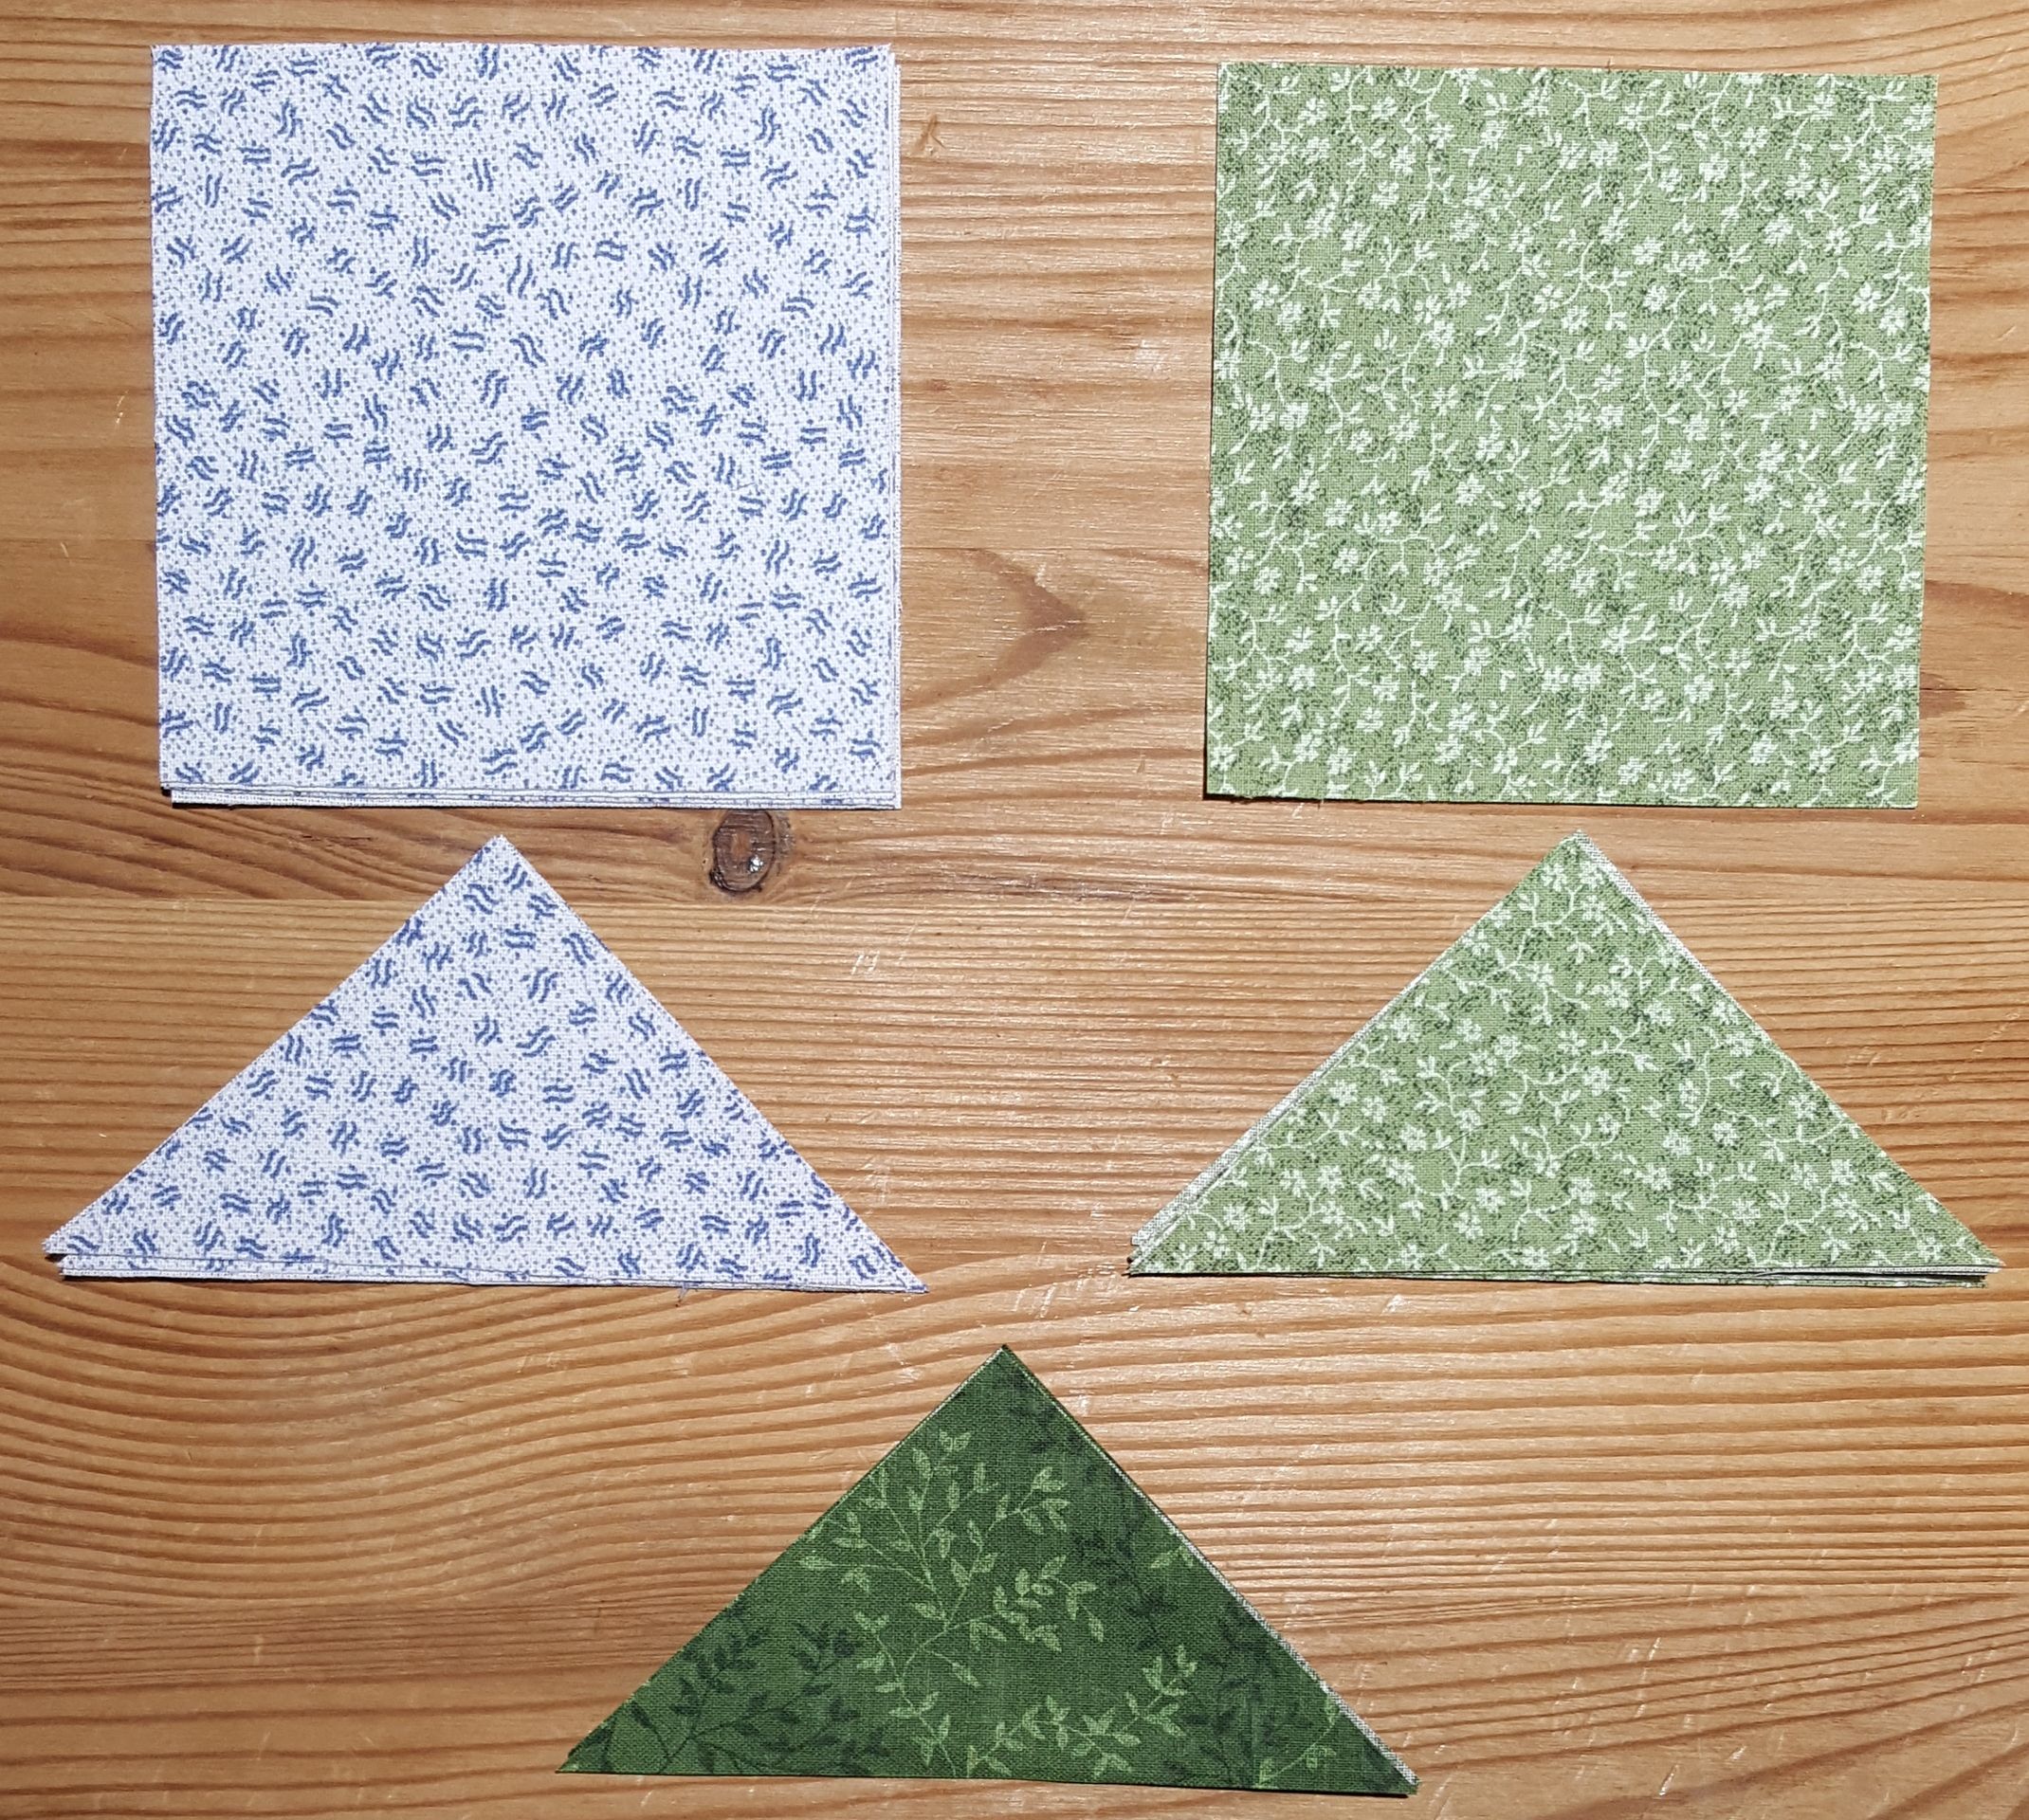
Pieces for 9 inch Ohio Star Quilt Block
Cut your pieces for the quilt block as follows:
Background Fabric – in the above photo, it is the blue on white fabric
4 3 ½ inch squares
1 4 ¼ inch square cut in half diagonally twice
Star Fabric – in the above photo, it is the light green tonal floral fabric
1 3 ½ inch square for star center
2 4 ¼ inch square cut in half diagonally twice for star points
Contrast Fabric – in the above photo, it is the dark green tonal leaf fabric
1 4 ¼ inch square cut in half diagonally twice for contrast
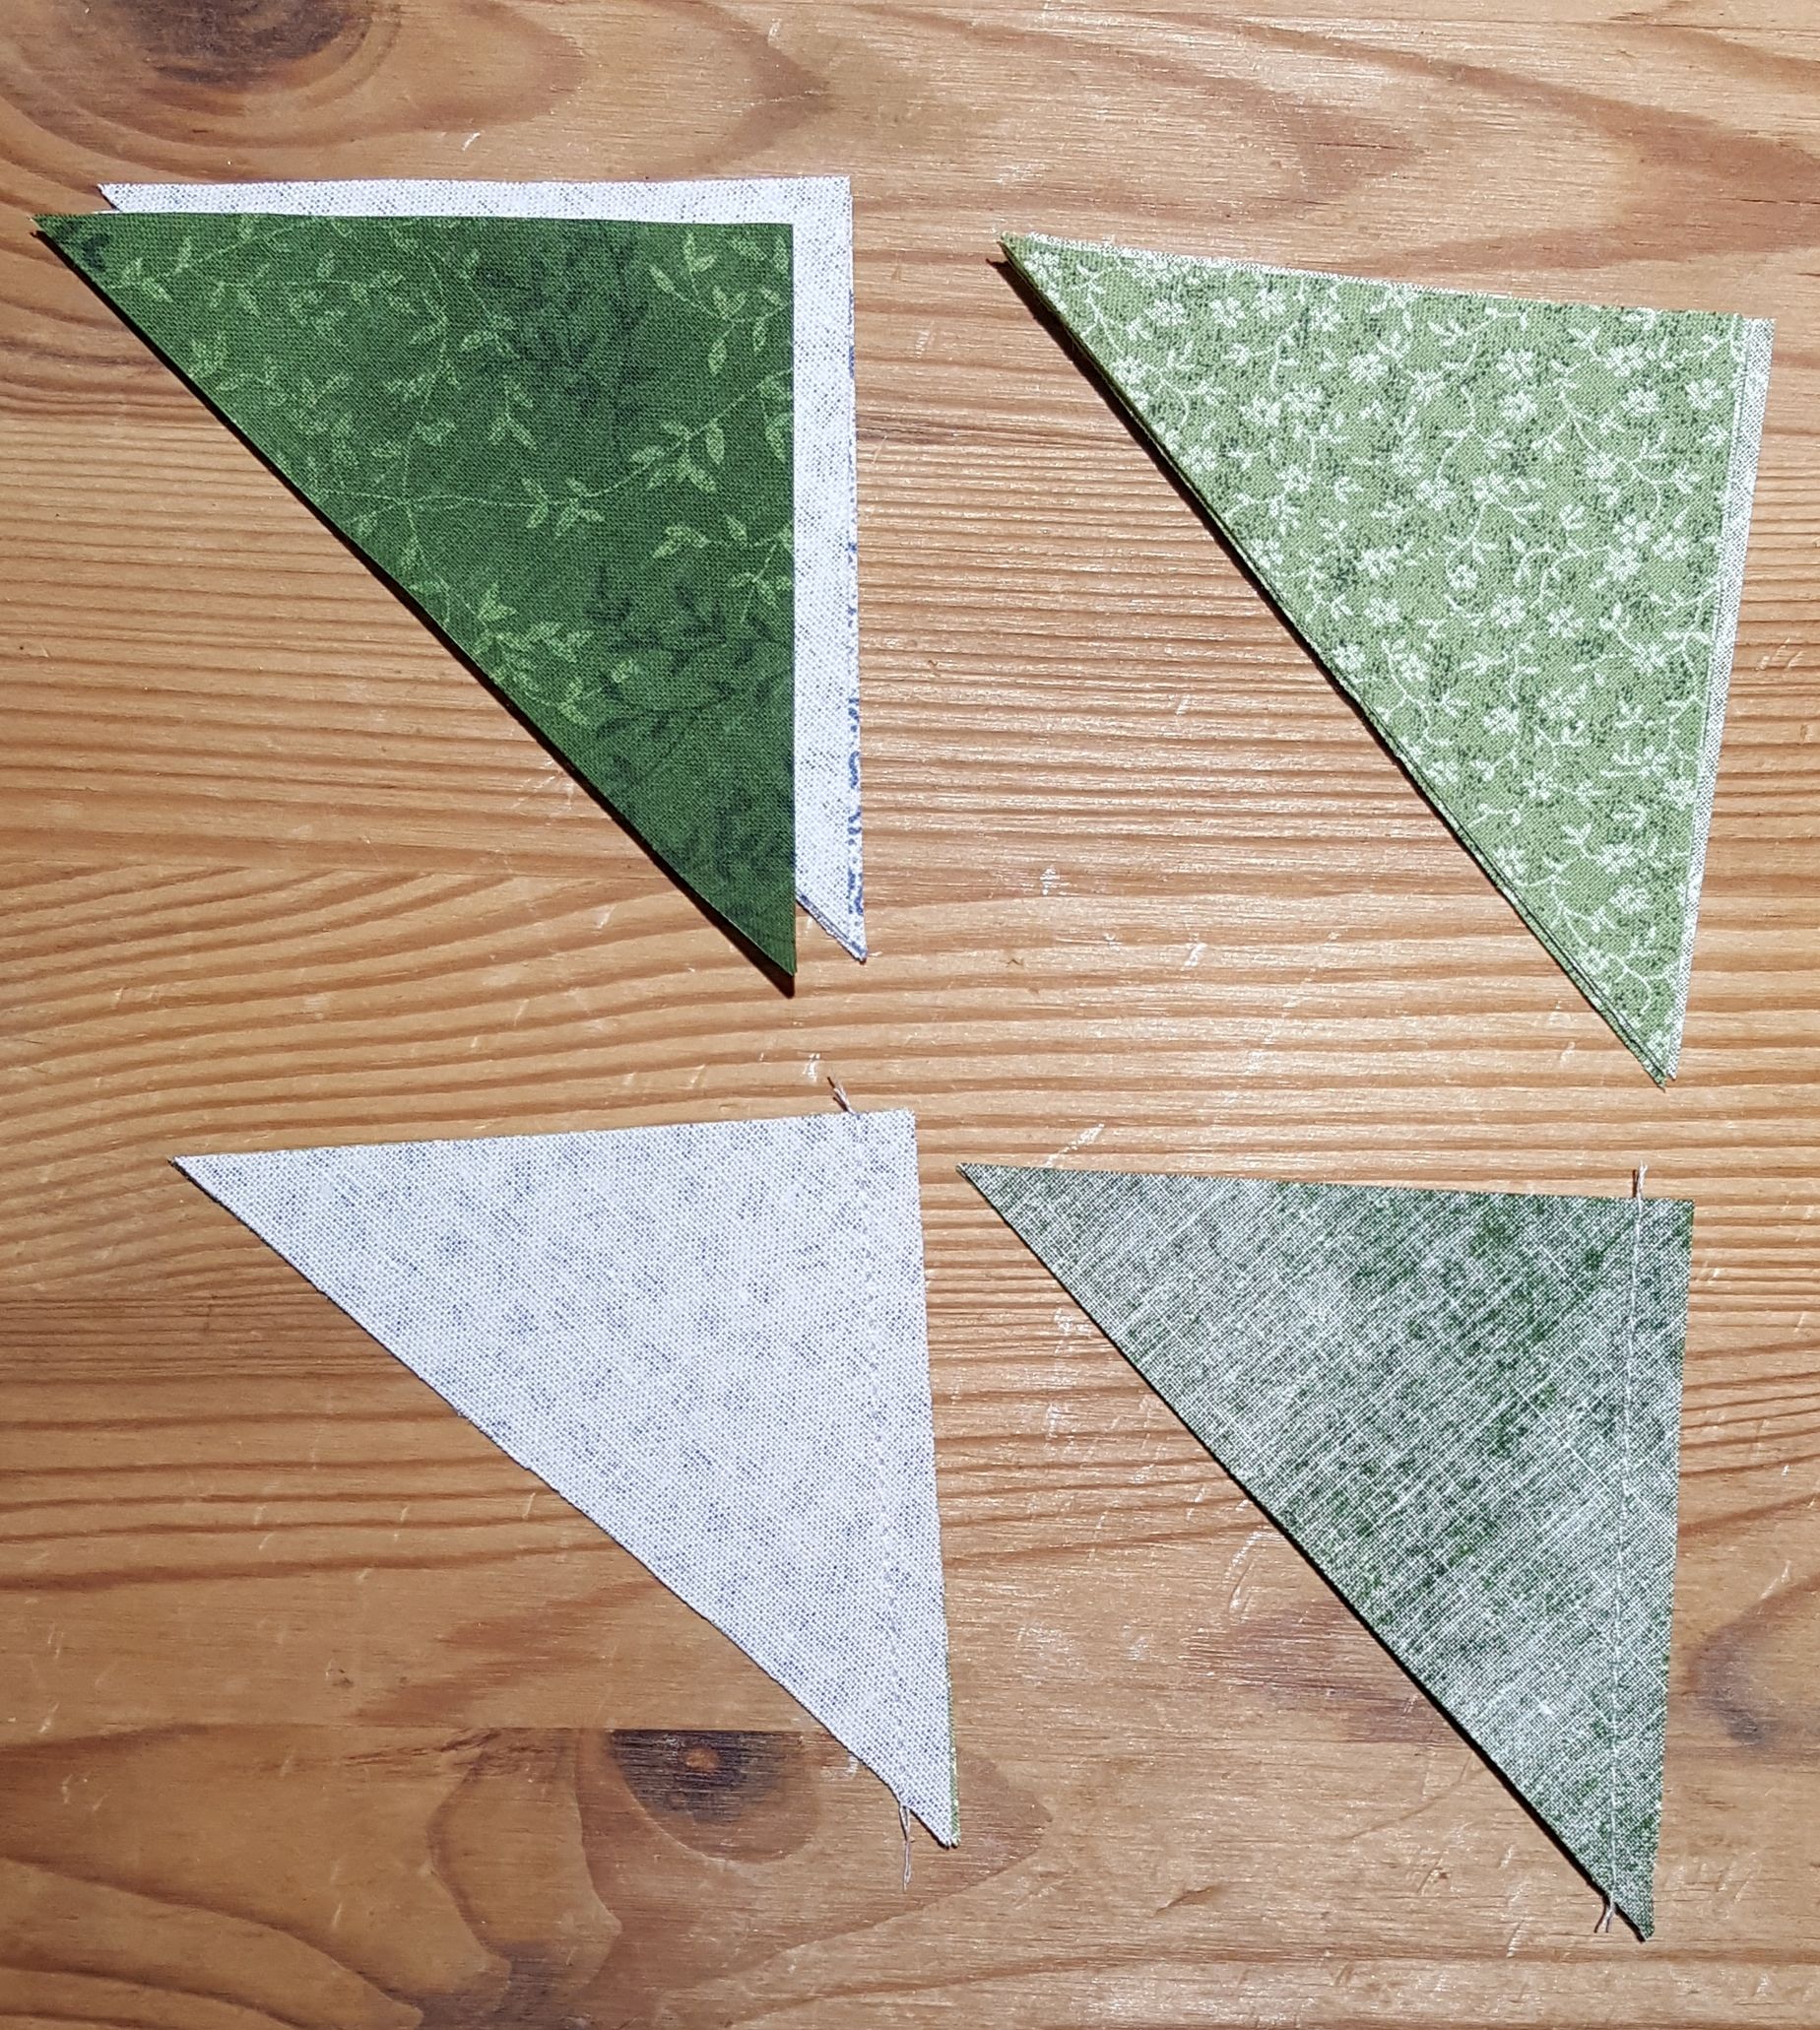
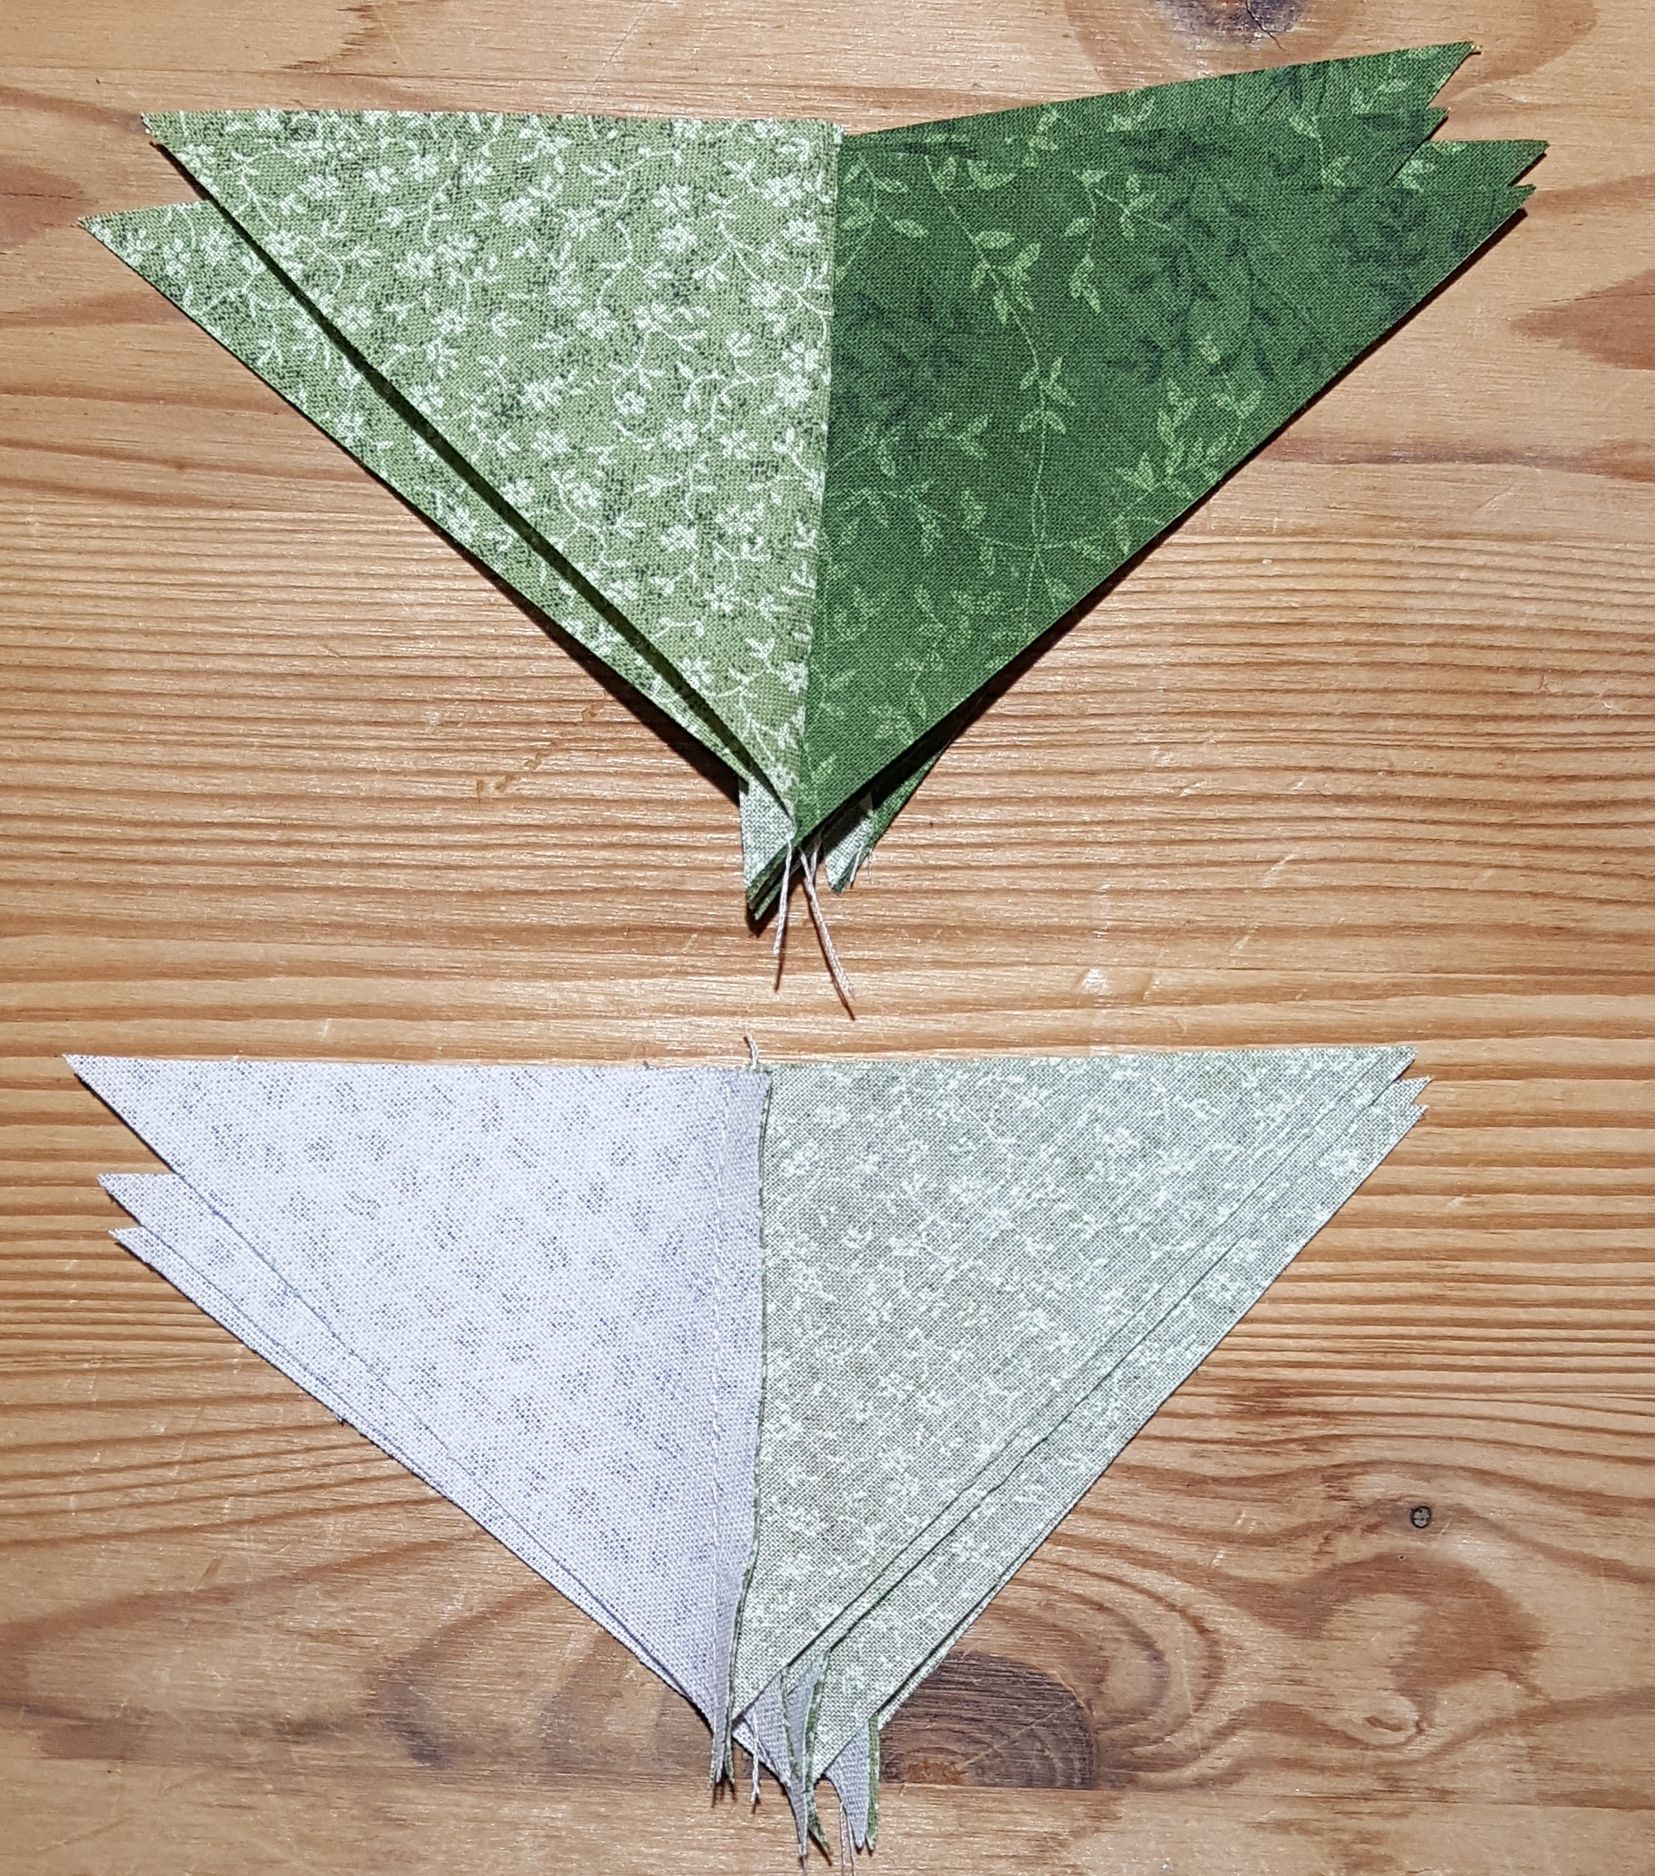
Sew the background triangles and contrast triangles to the star triangles with right sides together and star triangles always on the bottom. Sew down the right edge from the 90 degree angle as shown.
Background and contrast triangles sewn to star triangles
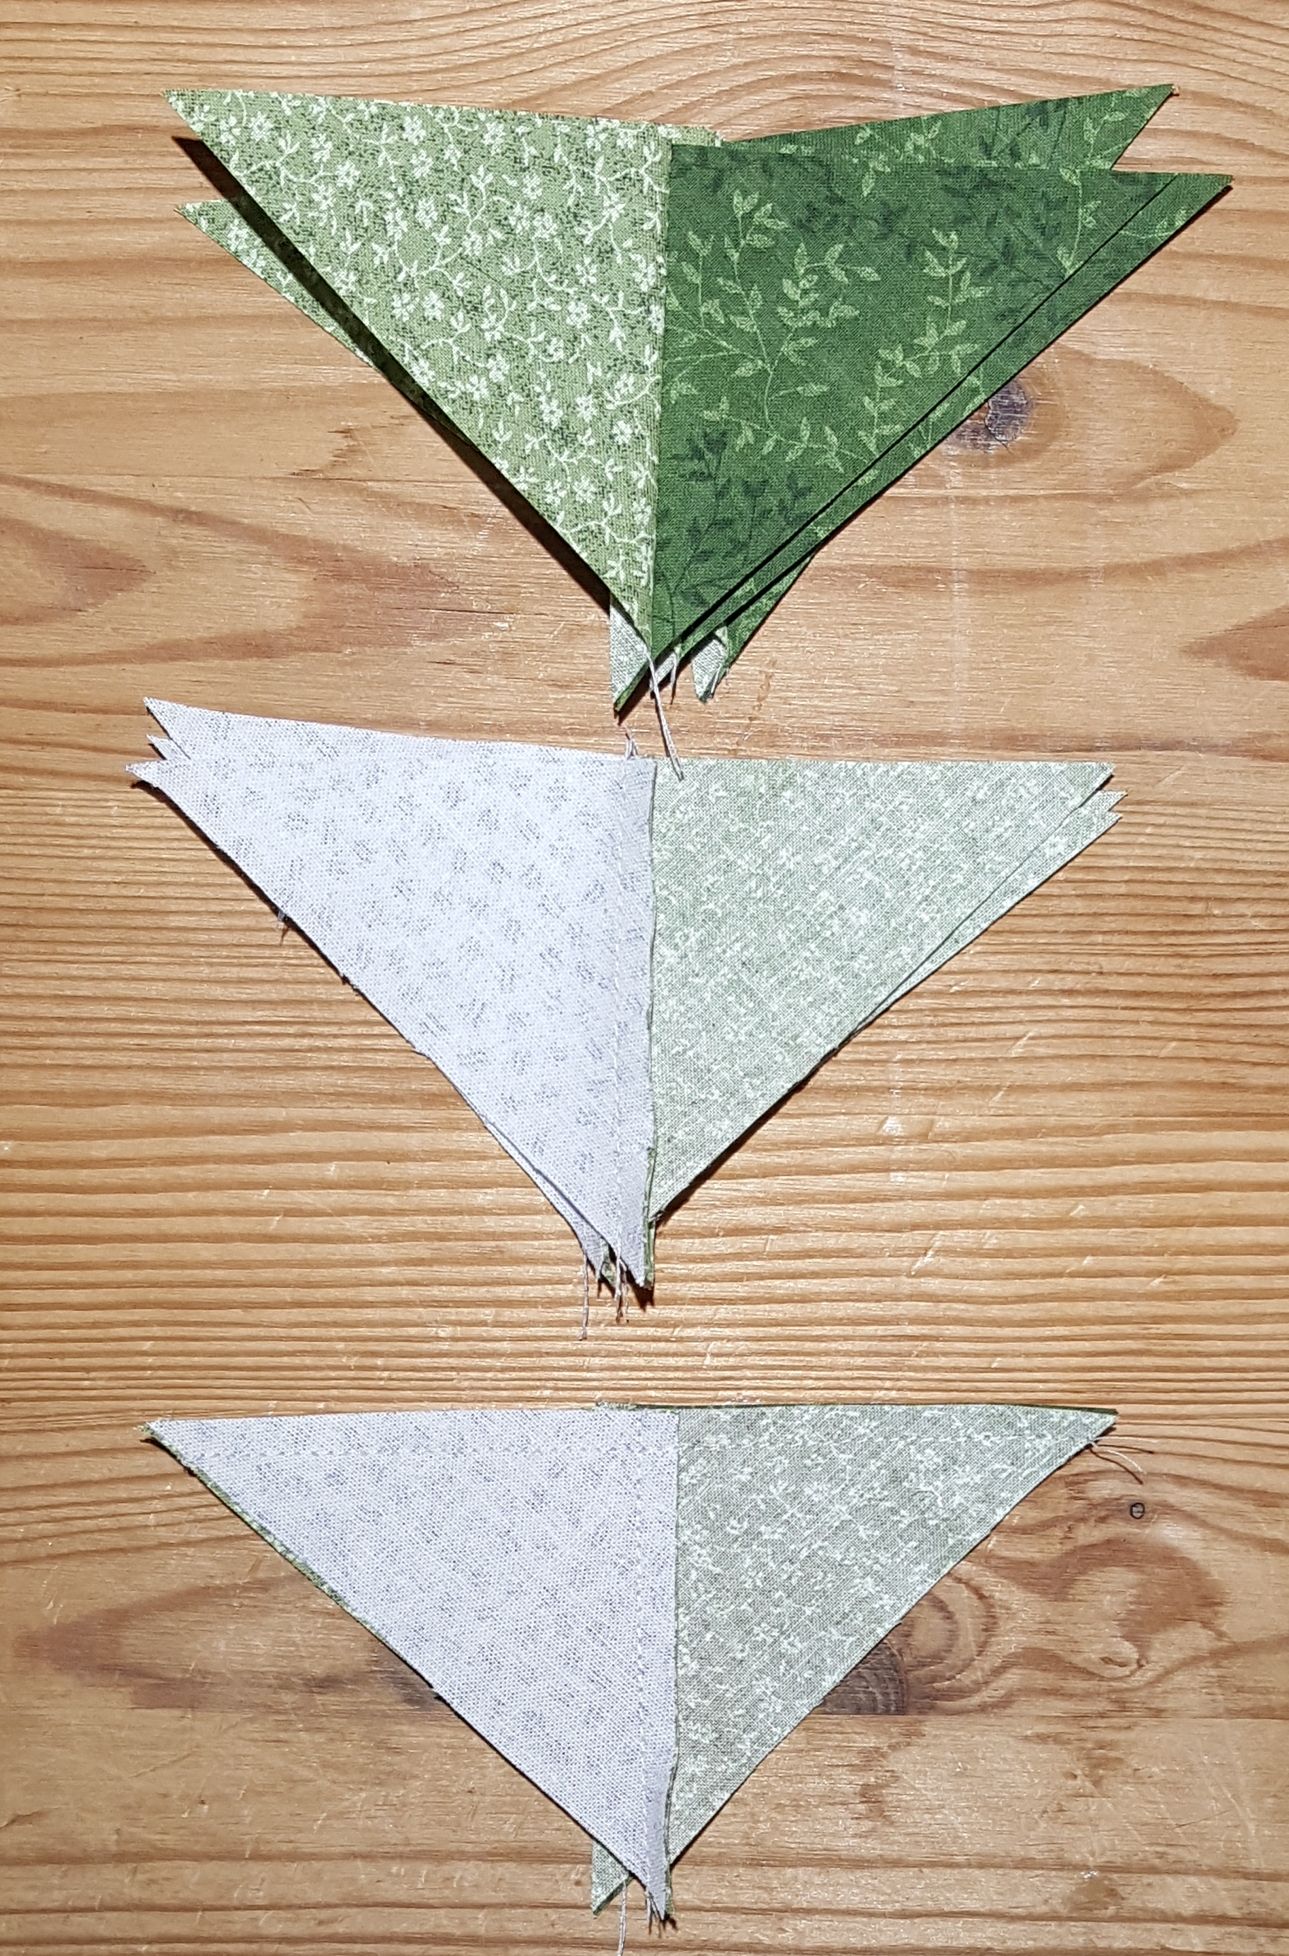
Star side of sewn triangle pieces for Ohio Star quilt block
Press seam toward star triangle on all pieces for Ohio Quilt block
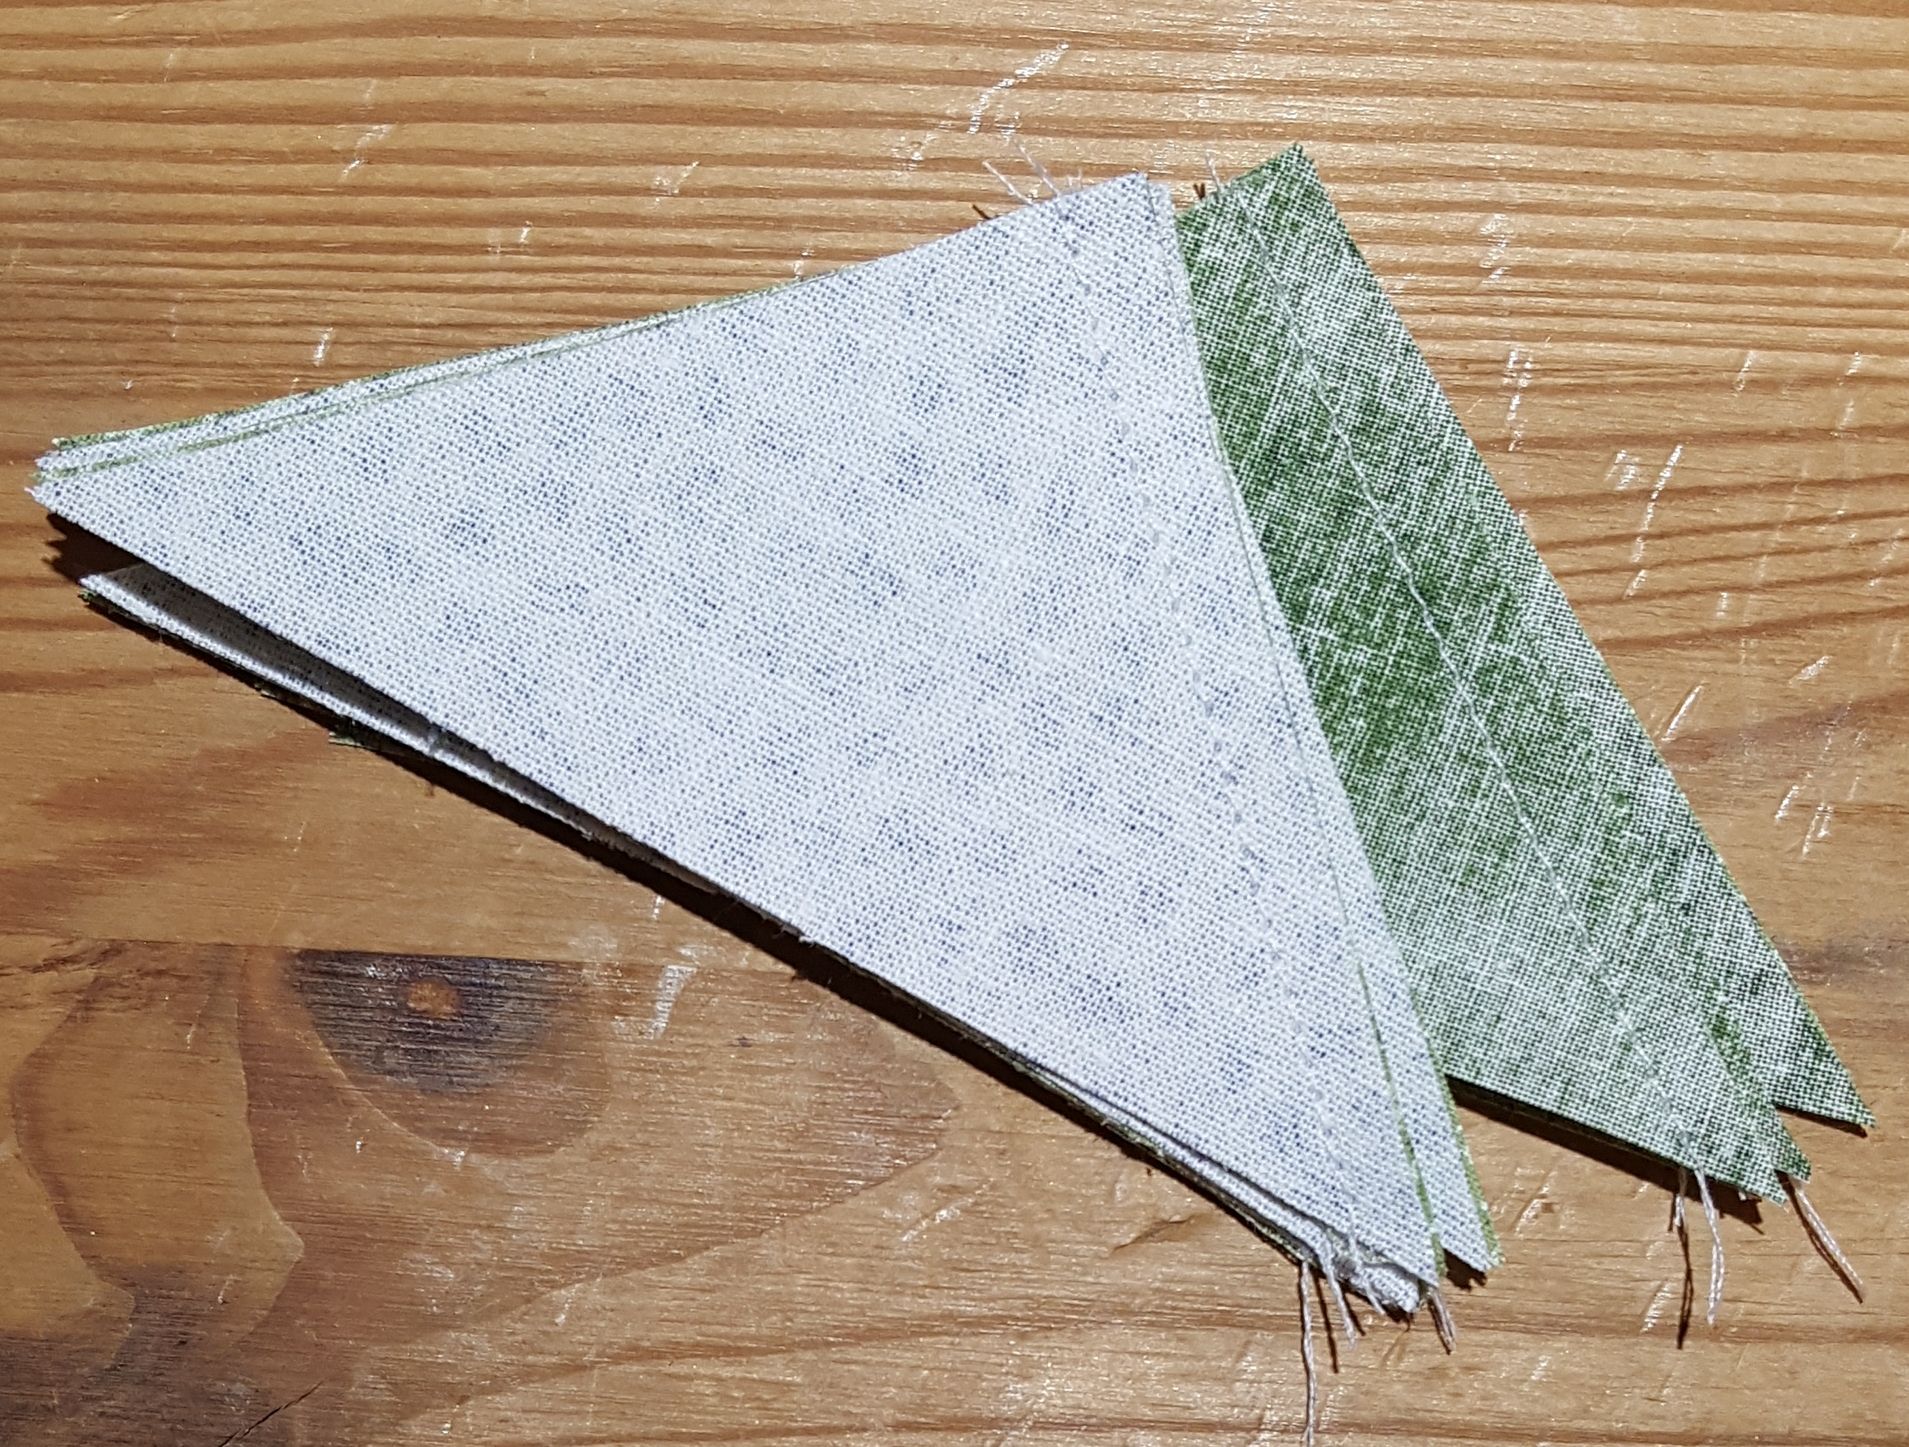
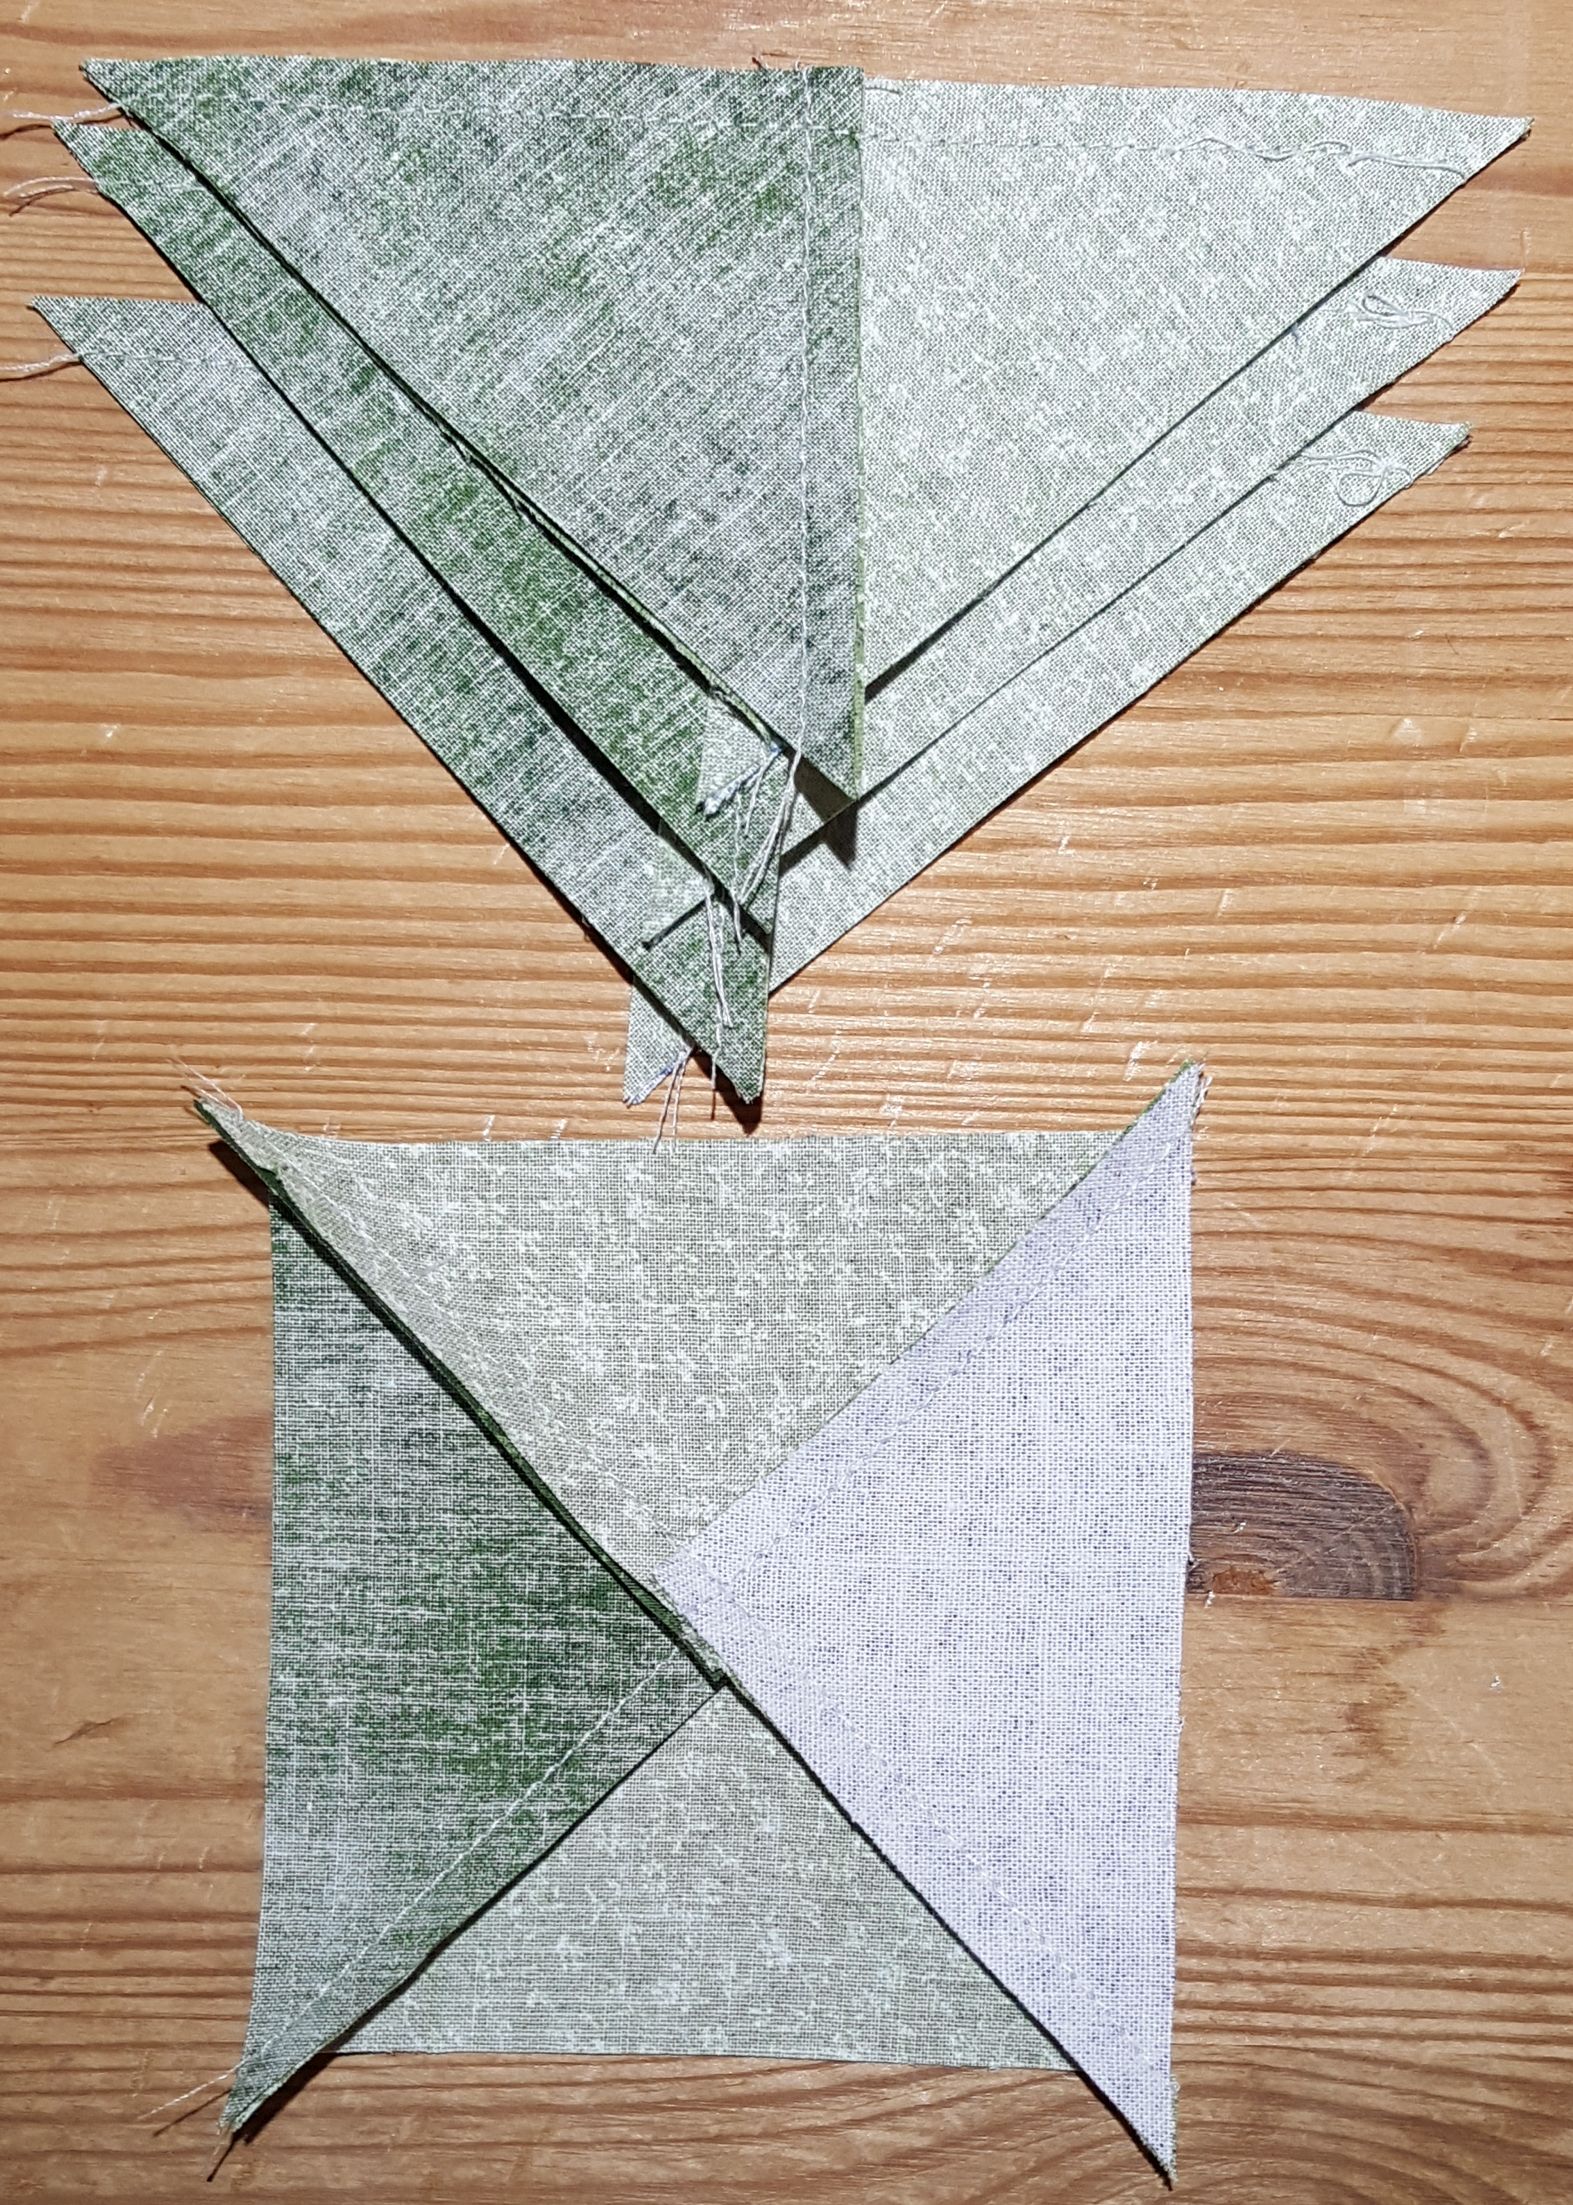
Sew background triangle sets to contrast triangle sets along long edge nesting seams
Open sewn triangles pieces and press seam toward contrast triangle
Trim dog ears from sewn triangle pieces for Ohio Star quilt block
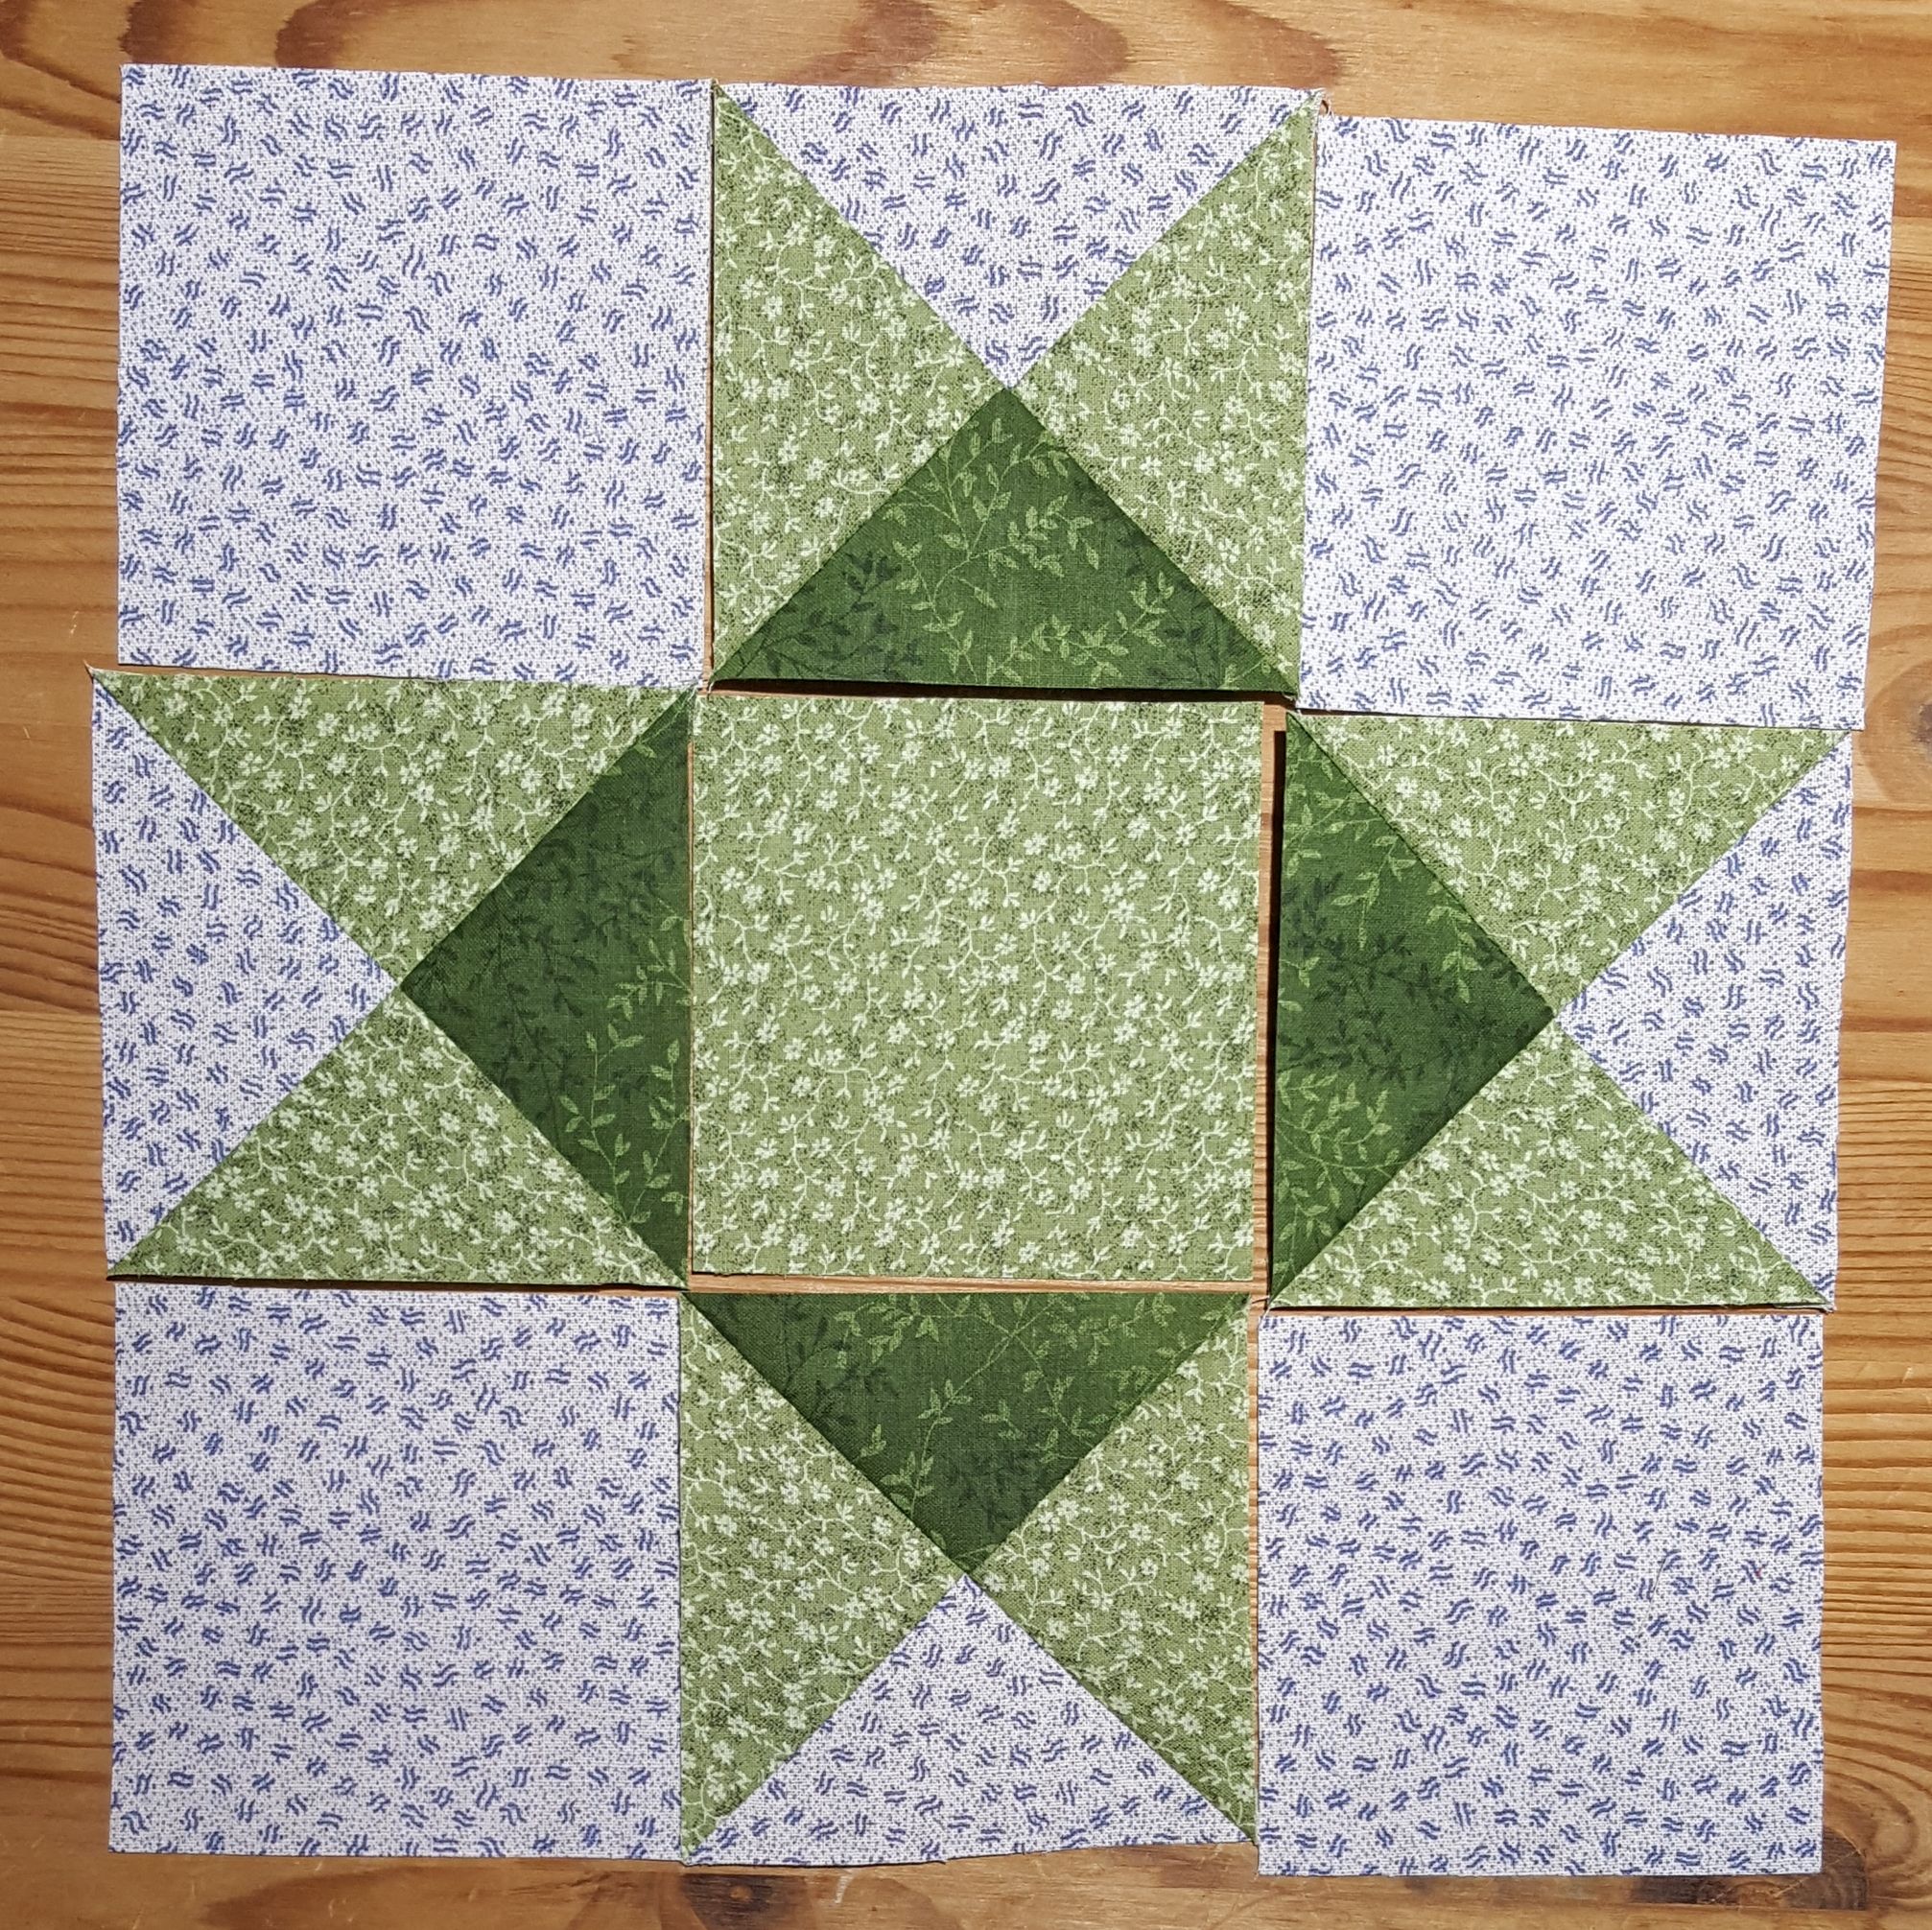
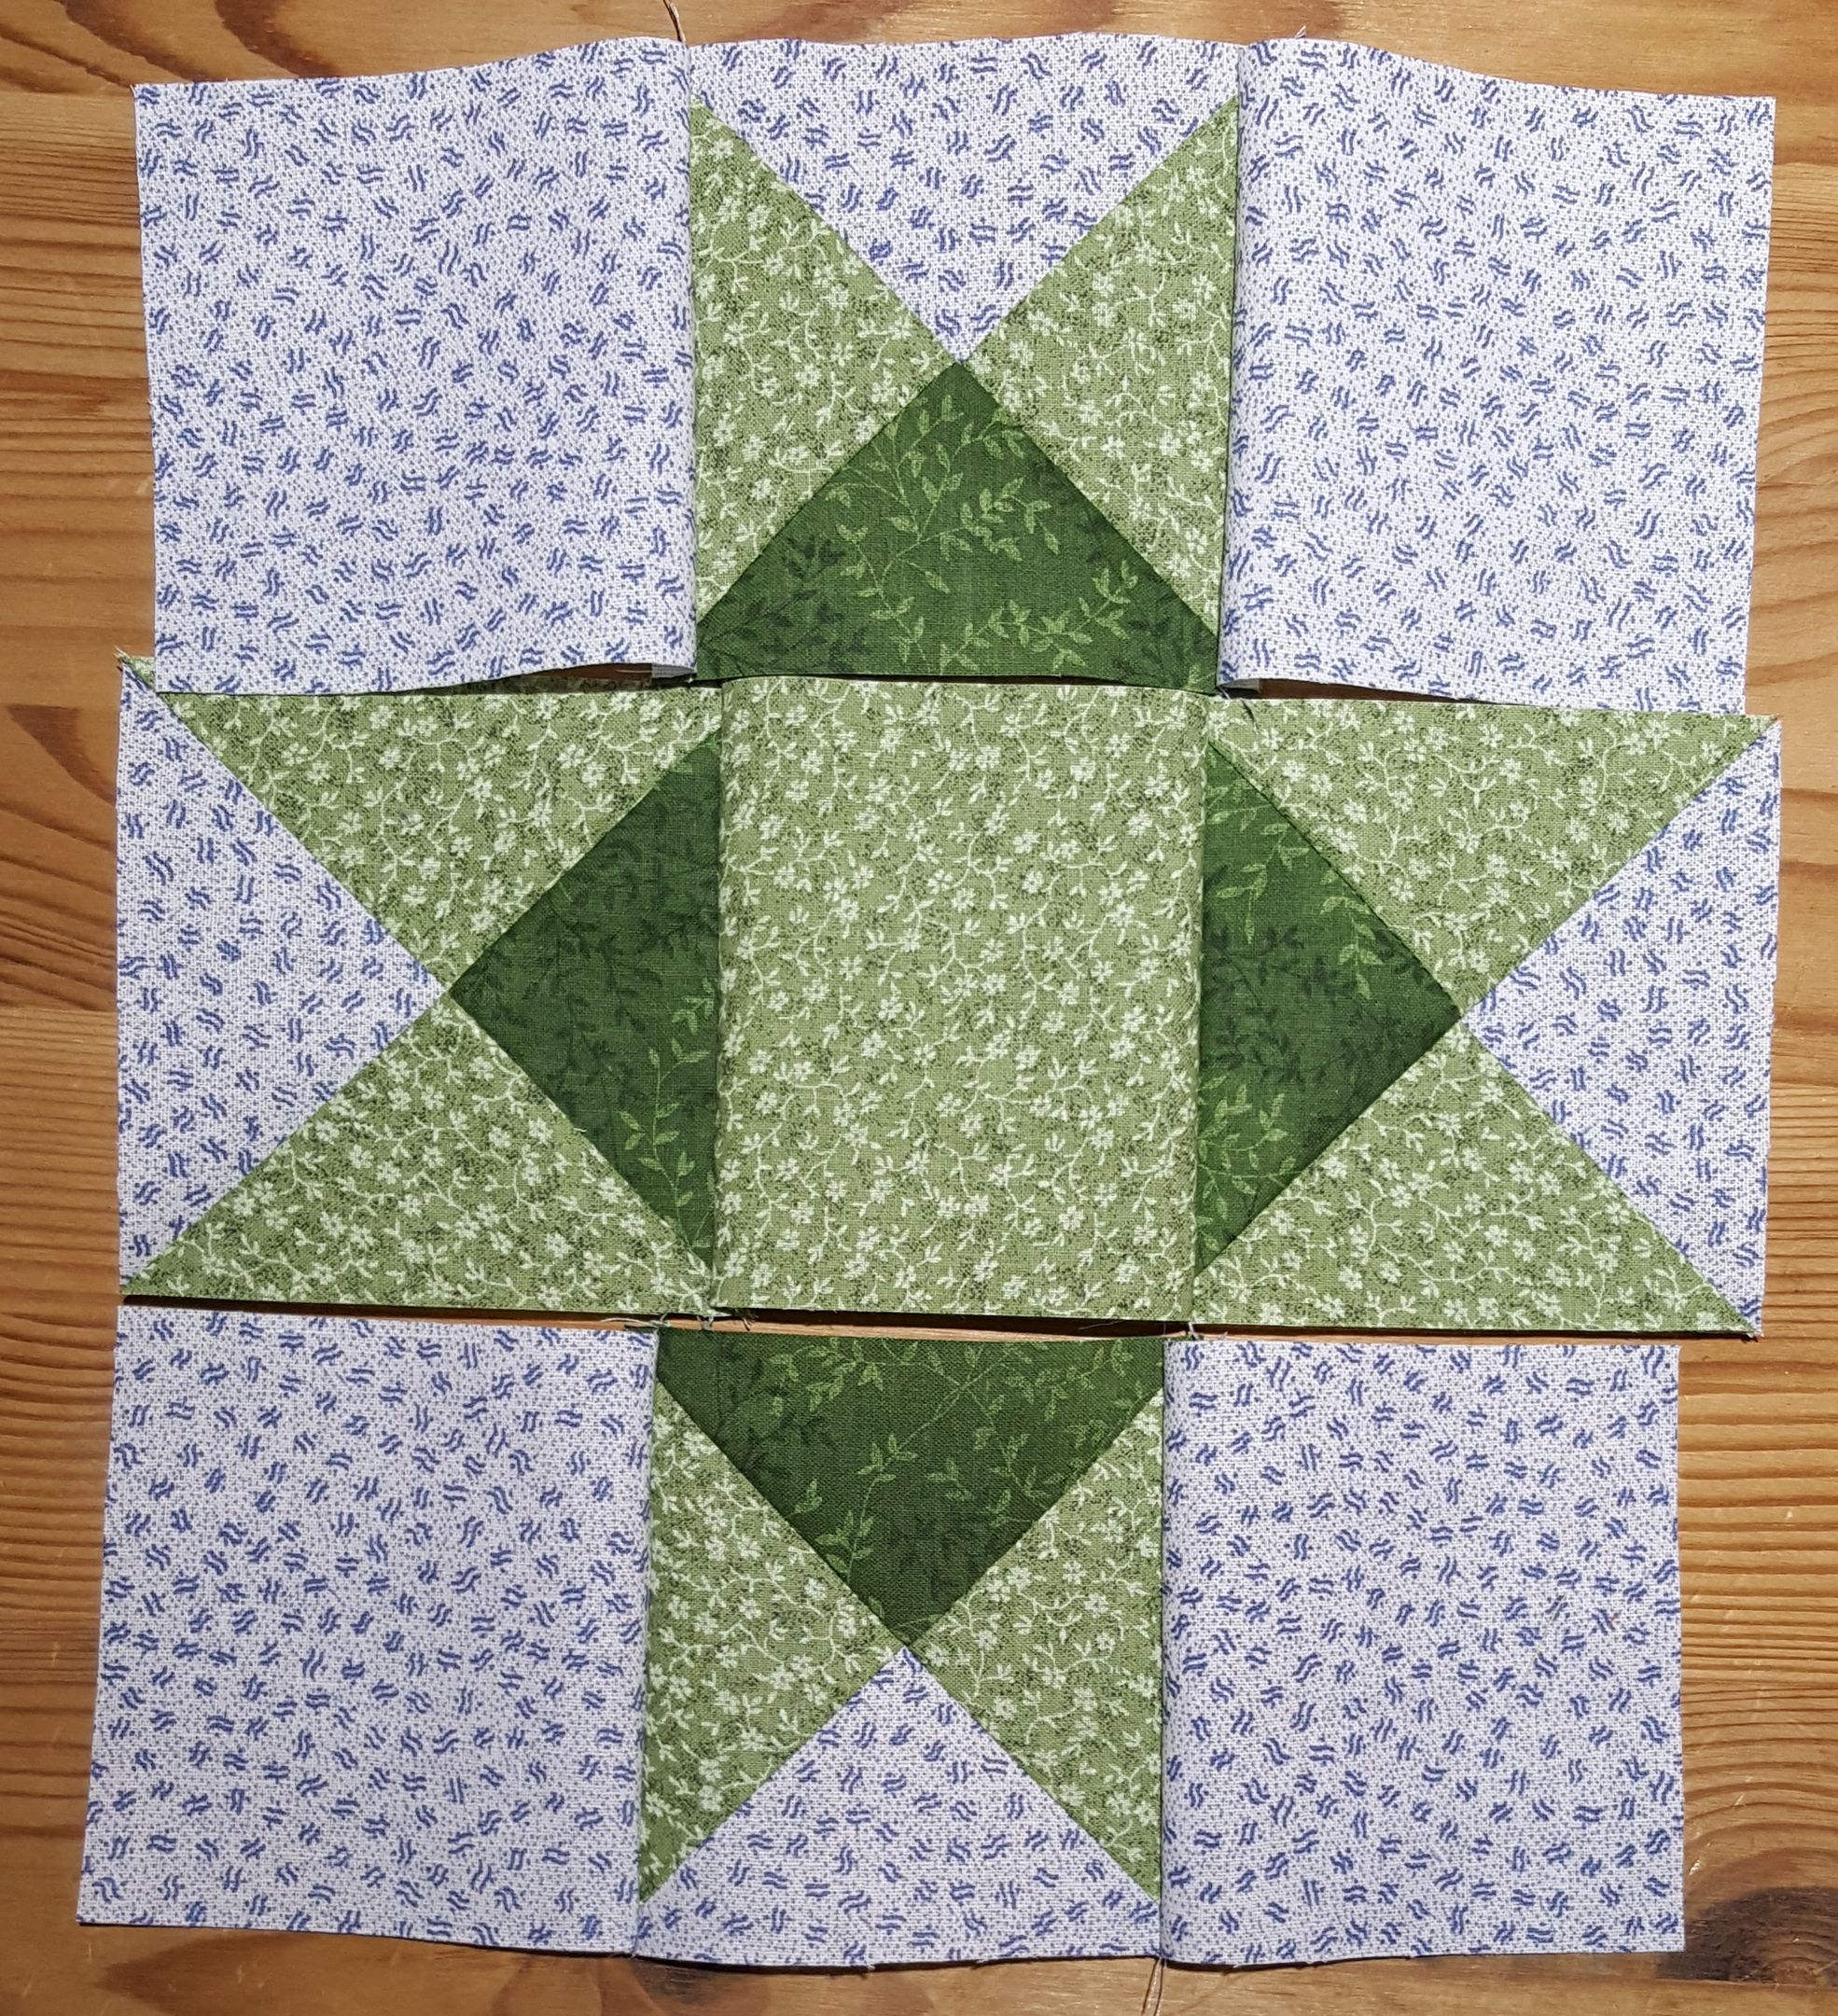
Arrange the sewn triangles with the background squares and the center square to form Ohio Star quilt block. Make sure your contrast triangles border the center square and the background triangles are on the outer edge.
Sew the rows together first for the Ohio Star quilt block. Keep checking to be sure you have the parts in the correct order as you sew.
Press the seams inward for middle row and outward for outside rows for the Ohio Star quilt block
Sew the rows together nesting the seams for the Ohio Star quilt block. Make sure you keep your rows in the correct order as you sew that third row onto the block.
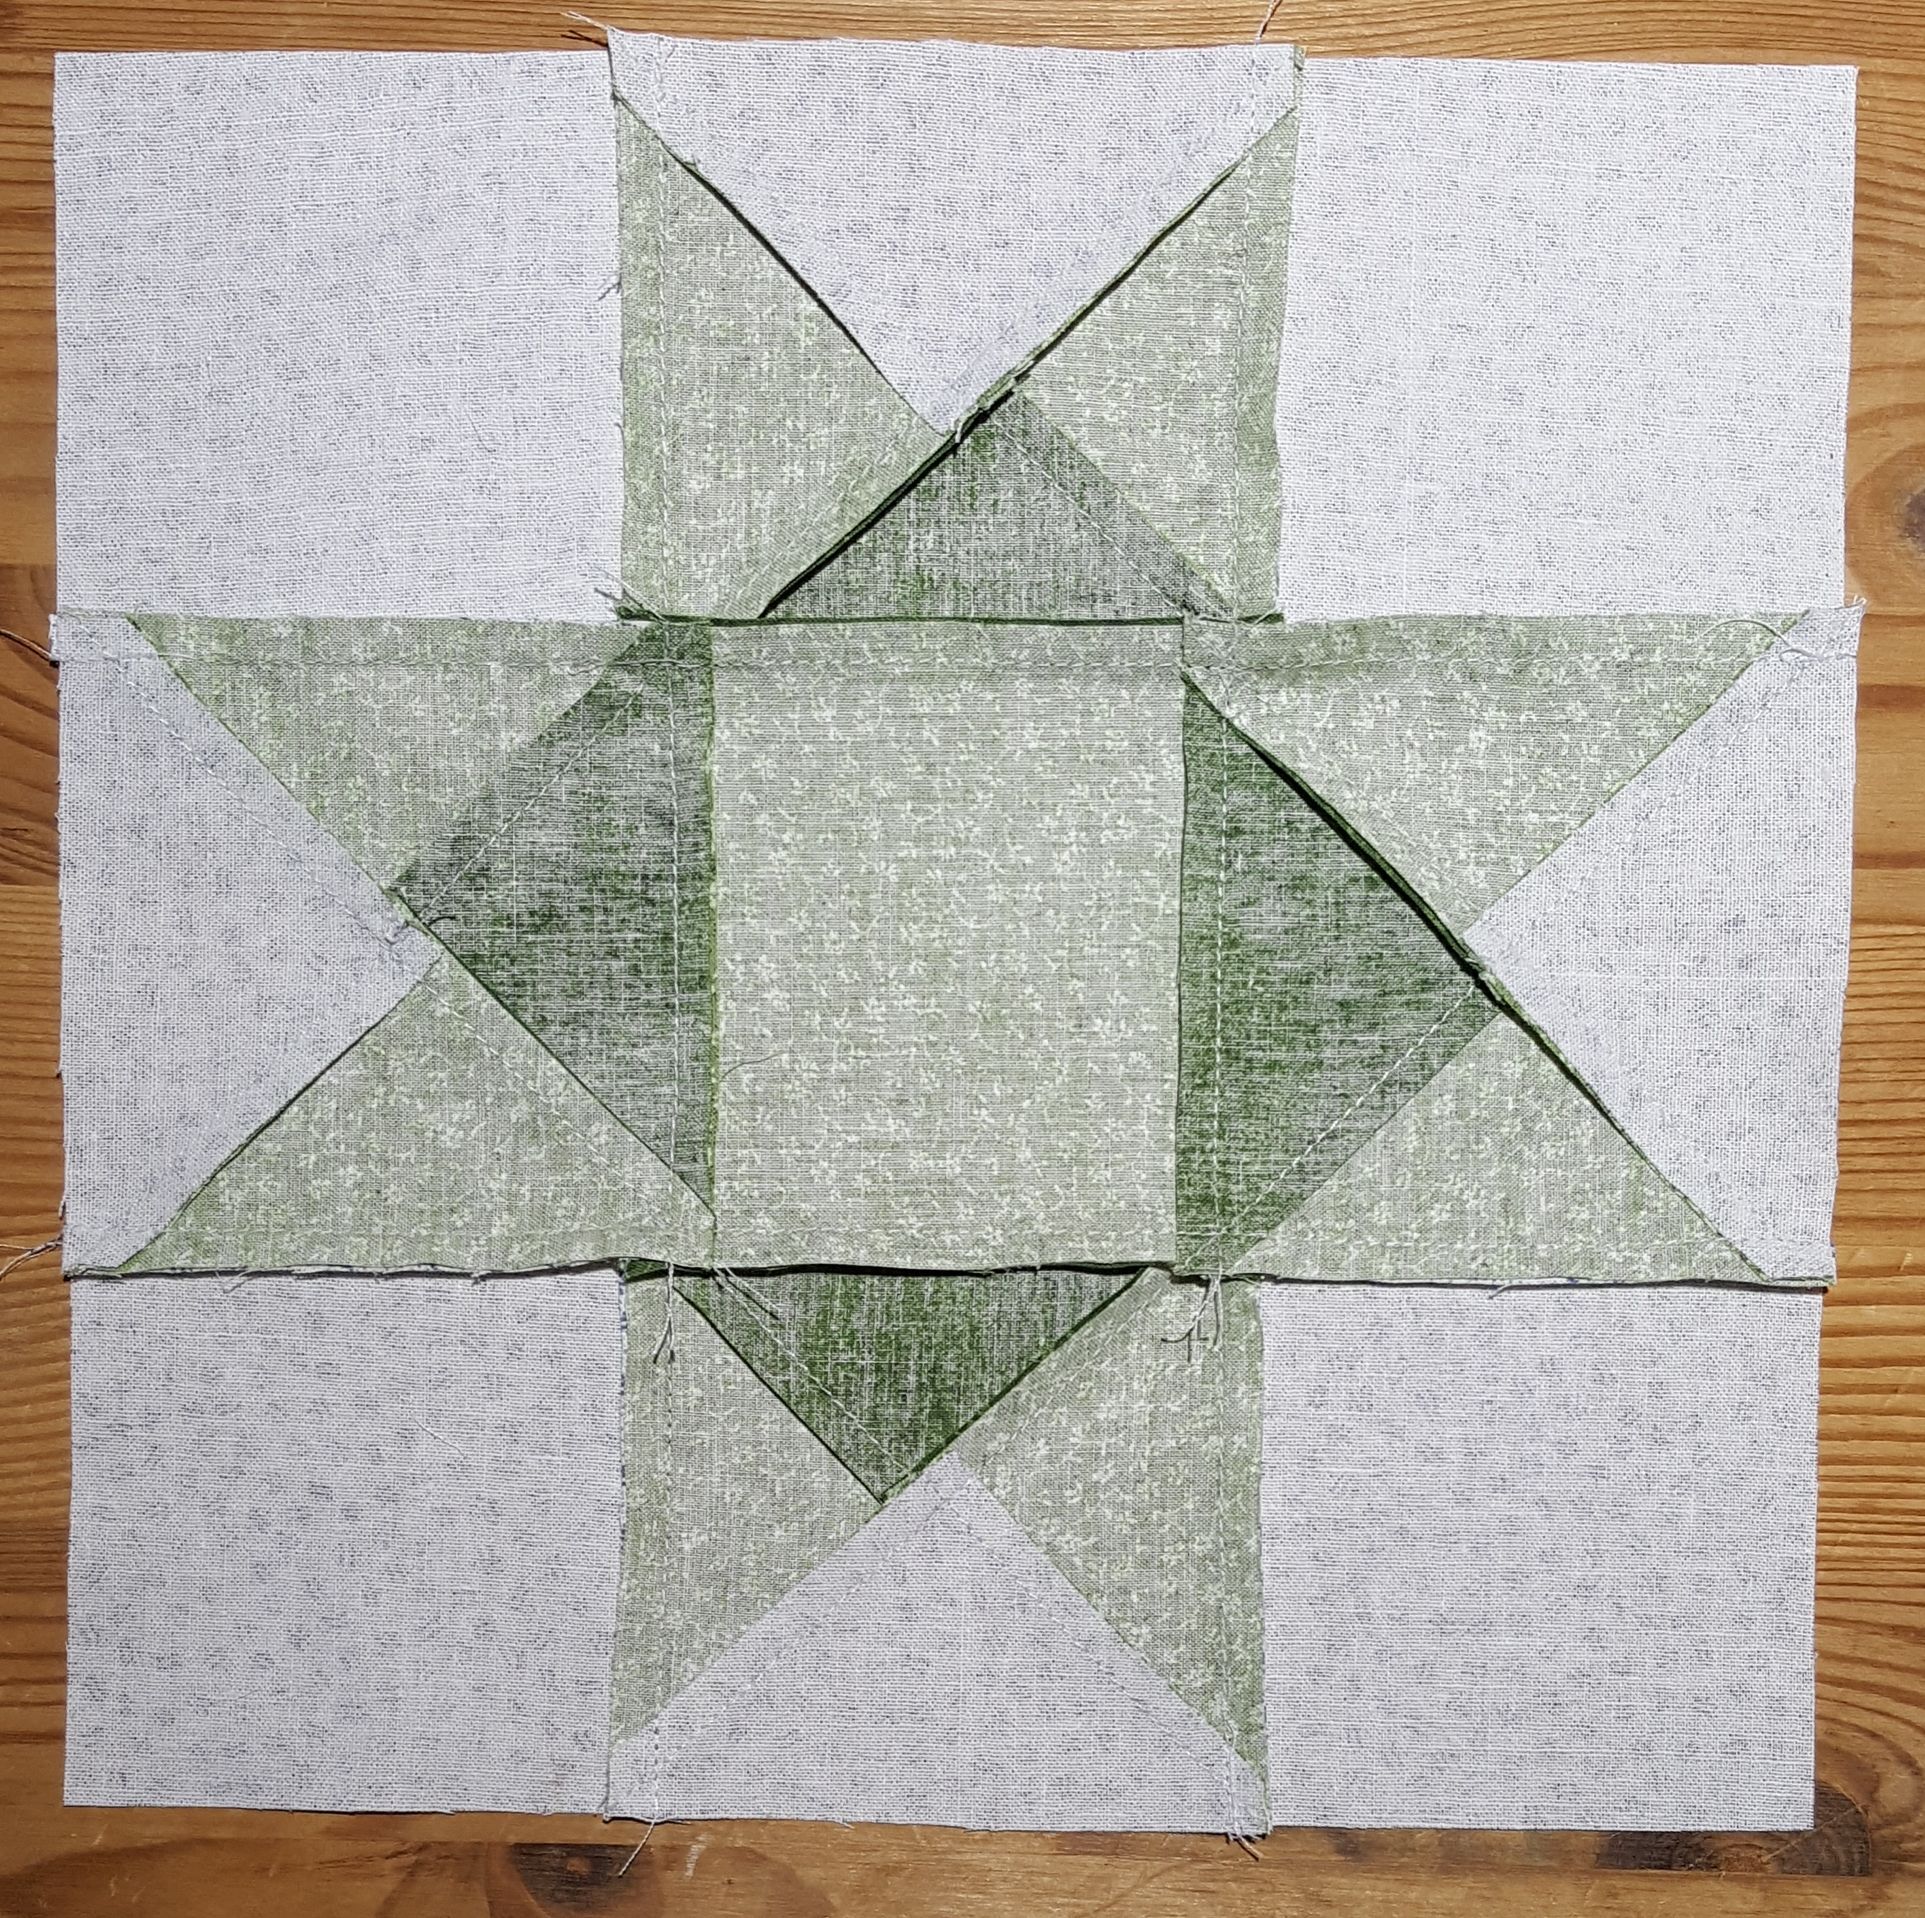
Press the row seams outward on the Ohio Star quilt block
Turn the block over and admire your beautiful 9-inch Ohio Star quilt block
As you can see, my block is not perfectly square. It tends to bow a little at the middle row. I do not trim it because this is caused by the fabric stretching. When I sew the block into the quilt, I just keep the edges of the two pieces I am sewing even with each other and stitch a quarter inch seam. Once the quilt is completely finished and washed, it all looks fine. I use unwashed fabric when I am quilting so the fabric shrinkage outweighs any wonkiness in the blocks themselves and the washing helps bring the fabric back into shape.
Calculating the finished size of your quilt is an easy thing to do once you know its intended use. If your quilt is being used on a bed, you will need to know the following to calculate the finished size of your quilt:
The mattress width and length;
How much overhang is desired on the sides and on the end (foot) of the bd;
Whether the quilt will cover the pillows.
If you know what size your quilt is going to be, check out my new, online Quilt Calculator!
Crib quilts require careful consideration if they are intended to be used in the crib with the baby. Baby quilts are usually smaller than crib quilts. Throws and lap quilts are entirely up to the creator and/or user although some guidelines are helpful when first learning to quilt.
Mattresses come in standard sizes so it is easy to find the mattress size. Choose from one of the following sizes:
Mattress Sizes
To determine how much overhang, decide where you want the finished quilt to fall on the sides of the bed. If you want the quilt to cover the mattress and box spring sides, measure the height of them. If you have a different spot you want the quilt to fall, measure down from the mattress top to the end of the fall. Multiply the answer by two and add it to the width of the mattress. Add the answer once to the length of the mattress. If you are not able to measure the height of the mattress and box spring, a good rule of thumb is to add 15” to 18” inches to each side of the mattress width to allow for overhang. Mattress thicknesses can vary considerably from 7” to 24”. Adding 18” is a fairly good compromise.
If you want the quilt to cover your pillows, add 12-15 inches to the length of your quilt. If you wish, you can measure the height of your pillows to give you the additional amount you need to add to the length.
Here is the simple formula for calculating the finished size of a bed quilt:
Quilt Length = Mattress length + overhang desired on end + length to cover pillows
Crib quilts are an exception. It is recommended that a crib quilt not be longer then the crib mattress to avoid having excess material around the baby’s face. Crib quilts should only be wide enough to tuck in lightly on the sides (approximately 4-5” wider than the mattress). Finished crib quilts should be approximately 32” x 52”.
Baby quilts are smaller than crib quilts. A good size for baby quilts is 32” x 42”. This is large enough to wrap around an infant or use under the infant when laying down. The width and height are such that it only takes one yard of backing and batting to make the quilt.
Throws can be made to cover a couch back, a chair back, or lay over a rocker. They can be any size you desire. Make the size to fit its use by measuring the area you want to cover or make a throw to feature the quilt and don’t worry about the size.
Lap quilts can be made to accommodate the intended user. They can vary considerably in size. Small lap quilts for chair use may be 34” x 44” to cover the legs. An average size adult lap quilt may be 46” x 60” to cover more of the body, while a larger, taller adult may like one 54” x 76”. If the quilt is to be shared by two people, you may want to make a wider, longer lap quilt to accommodate.
It isn’t difficult to calculate the finished size of a quilt. A quilt made for a bed will need a certain amount of overhang. Quilts for babies and young children need some careful consideration while quilts made for throws, laps or display can be any size desired. Experience is a very good teacher and once you have made a few quilts, you will become adept at determining the finished size of your quilt.
For a quick reference, print off the Quilt Size Guide to have on hand. It contains common mattress sizes and depths as well as the formula for calculating finished quilts for beds.
The old-fashion Monkey Wrench quilt block is easy to sew and makes up into a sweet little quilt. Here is a fast and easy way to make the time honored quilt block called Monkey Wrench by using precut 5” charm squares. Using this method, you get a 10 1/4 inch Monkey Wrench quilt block.
Note: As an Amazon Associate I earn from qualifying purchases.
To begin with, you will need seven of the 5” charm squares as follows:
2 matching medium or dark prints for the corners
2 matching light or medium prints for the corners
2 coordinating prints for the rectangles
1 print for the center (Cut this square into 4ths, evenly. You will only use 1/4 of this square.)
For my square, I chose the following prints:
Take each of the two matching medium or dark print squares and lay them out with one of the two light or medium print squares on top, right sides together, matching all four edges evenly. Draw a diagonal line from one corner to the opposite corner on each of the two sets. For the two coordinating prints, lay them right sides together, matching all four edges evenly.
Starting with the corner sets, stitch 1/4 inch away from each side of the diagonal line you drew.
For the coordinating set, stitch a scant 1/4 inch seam along opposite sides.
When you are done stitching, your pieces should look like this:
Using your rule, cut along the line you drew on the diagonals of the corner pieces.
Cut your coordinating rectangle piece into fourths, evenly.
Press open each piece, pressing the seam allowance to the darker side.
Snip off the rabbit ear pieces from the corner pieces.
Now lay out your pieces in three rows of three segments each, as shown below. Be sure your diagonal seams are all going in the same direction and the diagonal seams run from outside edge to outside edge.
If you don’t like the way your block looks, you can rotate the corner pieces so the prints swap places. Do the same for the rectangle pieces. Play around until you have what looks best to you. Stitch each row’s segments together. Then stitch the rows together, matching seams.
Press the seams flat from the back side. Turn and press smooth from the front side.
Sit back and admire your handiwork and marvel at how quick and easy it was to make this beautiful 10” Monkey Wrench block from 5” charm squares!