Posted on Leave a comment

How to Make a Quilt Jacket in 10 Easy Steps

Quilt Coat
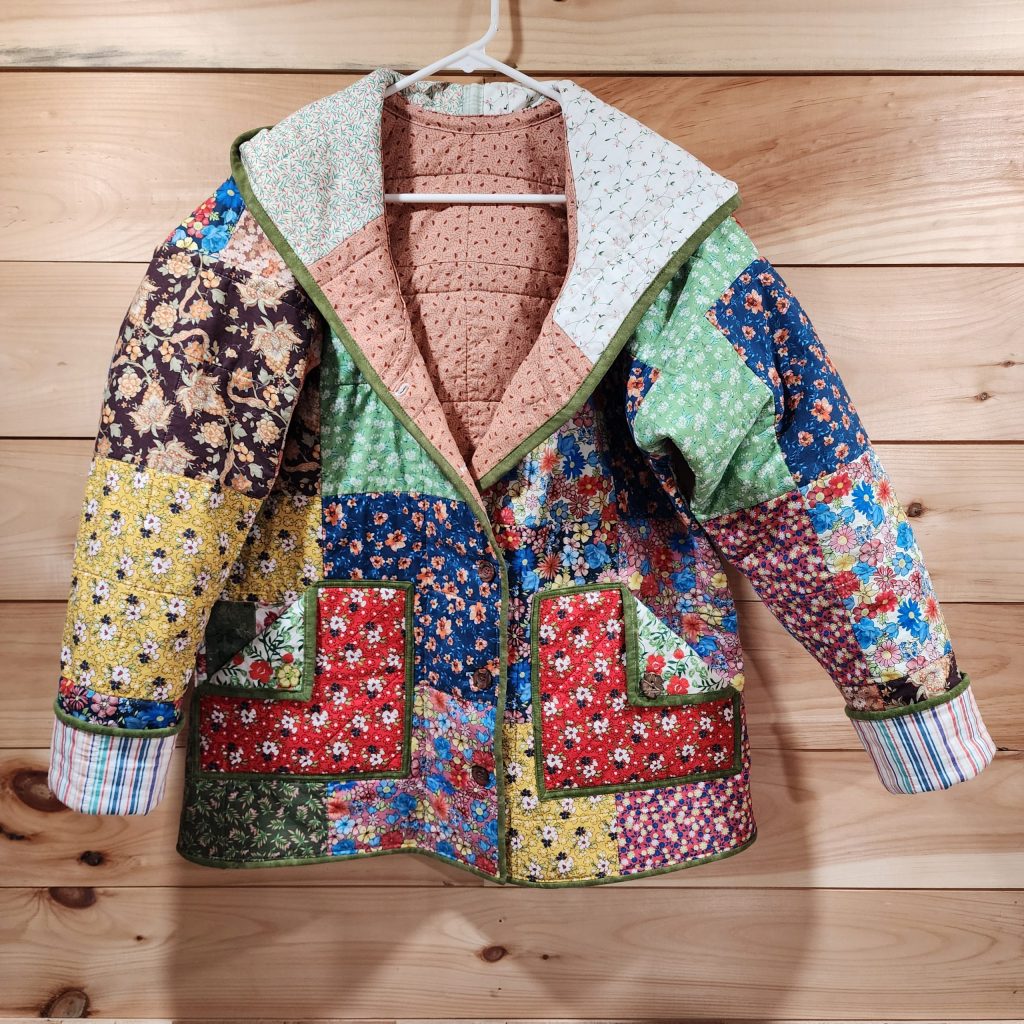
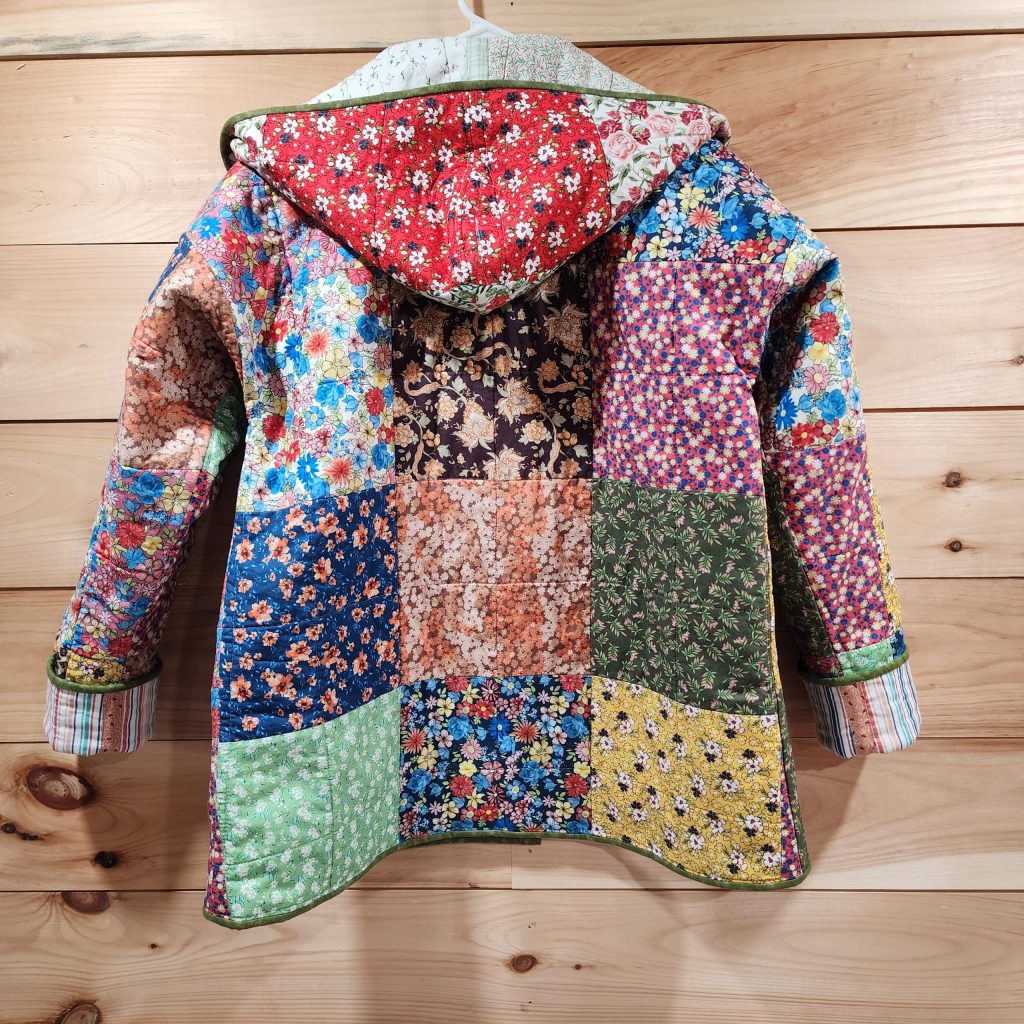
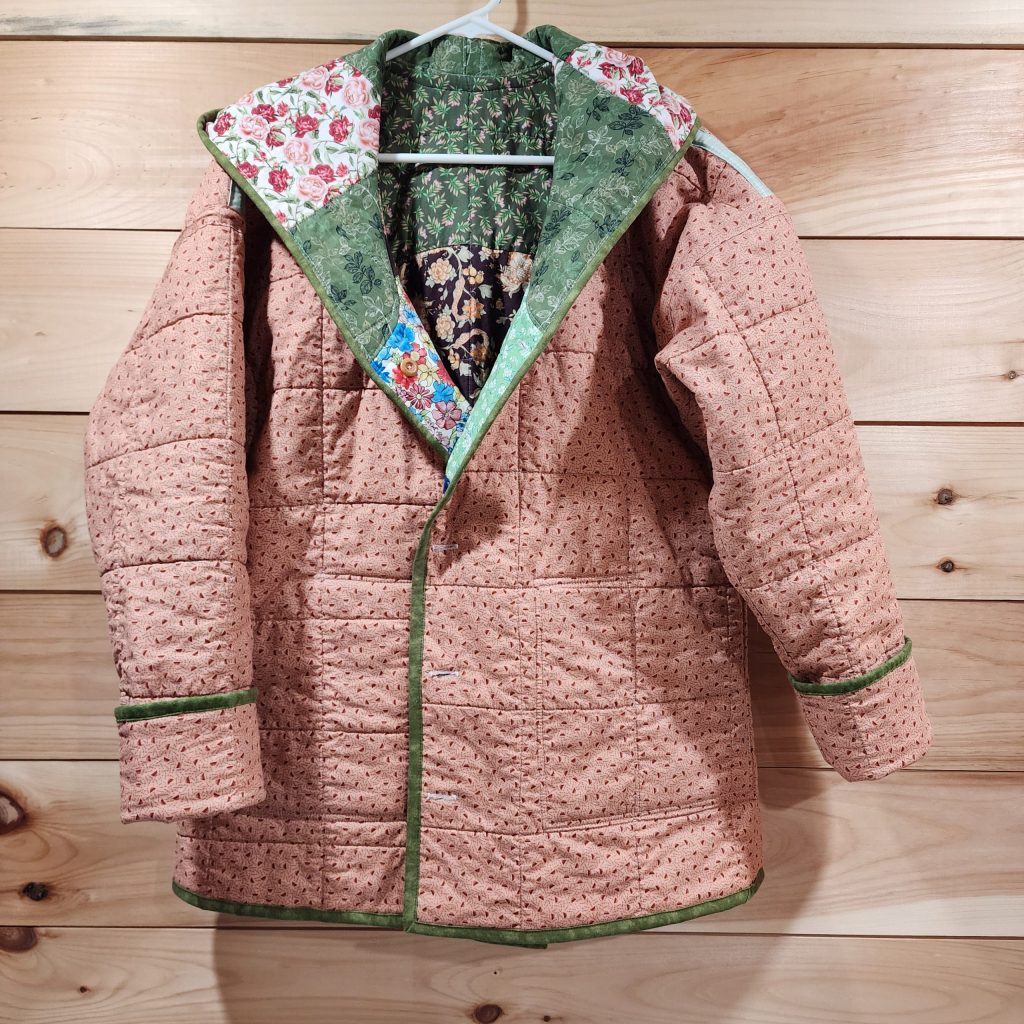
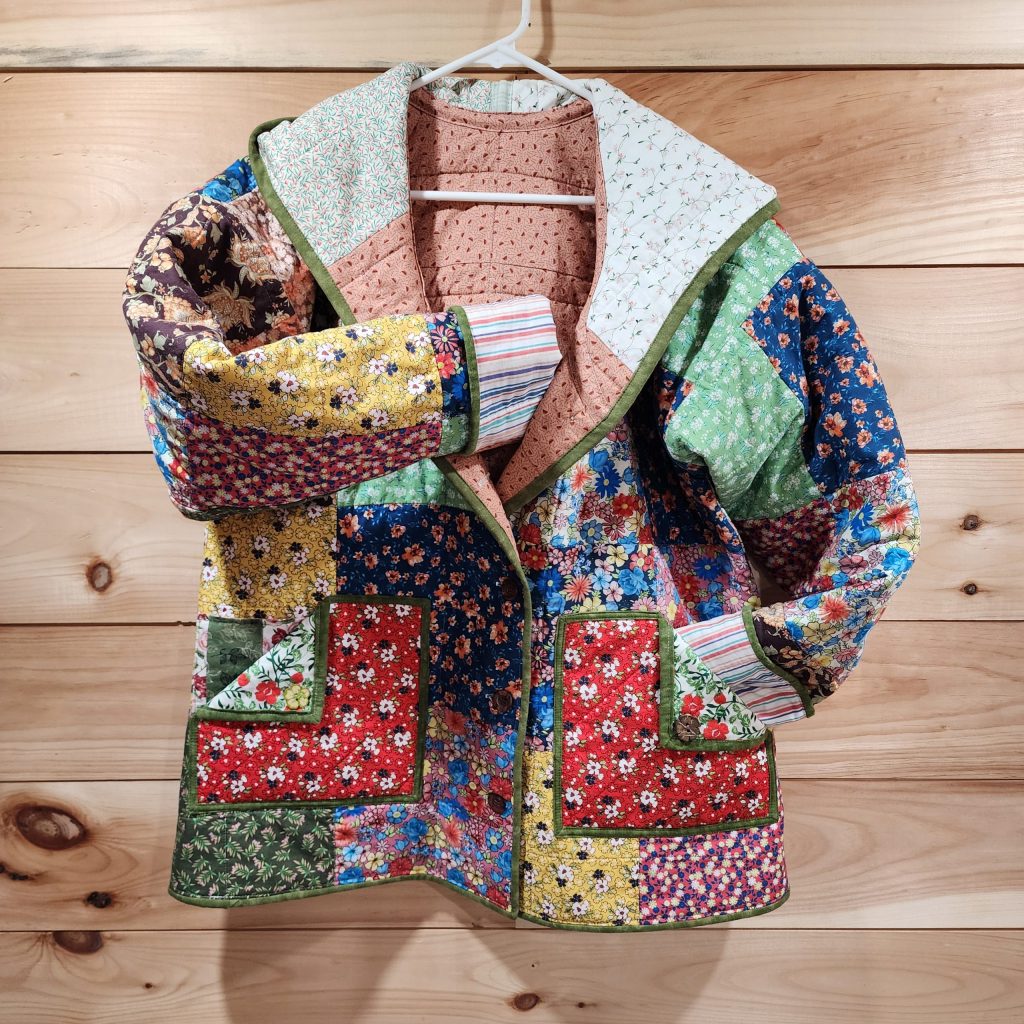
Handmade quilt jacket.

Quick View of the 10 Easy Steps

  1. Select a jacket pattern.
  2. Select the quilt pattern.
  3. Select the fabrics.
  4. Measure your pattern pieces.
  5. Create “mini quilts”.
  6.  Wash and dry your mini quilts.
  7. Cut out your jacket pieces from your mini quilts.
  8. Sew your jacket.
  9. Bind the raw edges around the jacket front, bottom and sleeves.
  10. Add desired embellishments.
  1. Select or create a jacket pattern. Choose a pattern with as few pieces as possible or create a simple jacket pattern with the following pieces:
    • Pocket
    • Front
    • Back
    • Sleeve
    • Collar or hood
    • Pocket
  2. Select the quilt pattern for your quilted pieces. You can go very simple and use one fabric for the main part and a second for the backing. You could use individual squares sewn together, or use detailed quilt blocks with or without sashing.
  3. Select the fabrics. You will need approximately 5 yards of fabrics. Amount of each will vary depending on your quilting pattern. If you want a variety of fabrics, choose 16-20 fat quarters. Always make sure you have some extra on hand in case of mistakes or miscalculations.
  4. Measure your pattern pieces at the widest and longest points to determine each pattern piece’s width and height. Add about 6% for shrinkage if using unwashed fabric. Write these measurements down in the following manner with the width first and the length second. The number in parentheses before the width and length is for the quantity of each you need. You will need at least two fronts, two sleeves, one back, one hood (or collar) and one or two pockets depending on your pattern.
  5. Create “mini quilts” in each size stated above based on your quilt pattern from #2 above. As you create the “mini quilts” tops, keep your pattern piece handy and think about the placement of your quilt blocks or squares and where they will fall in the finished jacket. For your two fronts and sleeves, you can create mirror pieces, completely different pieces, or complementary pieces. On the jacket back, you can feature a special quilt block or fabric piece. Be creative and have fun. Back and bat each mini quilt top just like a real quilt. You do not need to bind the edges as you would a finished quilt. However, you should either serge or stitch around them. Serging is the best choice. Second best is to use a zig zag stitch letting it overlap the raw edges. Third best is a straight stitch all around. When you are done, you will have a mini quilt for each part of your jacket.
  6.  Wash your mini quilts in lukewarm water and tumble dry. This will allow shrinkage to occur before you make your jacket. It also gives your quilted pieces that nice crinkly quilty look and feel. Include a piece of the backing material that you can use for your seam binding. Remove your mini quilts and backing from the dryer immediately after the dryer stops and make sure your pieces are completely dry. Lay your pieces flat.
  7. Using your pattern and the correct mini quilt for each pattern piece, cut out your jacket pieces from your mini quilts. Remember to cut the quantity you need of each pattern piece and to cut the second one in REVERSE. In other words, cut one front with the pattern face up, then cut the second front with the pattern face down so you have a left front and a right front with your quilt pattern on the correct side of each. The same for your sleeves. Transfer any pattern markings that you need to the cut pieces.
  8. Follow your sewing directions to sew your jacket. As you sew, finish each seam. First, trim the seam to ¼ inch. Then finish it with a piece of seam tape or a serger. For a nice, finished look, use boughten or handmade seam tape and bind each seam. A single piece centered over the seam overlapping the raw seam edges and stitched down on both sides creates a very professional finish.
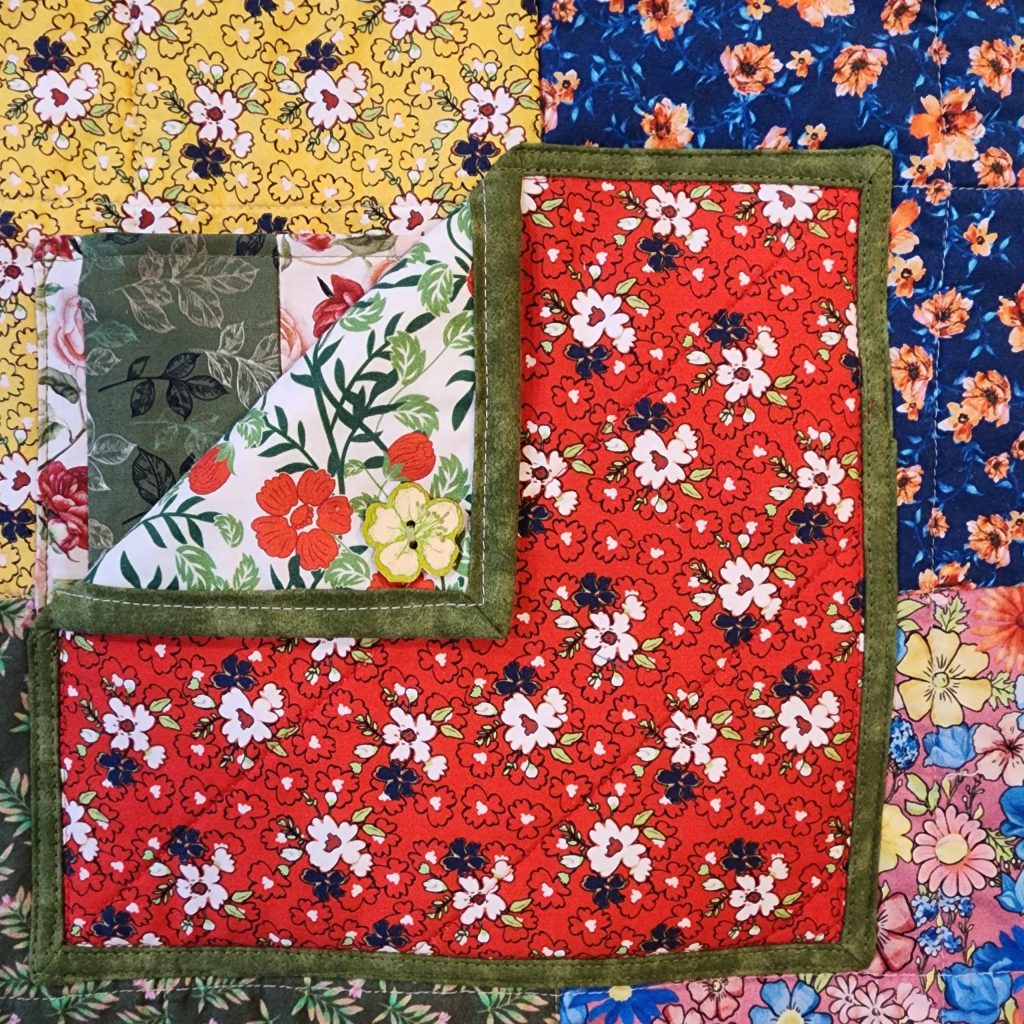
  9. Once your jacket is sewn, make quilt binding and finish the raw edges down the fronts and bottom of the jacket and at the cuffs. Make sure there are no raw edges left showing when you are done.
  10. Add any final embellishments such as buttons and button holes or decorative touches you desire.

Congratulations! You just completed your quilt jacket!

Posted on Leave a comment

First Handmade Quilted Coat Quilt Jacket

Quilt Coat

After looking at many pictures and photos of handmade quilted jackets, I decided to try my hand at one. I love antique quilts for what they are and decided I would make mine from new fabrics as I did not want to cut up an already made quilt.

Basically, I created a mini quilt for each pattern piece I needed. I decided to use simple large fabric squares for my quilt pattern. After making each mini quilt, I washed and dried them to allow for shrinkage and to give the pieces a nice “quilty” feel.

After washing and drying, I cut out my pattern pieces, sewed them together, finished all the seams with binding as I sewed them, and bound the outside raw edges just like I would a regular quilt. I added buttons and buttonholes for the finishing touch.

I am very pleased with the finished result. I love the quilted coat. I am disappointed that it is a little too big for me, though. I will have to make another one, now.

Posted on Leave a comment

Blackford’s Beauty Table Runner Quilt with On Point Setting

I made this pretty little sweetie when I was first learning to quilt about 10 or 12 years ago. Unfortunately it’s been sitting on a bureau top collecting all sorts of junk. Now it has a tear and many stains on it. To make matters worse, a plant leaked on it and made the red run color.

One of my Facebook friends said this about it, “Lovingly antiqued”.

I replied, “Almost ruined. Very sad. It was quite a nice piece, especially for a beginner quilter, as I was when I made it.”

Blackford's Beauty Table Runner Quilt
Blackford’s Beauty Table Runner Quilt

I even Free Motion quilted it. I can’t believe I did this when I was first learning quilting.

I have fabrics picked out to make another one. I don’t know when I will get it done, but I am ready when the time is right.

Maybe I will write up the pattern when I redo it. I found this pattern in a quilt magazine, but I don’t have it anymore.

Posted on Leave a comment

Eventide Quilt Top Finish – Treasure Found in a Storage Tub

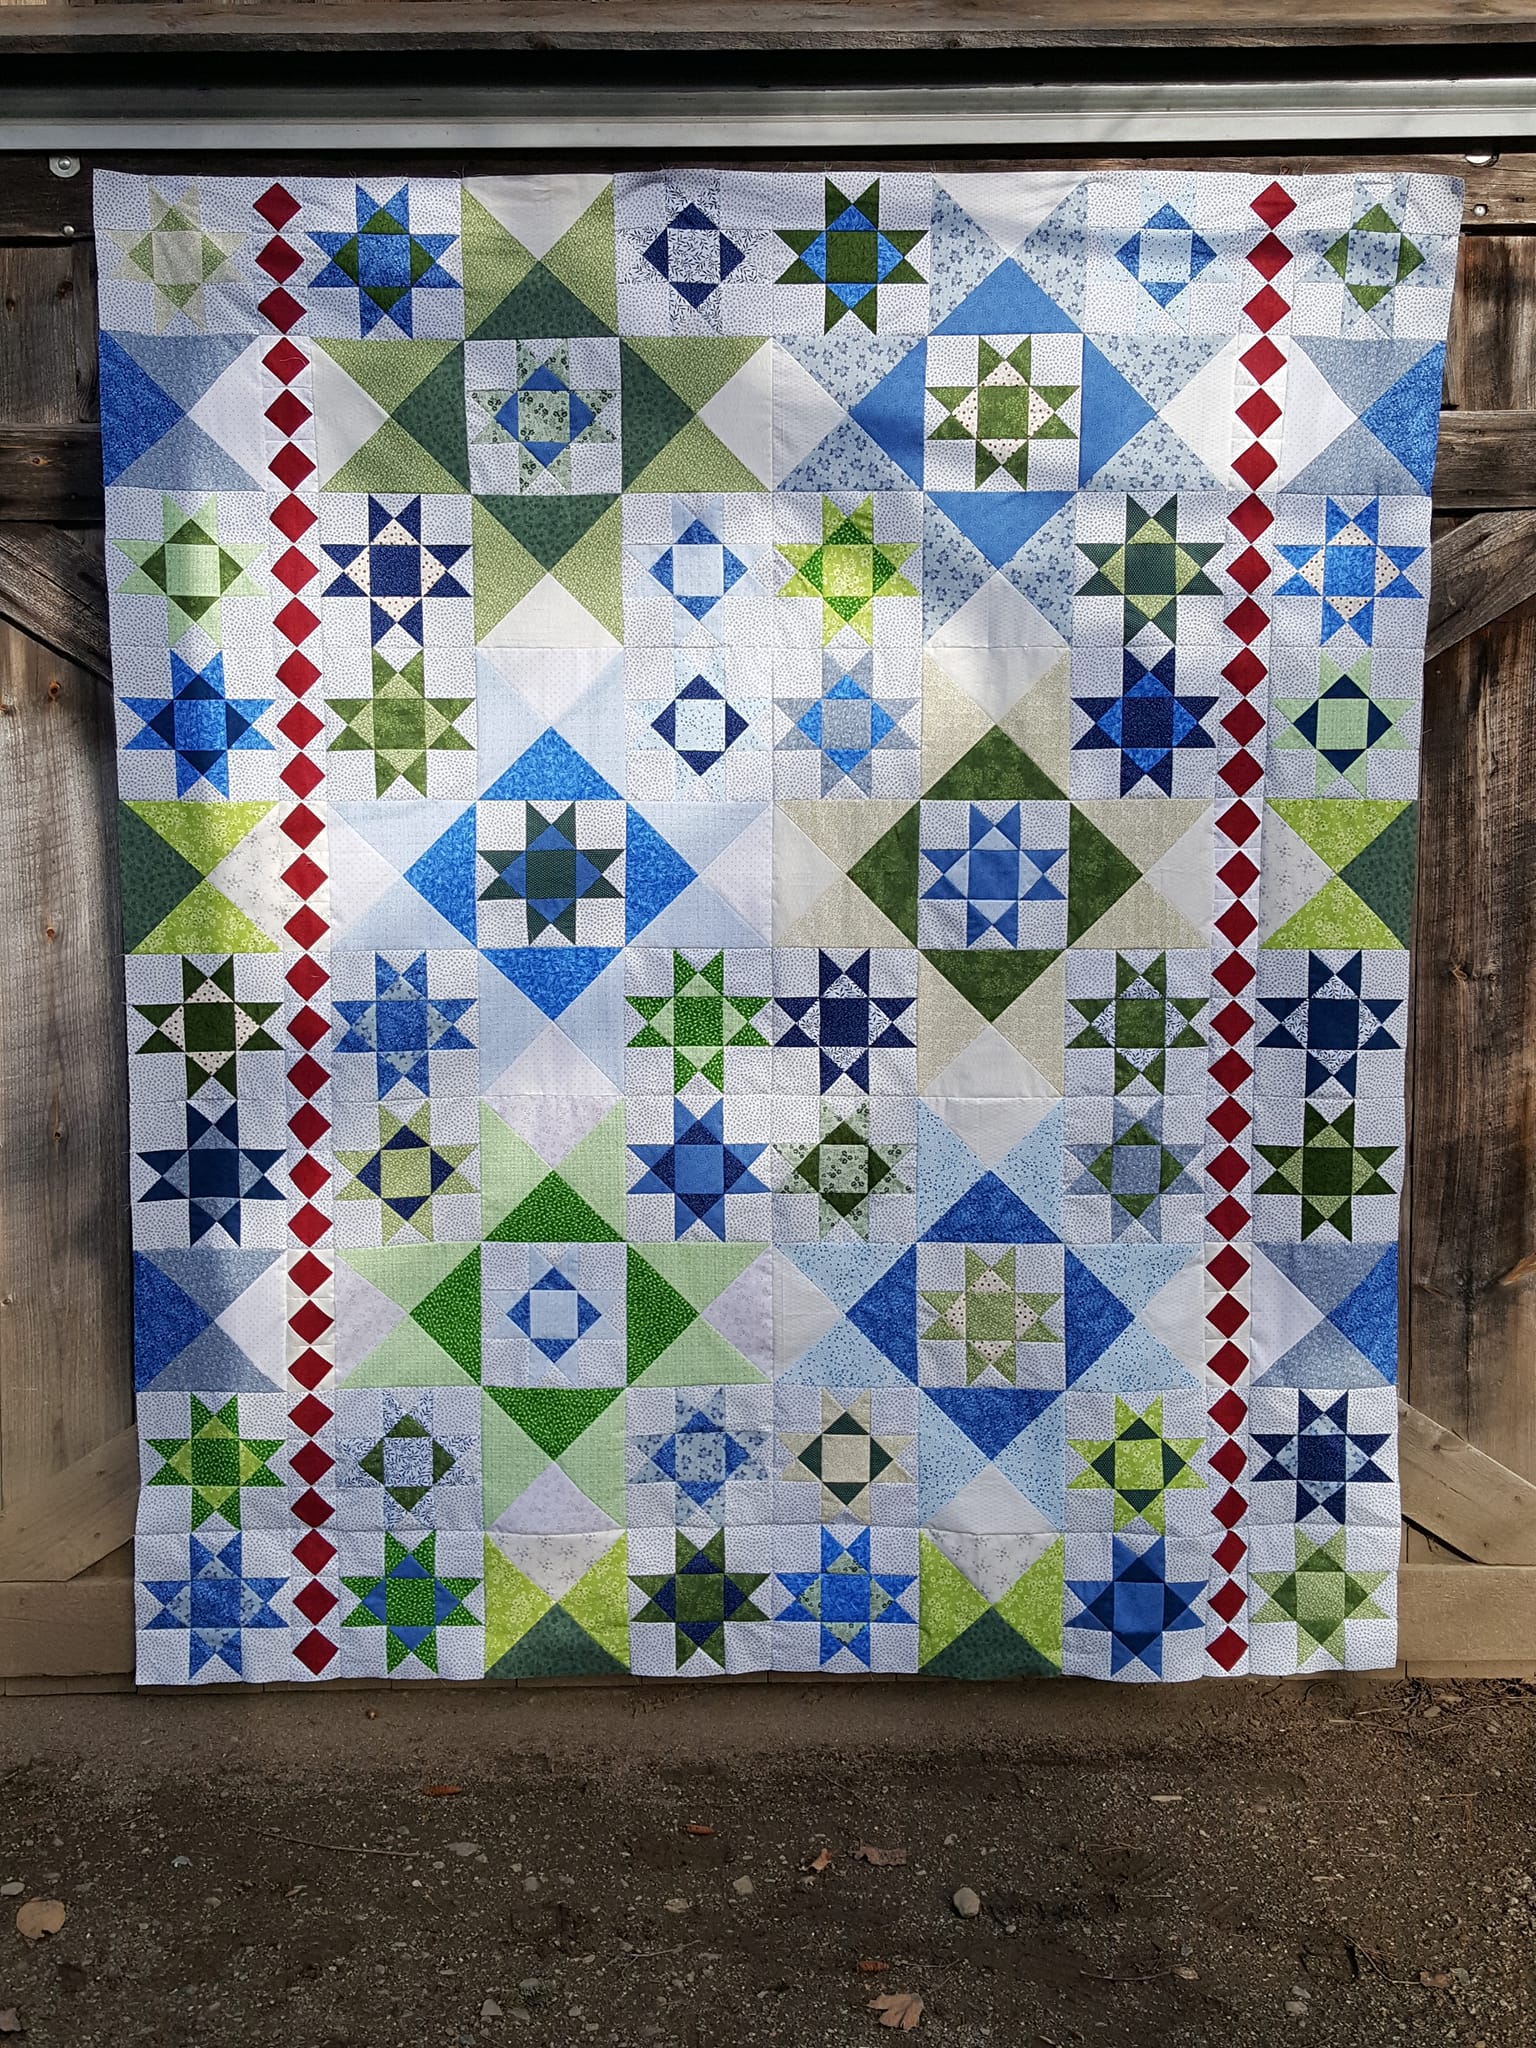
Eventide Quilt Top in Blues and Greens

As I stated in a previous post, I found some treasures in one of my quilter’s storage tubs – a quilt top all cut out and ready to sew called Eventide. I found this quilt on the Internet a few years back when it was part of a sew-along put on by Cupcakes ‘n Daisies. The sew-along is long past, but Thelma has several posts still up including one called “Eventide Parade” where you can view several pictures of participants’ quilt tops. The original pattern is from Miss Rosie’s Quilt Company but I made my own pattern.

When I found this quilt ready to sew I was in an “Ohio Star” kind of mood. I had just completed a quilt called “Square Dance” from a book I have on scrap quilts. That was my third Square Dance quilt. I then completed a quilt top called Scrappy Ohio Stars with sashing and a border and was already dreaming of another Ohio Star quilt. I had such a fever to finish this quilt that I sewed the entire weekend and finished the top on Sunday morning.

Eventide Quilt Top from Ohio Stars

I wanted a good photo of the quilt top and laid it out on the bed. However, the artificial light did nothing to flatter the features of the quilt and the overhang on the sides hid the effect of the red borders. I knew I needed a full shot of the entire quilt top. I looked out the kitchen window trying to figure out how I could get it hung up outdoors and saw the shed was lit nicely in the mid-morning sunshine. I got out my ladder and my little stapler and tacked the quilt top to the shed wall. The effect was stunning! I got this beautiful photo of my finished Eventide quilt top.

The original pattern calls for a border all around, but I really like it without the border. However, I added another row of blocks across the bottom to make mine finish at about 78 x 90 inches. I have already ordered the backing and I can’t wait to get this one layered and quilted.

I am now dreaming of another Eventide in a different color scheme. I swore I wouldn’t create unfinished tops but I just can’t stop piecing blocks!


Posted on Leave a comment

How to Make a 9-inch Ohio Star Quilt Block – A Visual Guide

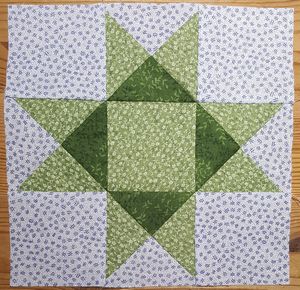
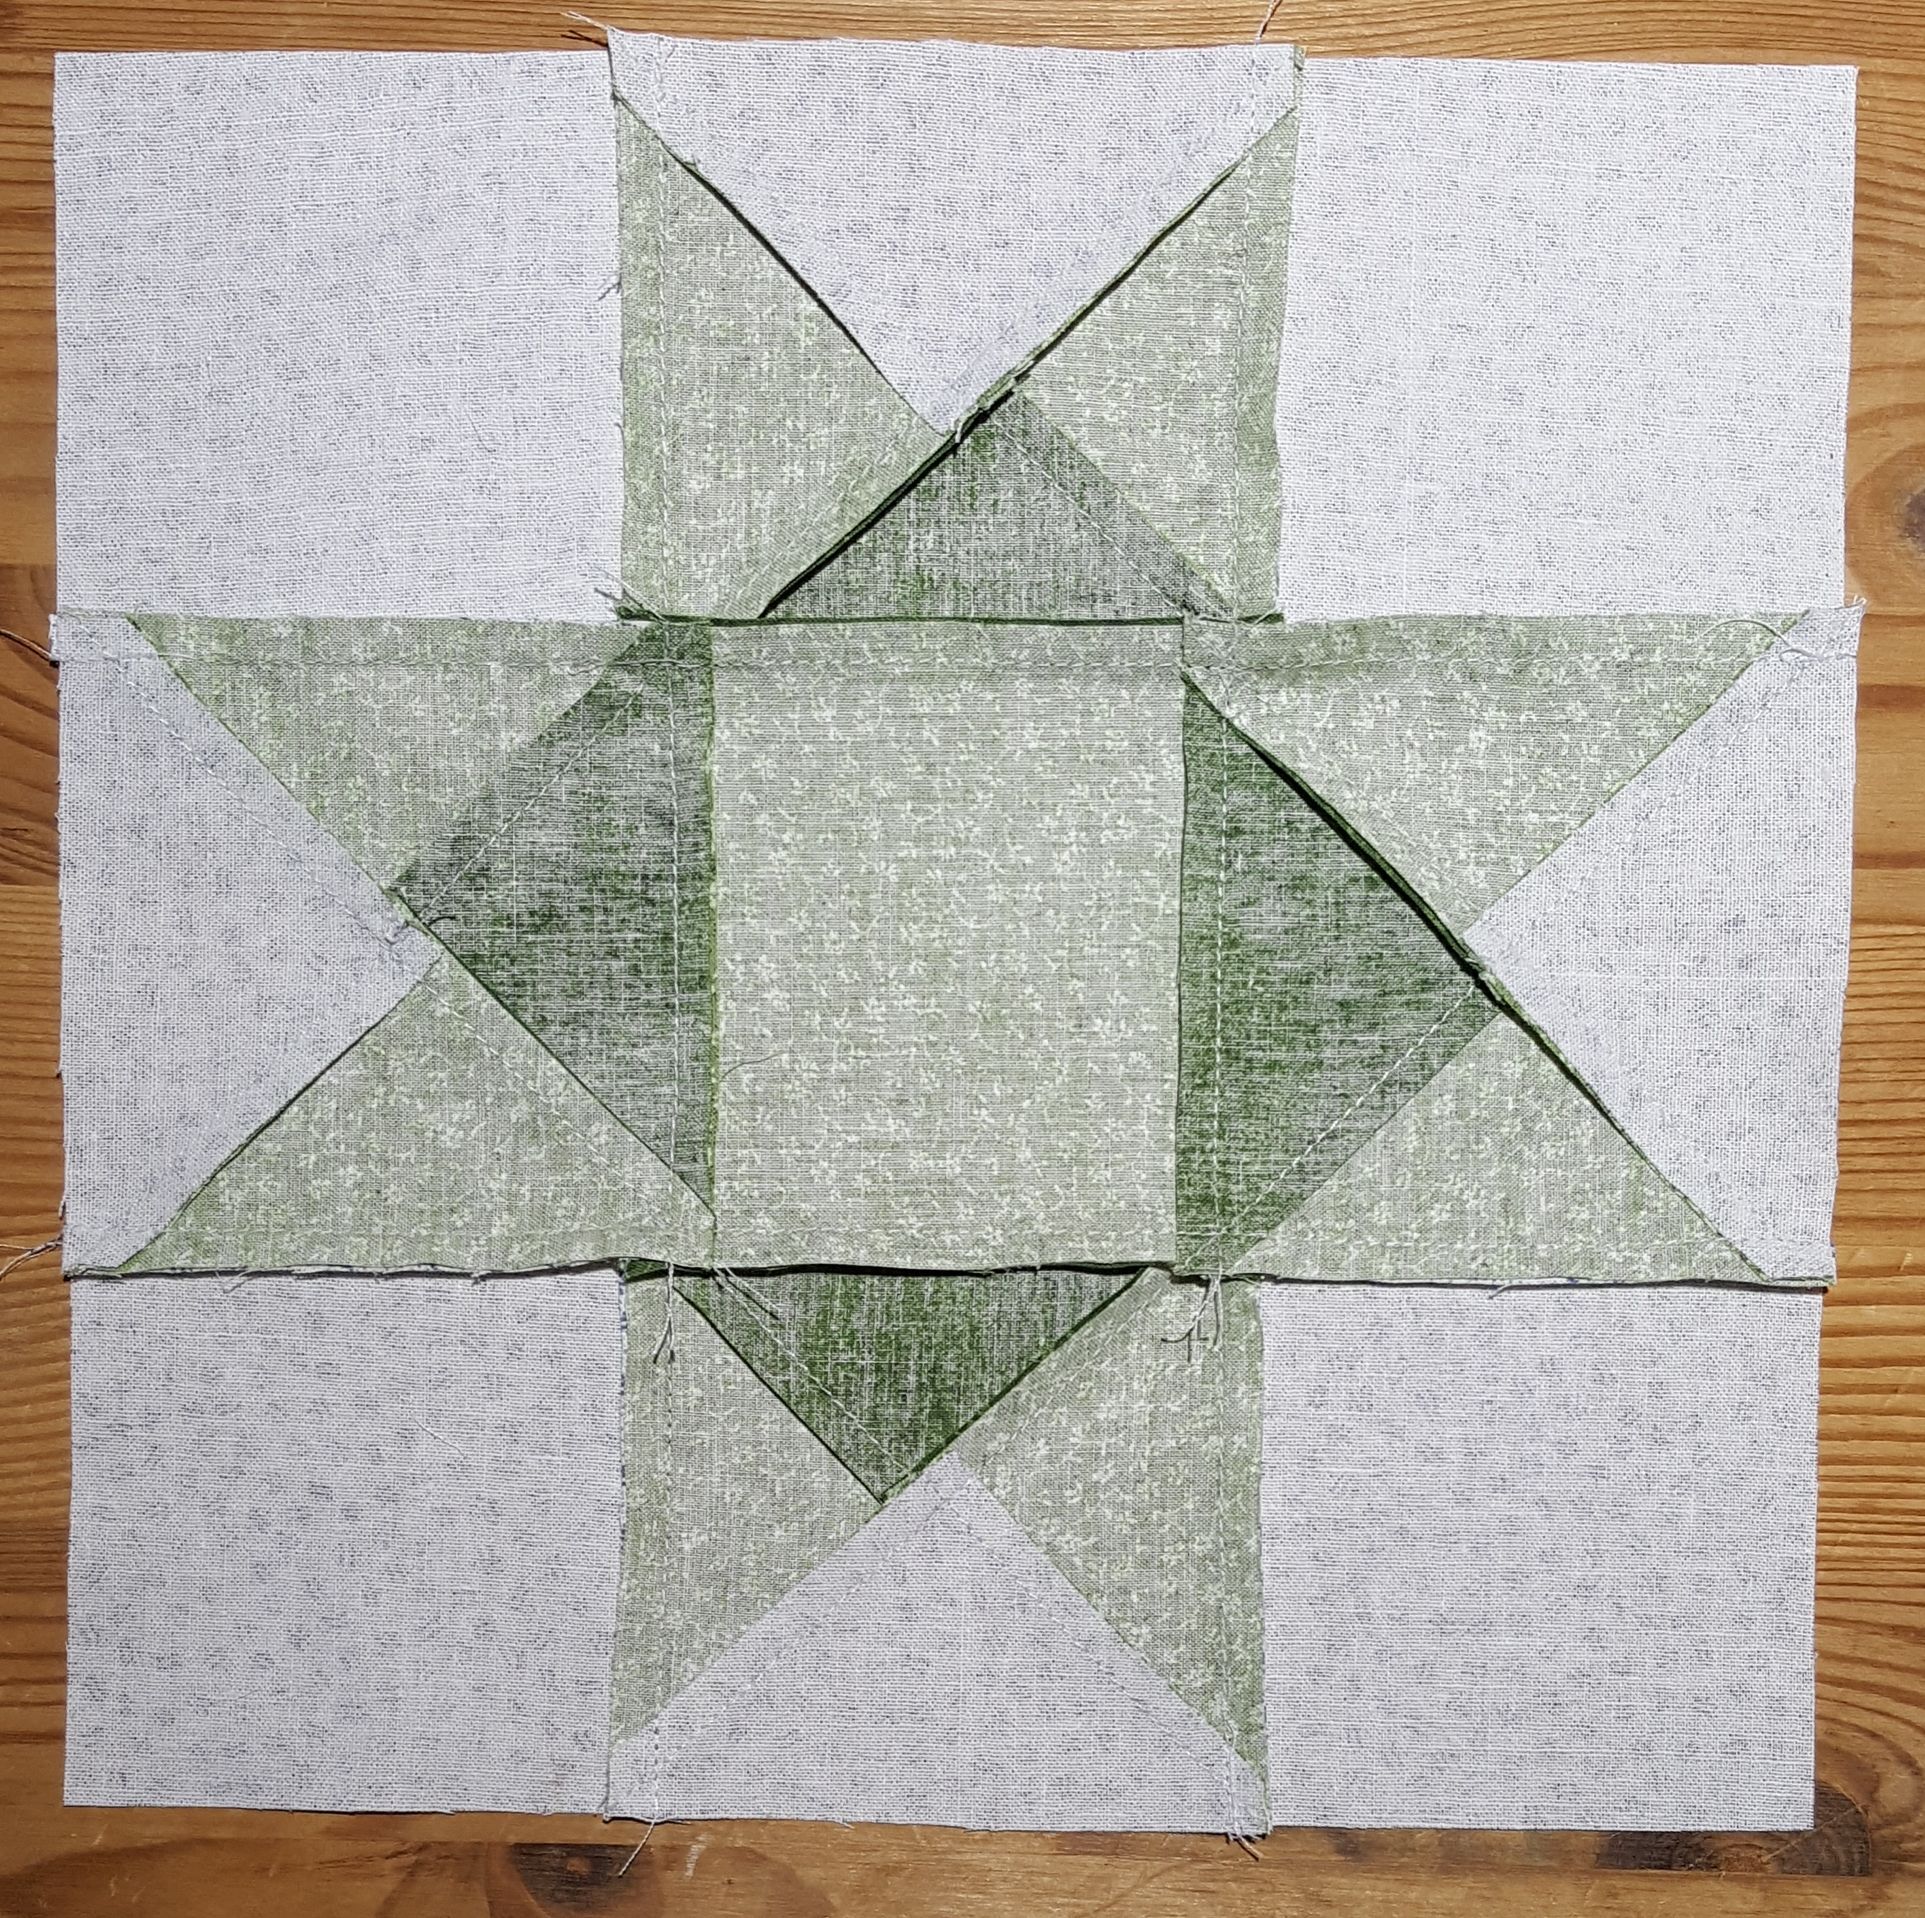
Beautiful 9-inch Ohio Star quilt block

This is a visual guide to making a 9-inch Ohio Star quilt block using actual photos from making one 9-inch Ohio Star block.

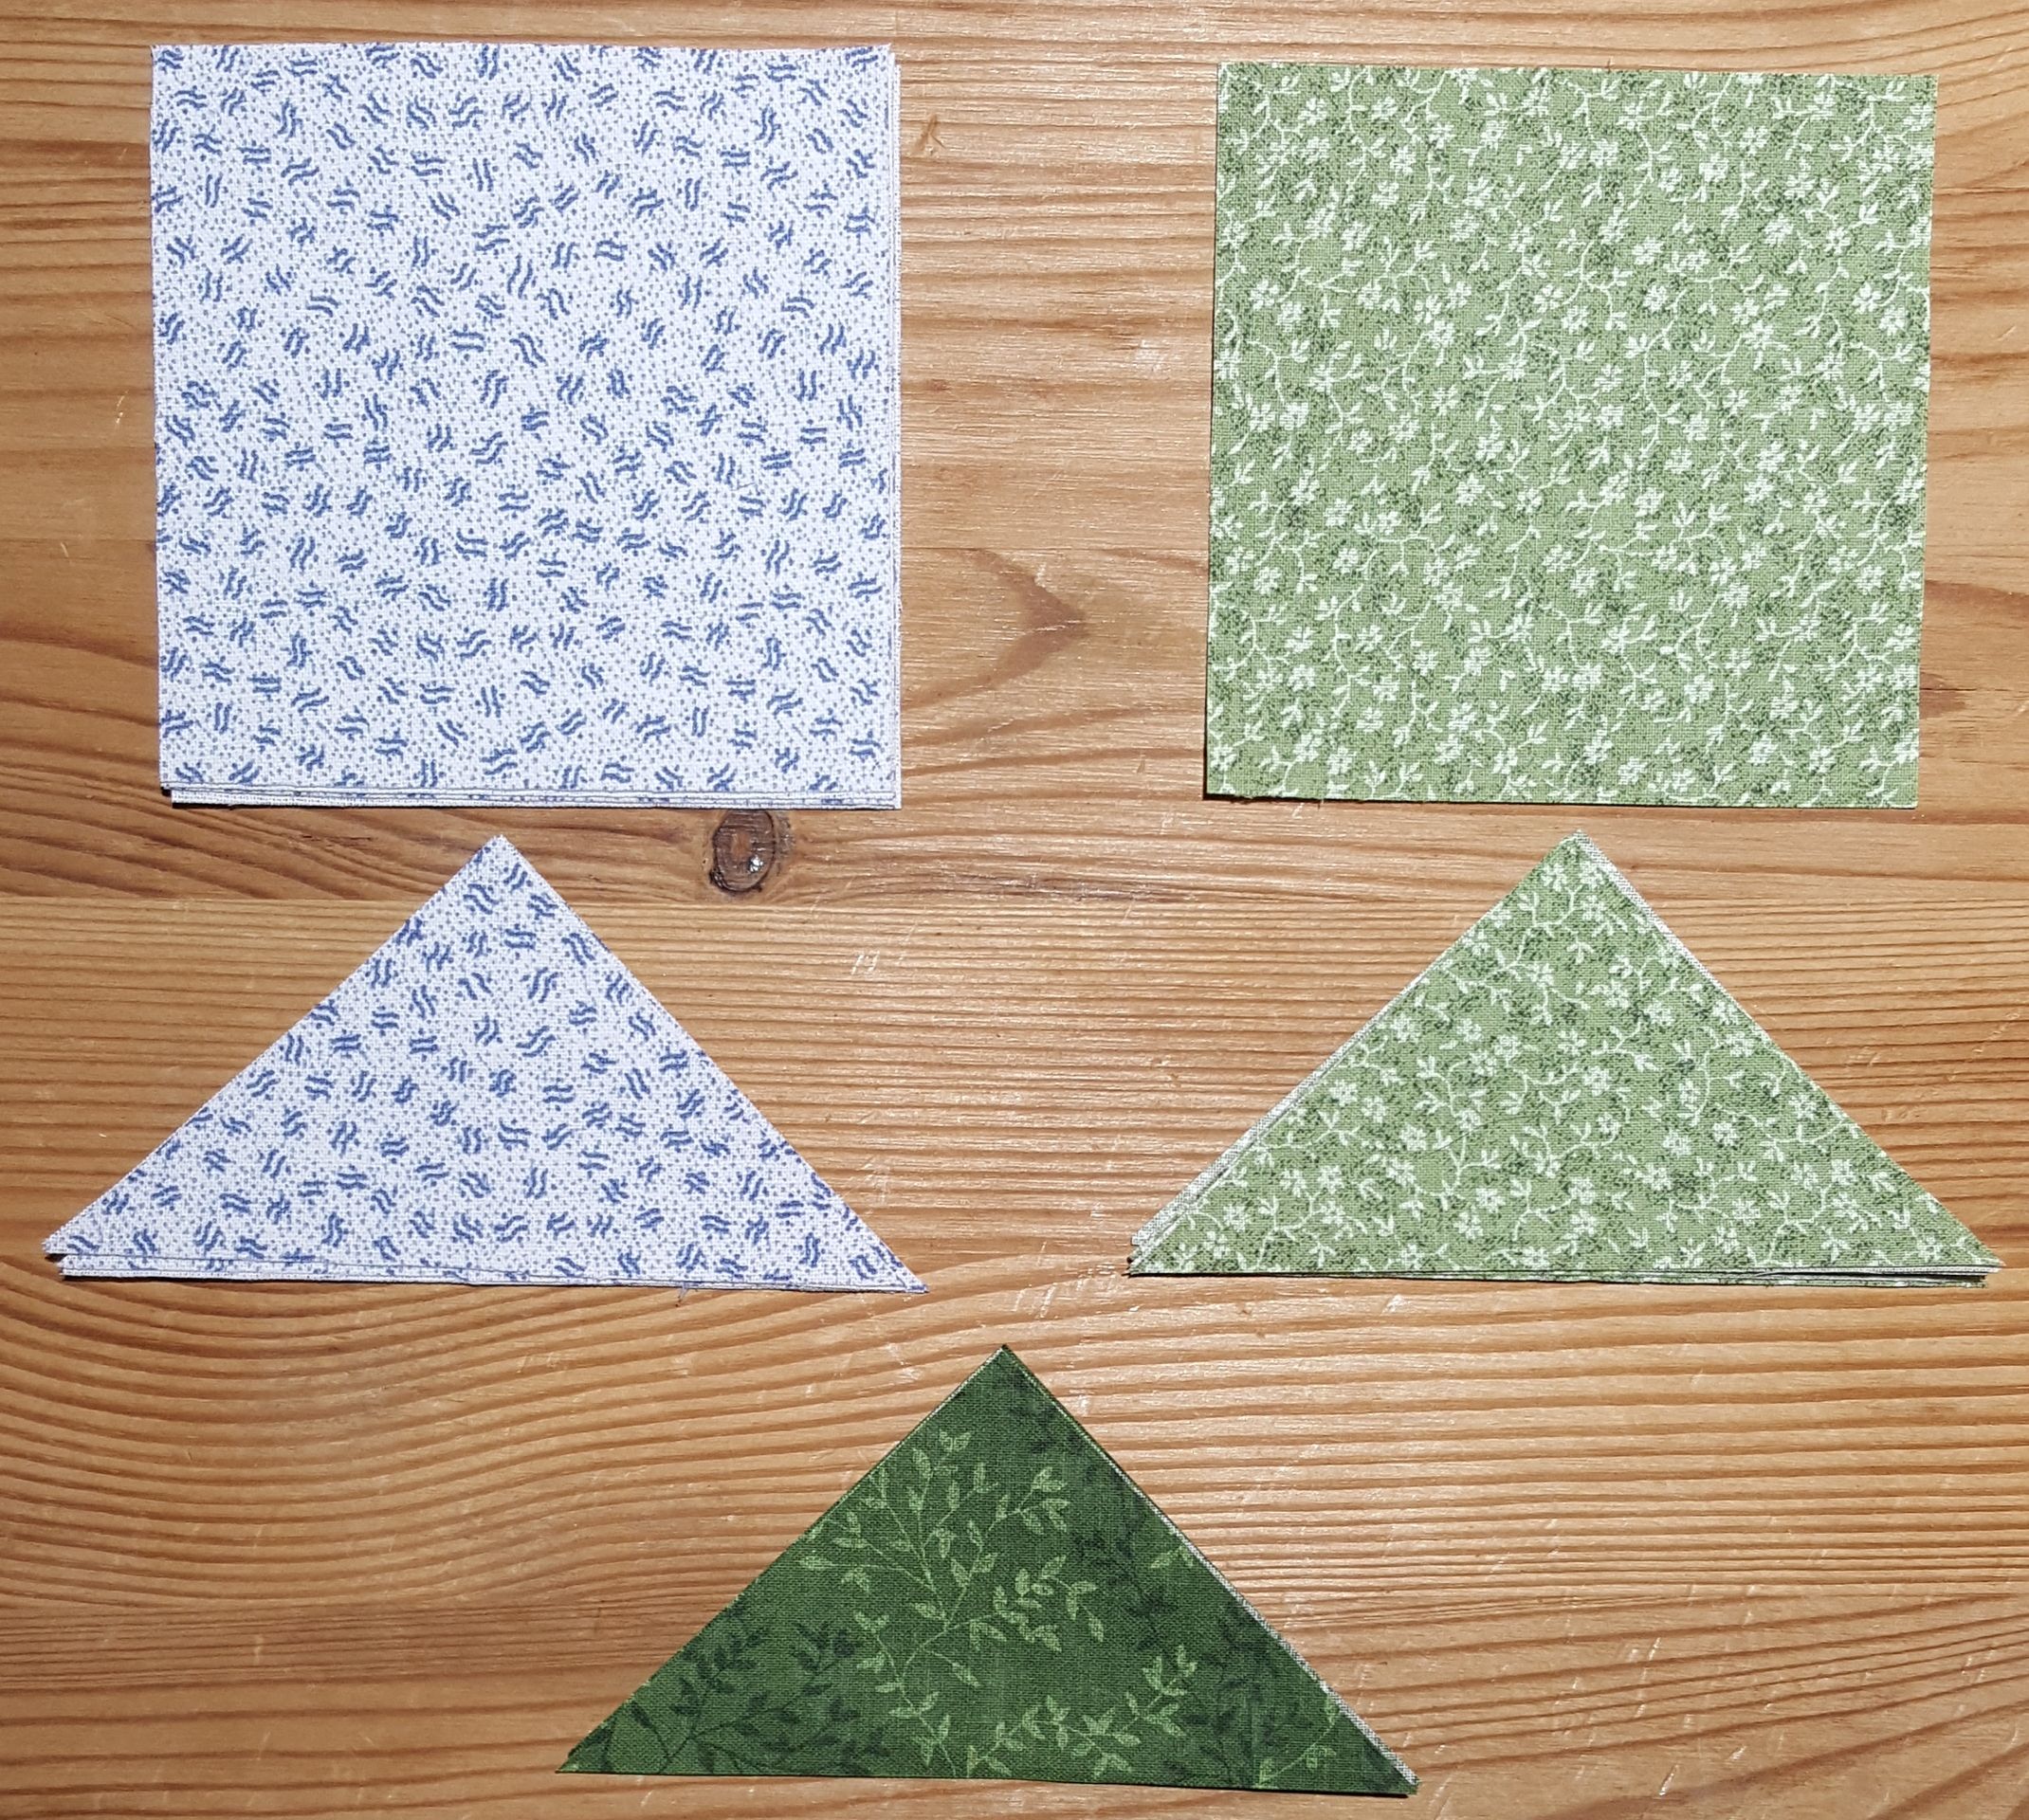
Pieces for 9 inch Ohio Star Quilt Block

Cut your pieces for the quilt block as follows:

Background Fabric – in the above photo, it is the blue on white fabric

  • 4 3 ½ inch squares
  • 1 4 ¼ inch square cut in half diagonally twice

Star Fabric – in the above photo, it is the light green tonal floral fabric

  • 1 3 ½ inch square for star center
  • 2 4 ¼ inch square cut in half diagonally twice for star points

Contrast Fabric – in the above photo, it is the dark green tonal leaf fabric

  • 1 4 ¼ inch square cut in half diagonally twice for contrast

Sewing the triangle pieces together for Ohio Star quilt block
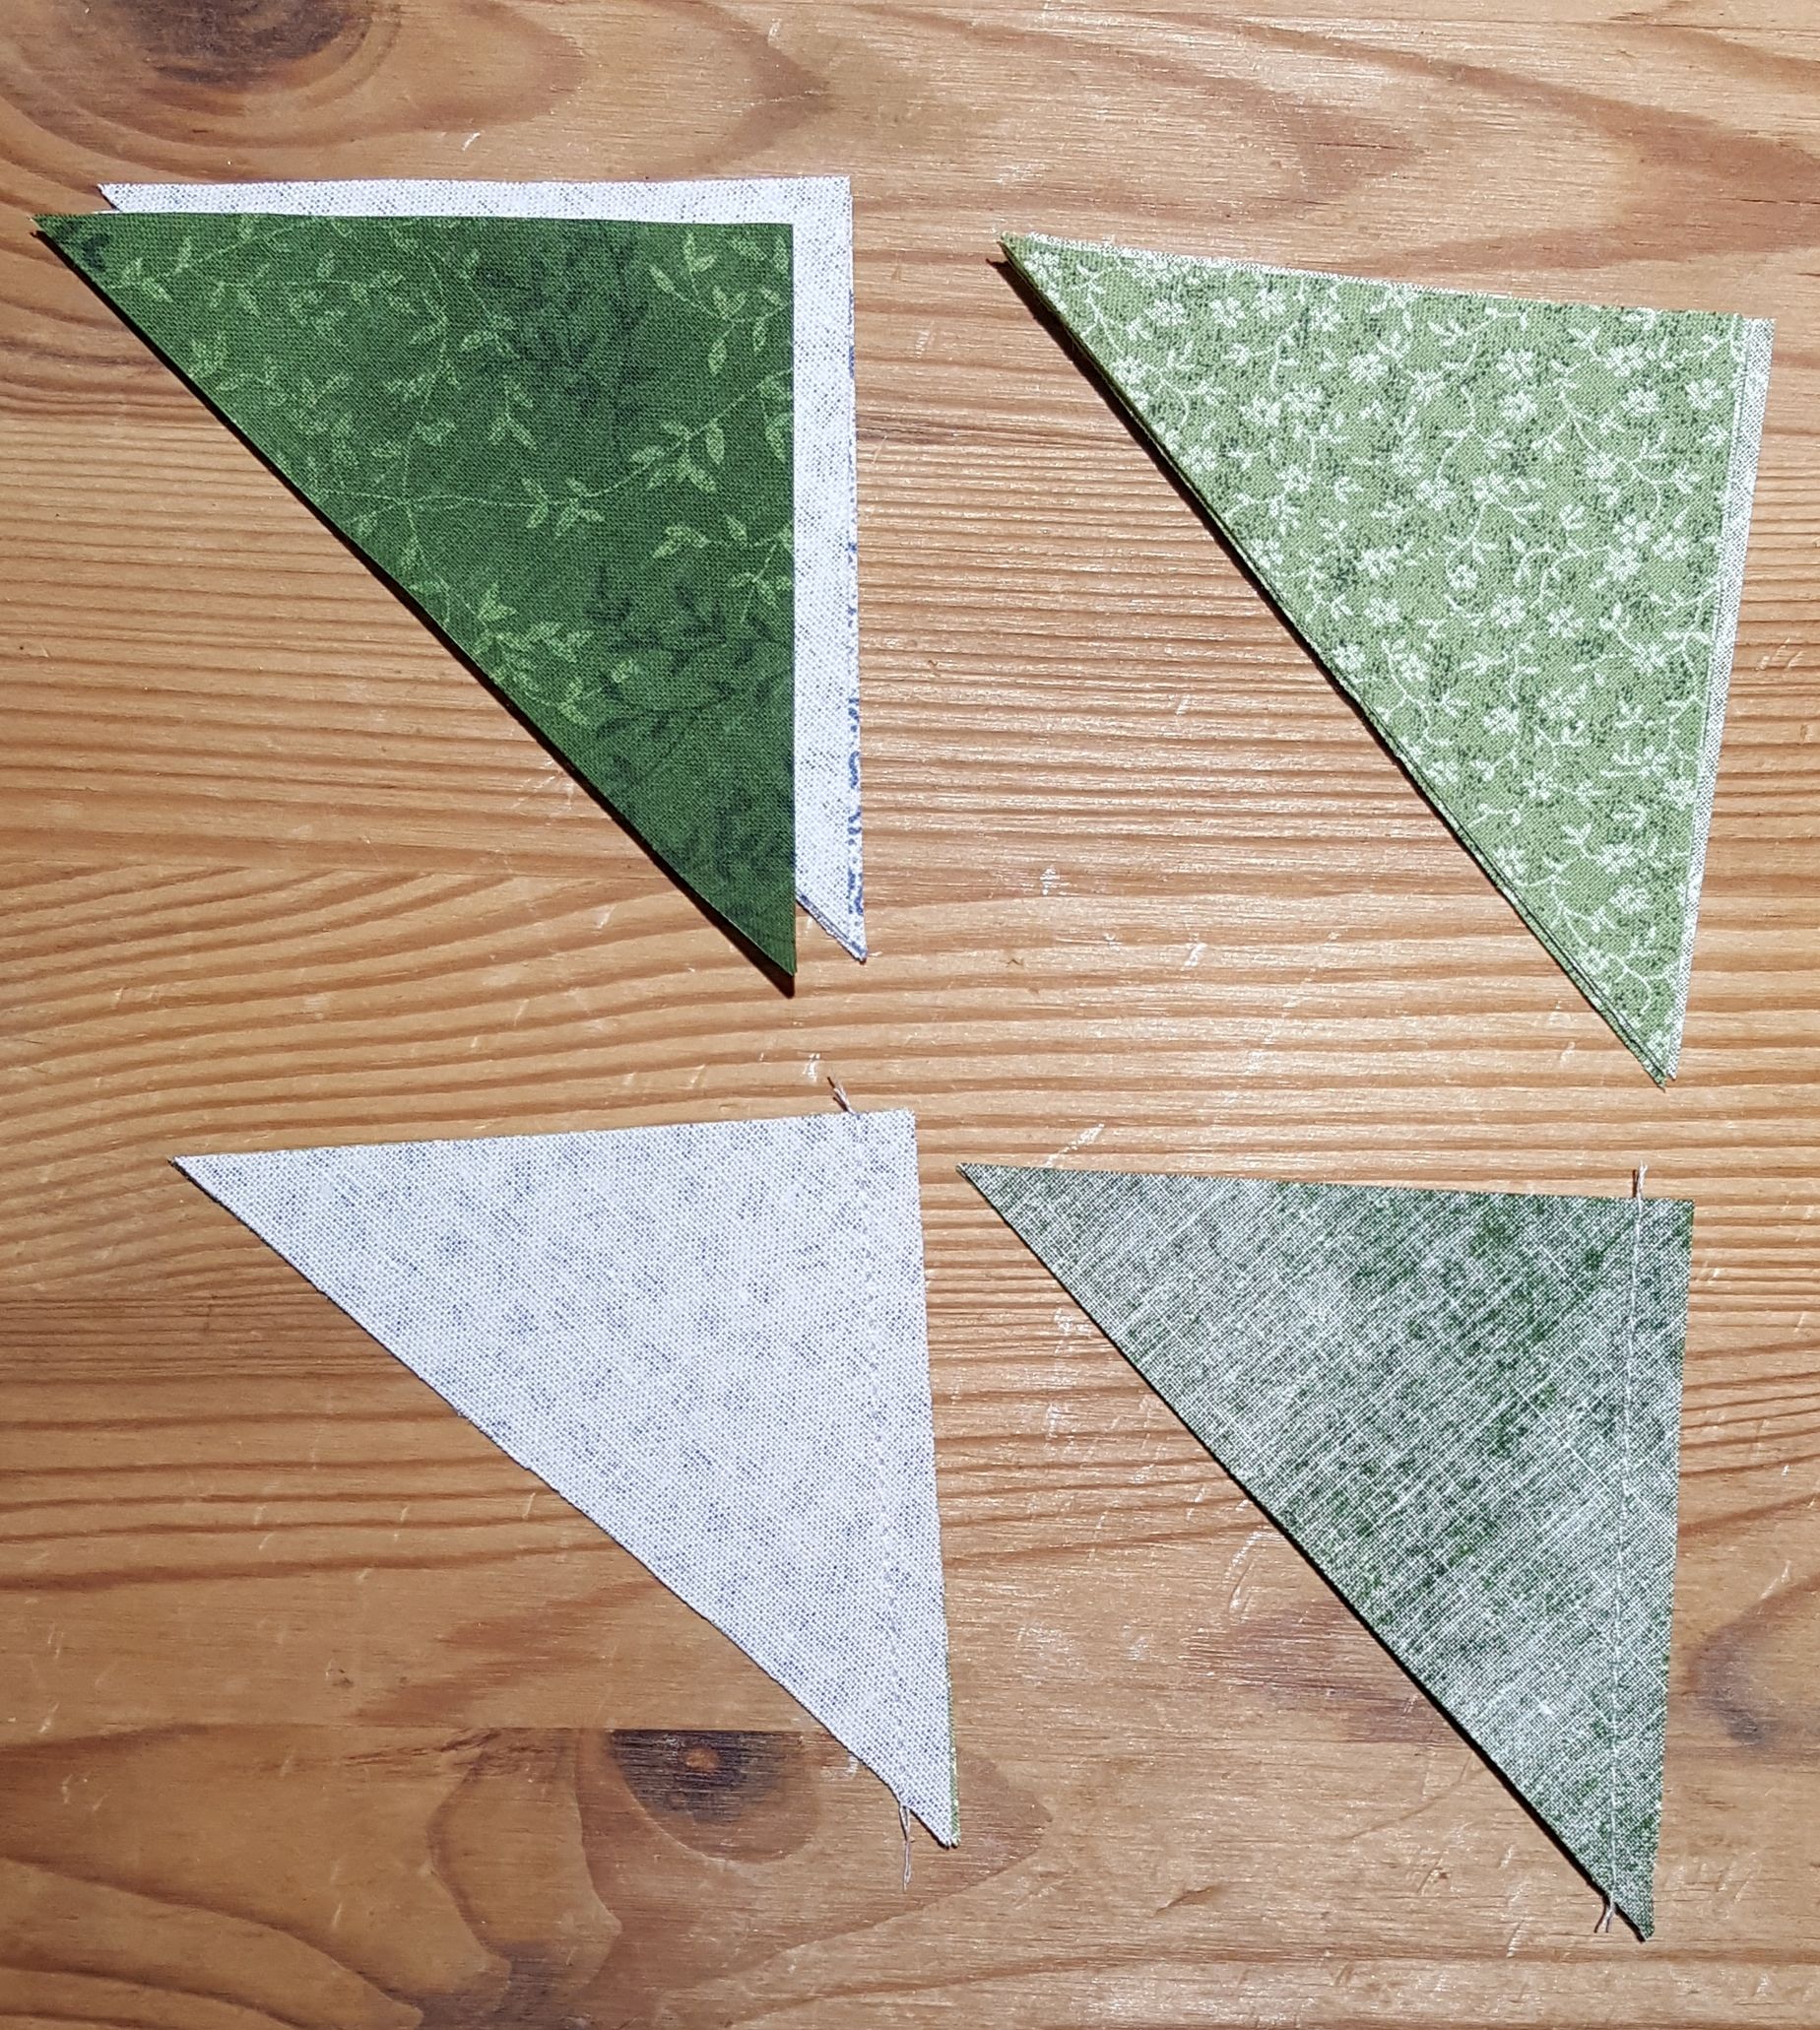
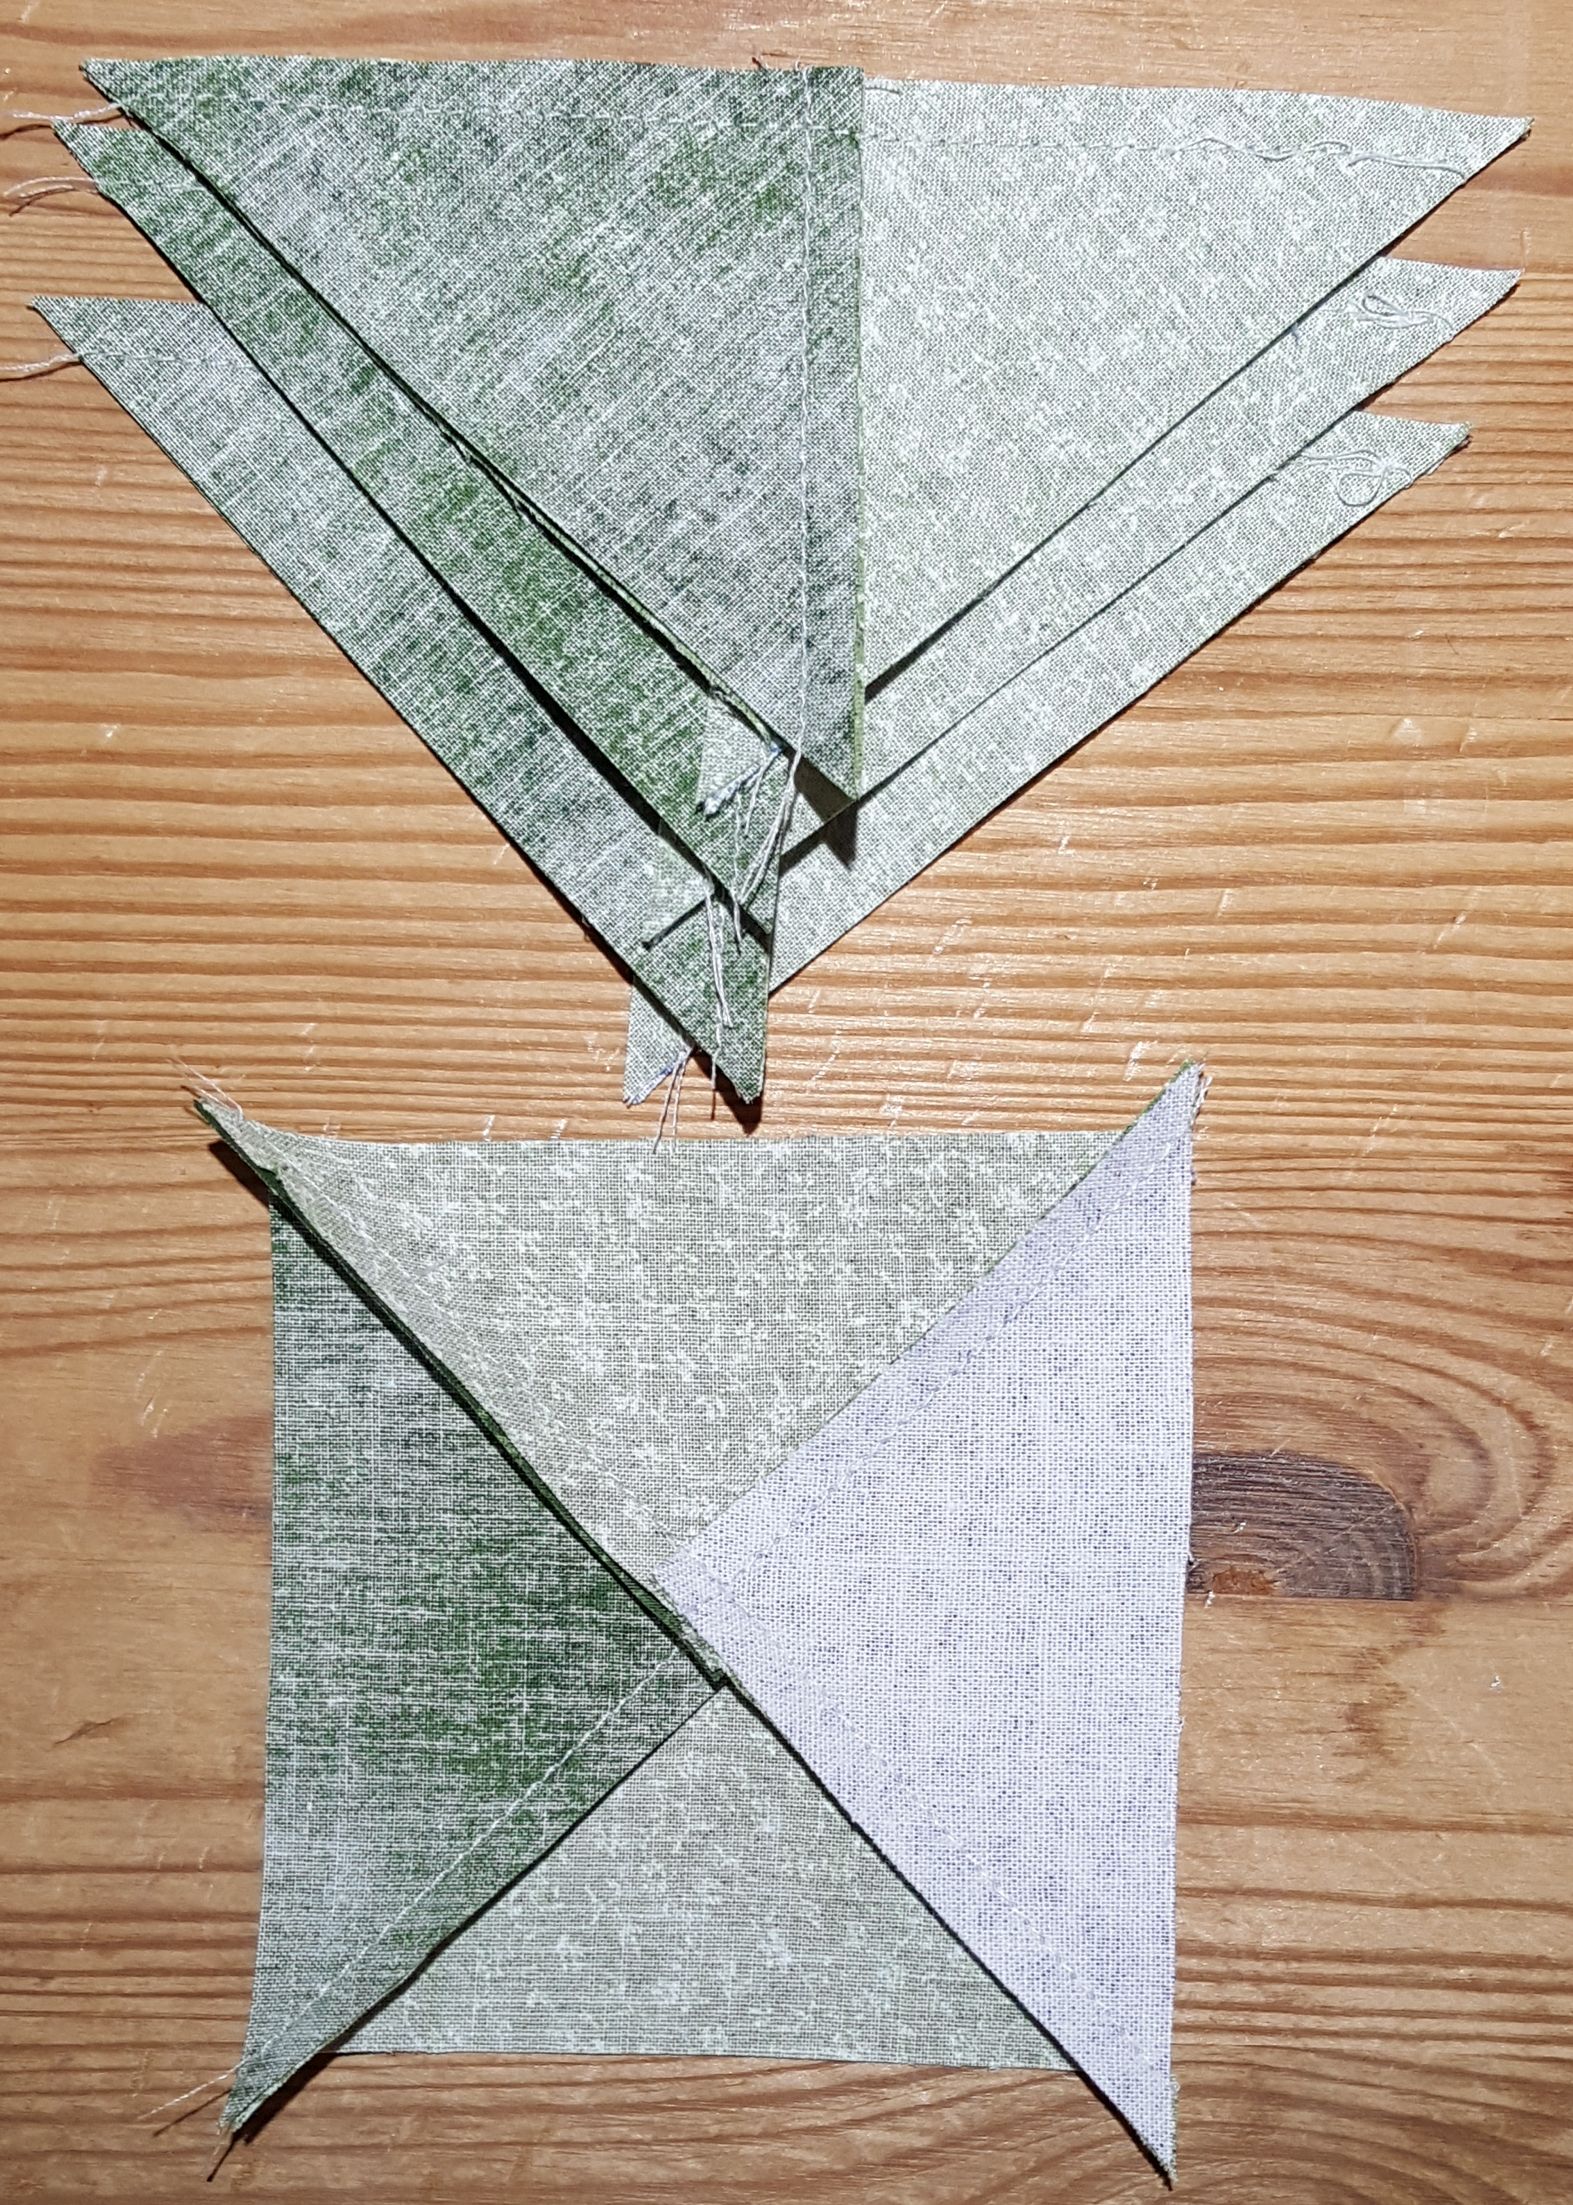
Sew the background triangles and contrast triangles to the star triangles with right sides together and star triangles always on the bottom. Sew down the right edge from the 90 degree angle as shown.


Background and contrast triangles sewn to star triangles


Star side of sewn triangle pieces for Ohio Star quilt block


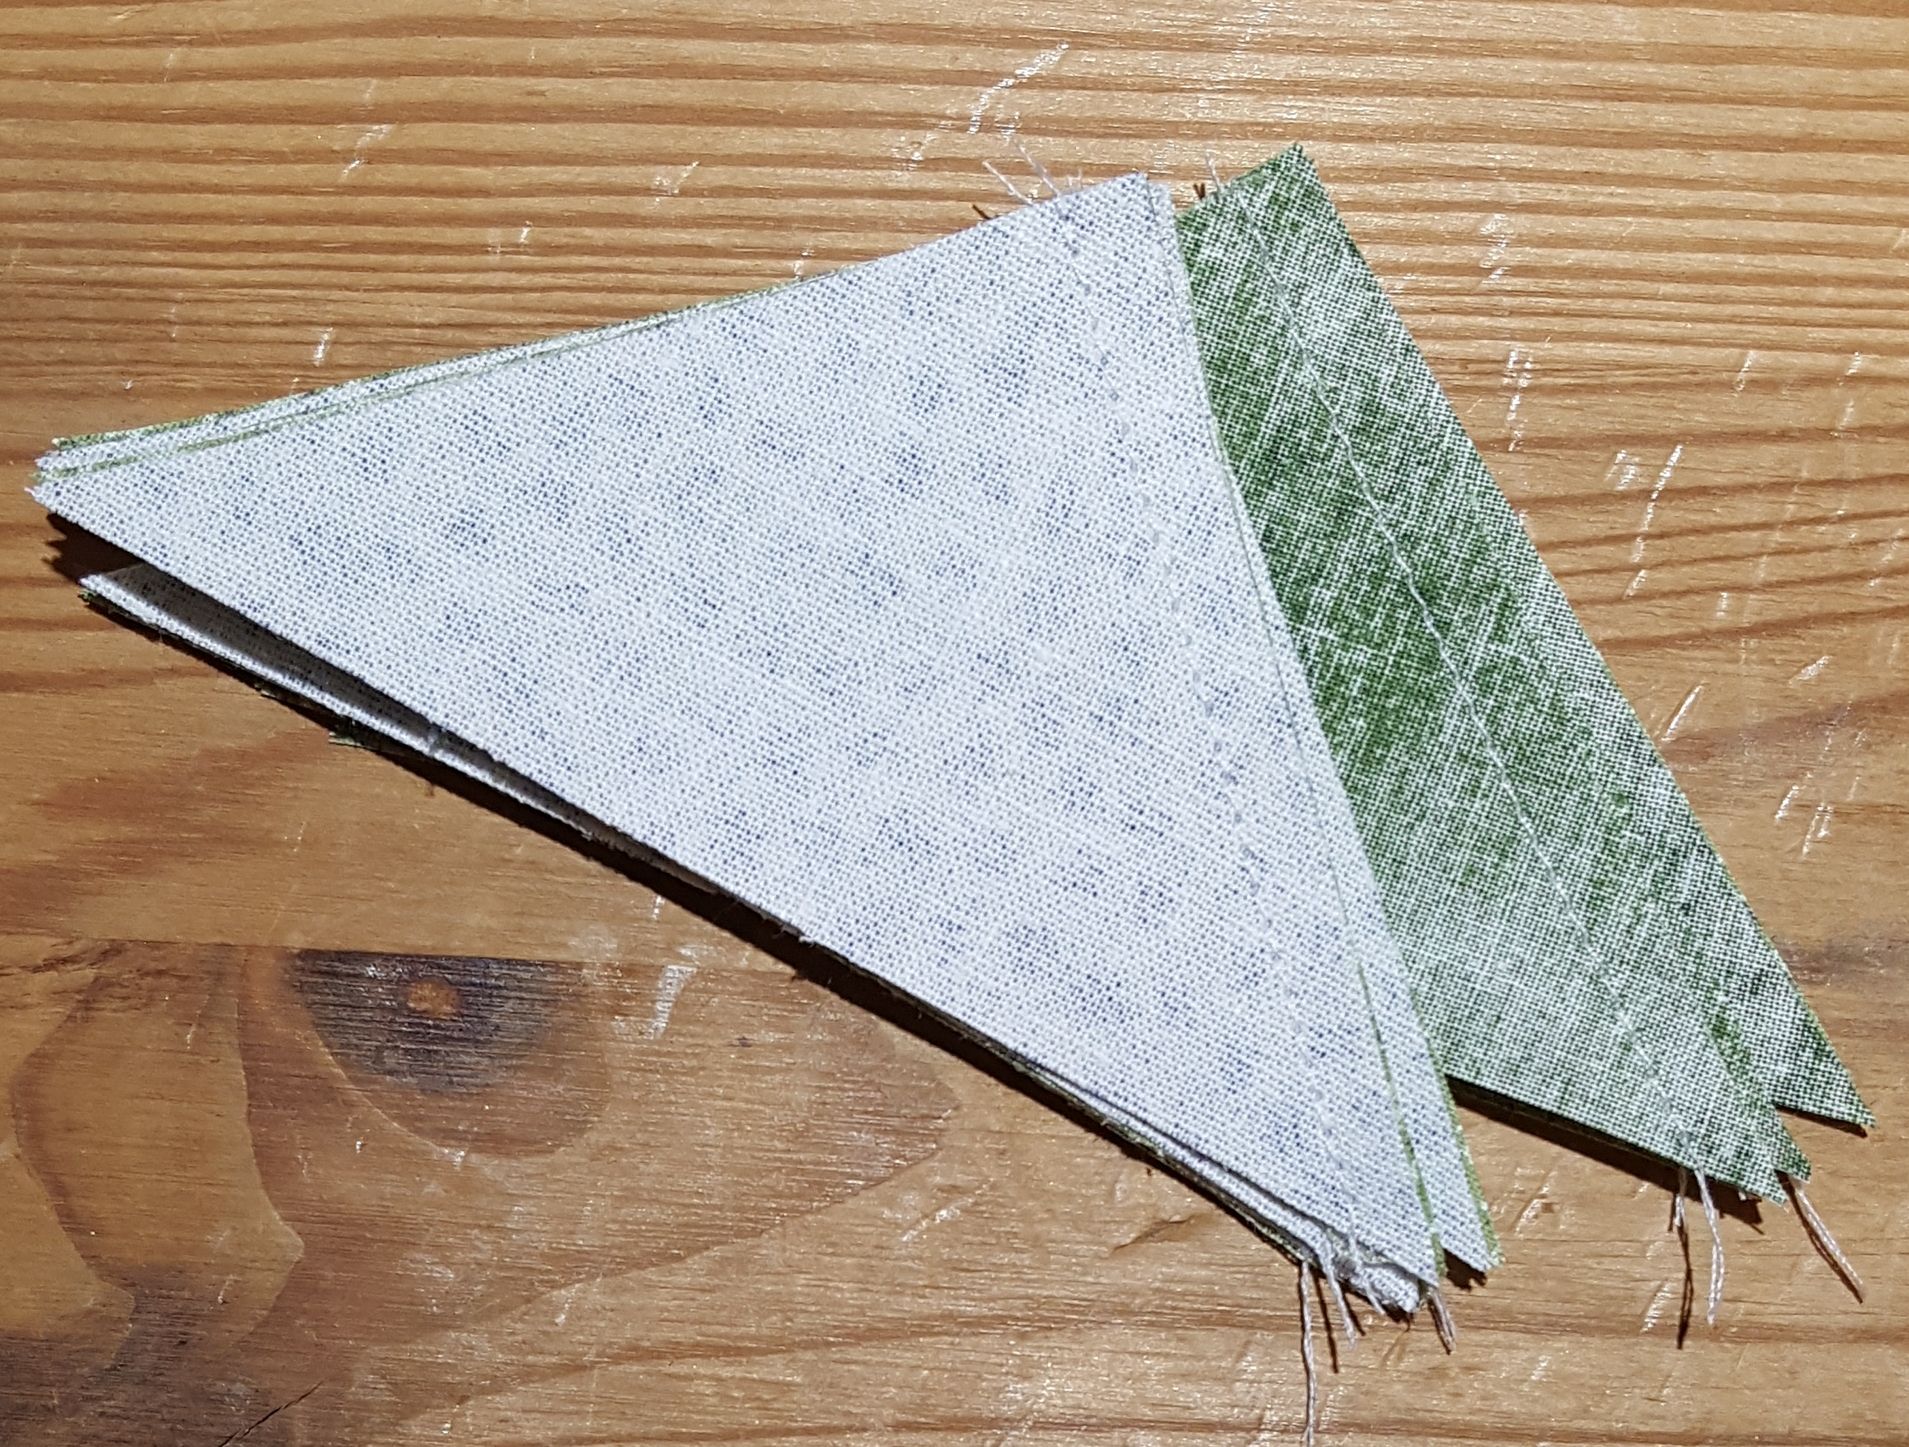
Press seam toward star triangle for Ohio Quilt block
Press seam toward star triangle on all pieces for Ohio Quilt block


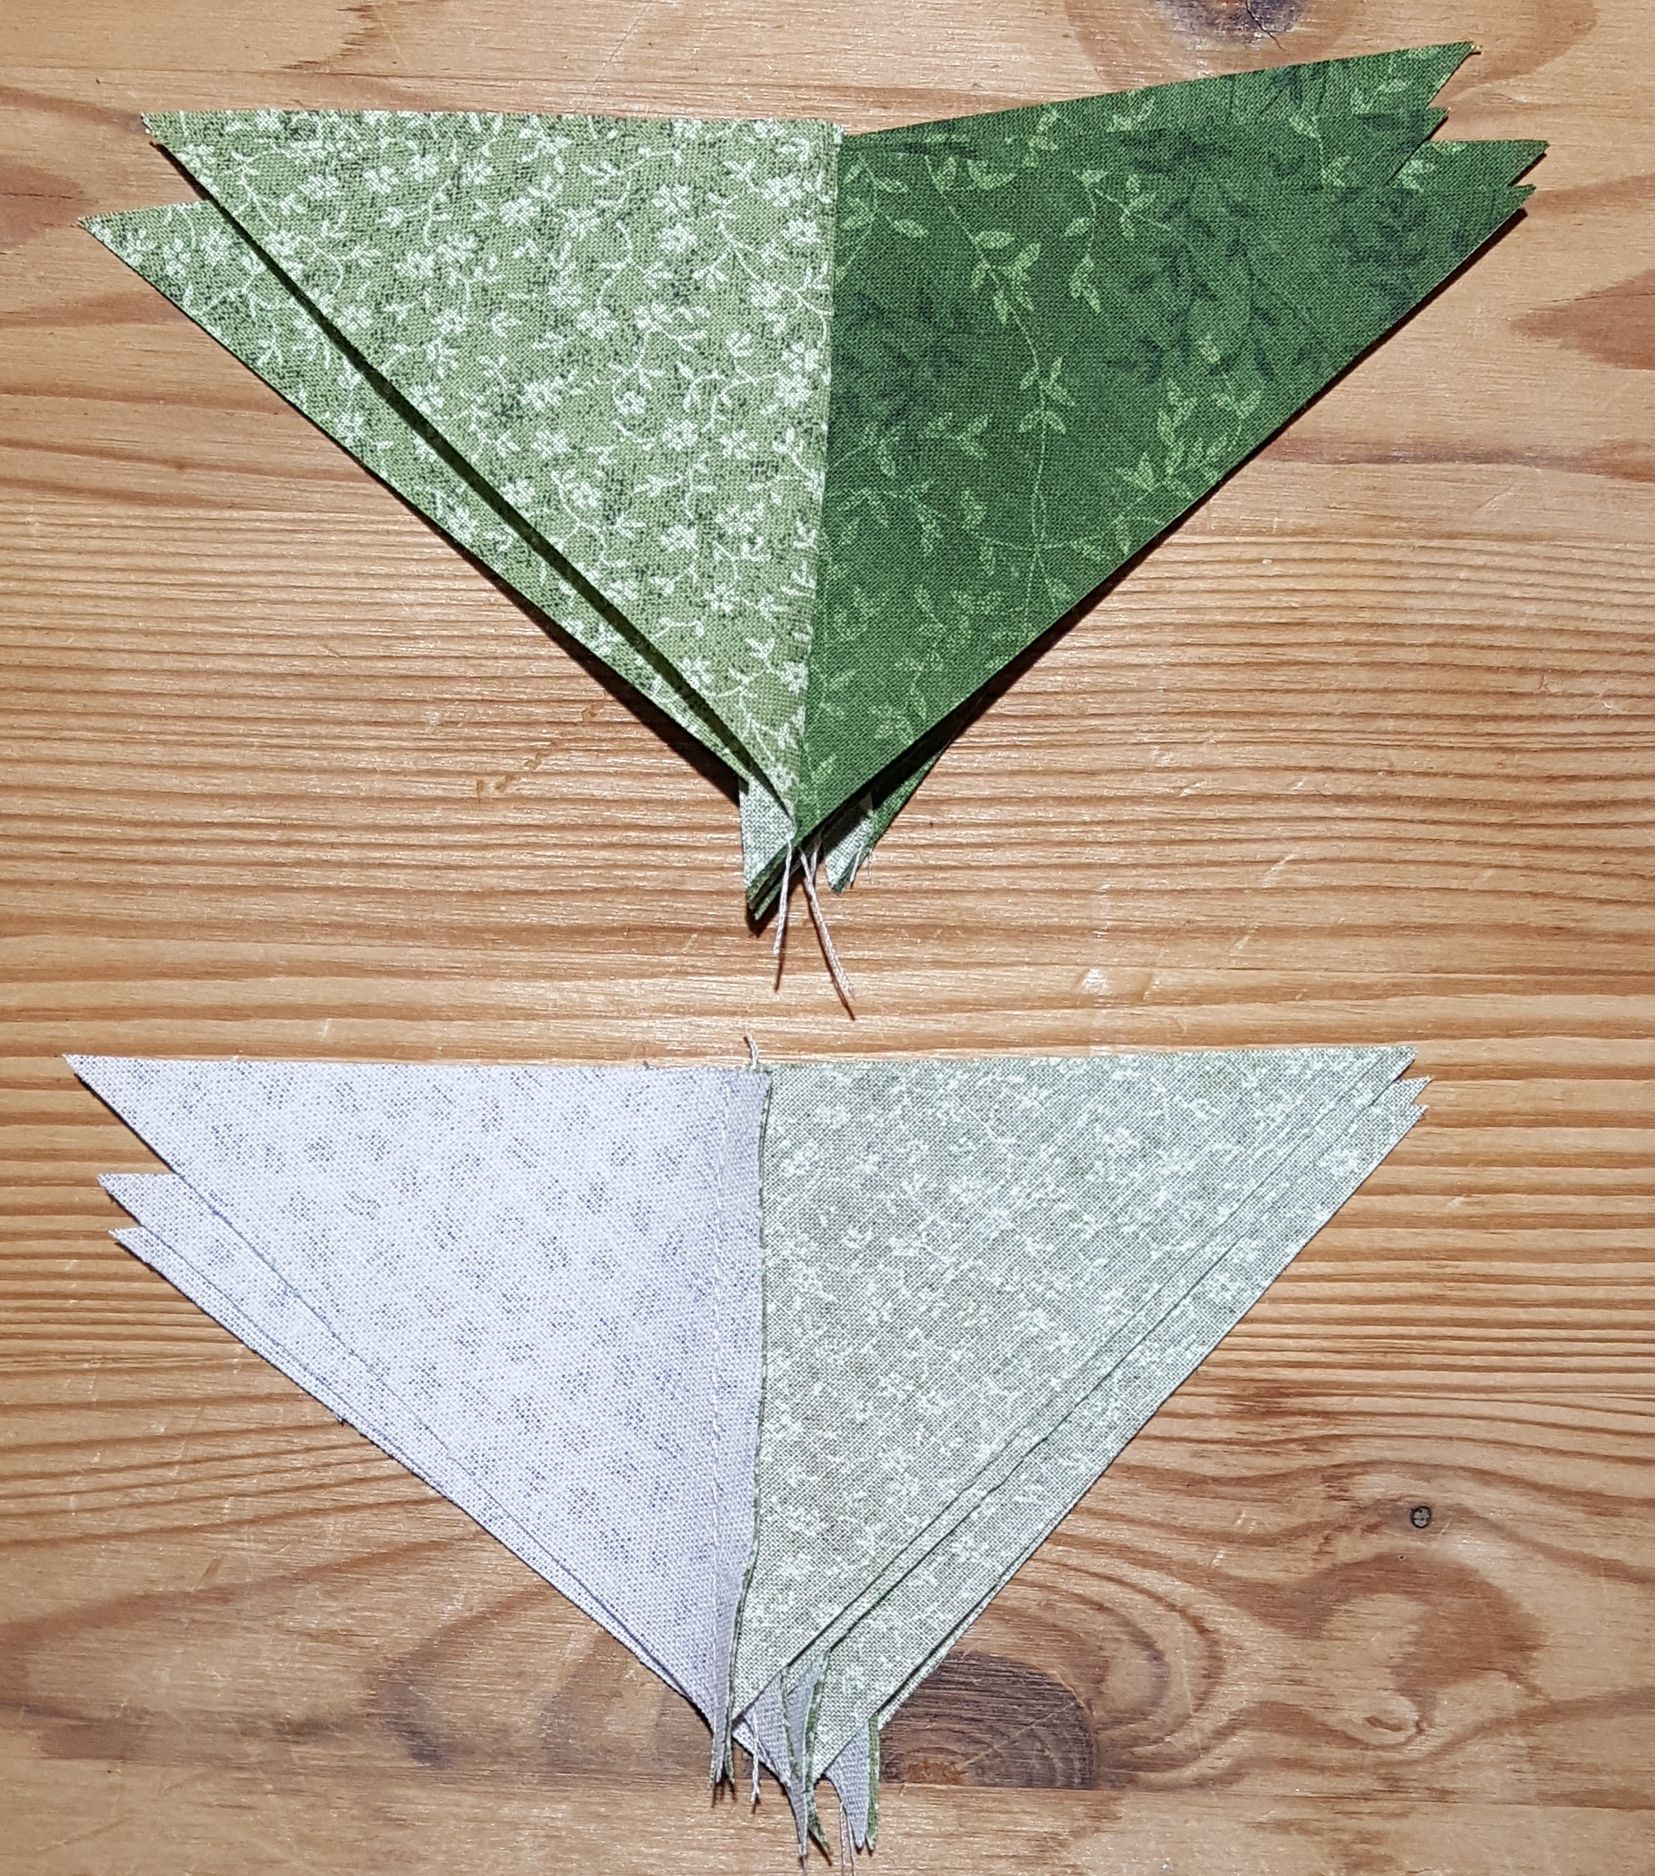
Sew background triangle sets to contrast triangle sets along long edge nesting seams for Ohio Star quilt block
Sew background triangle sets to contrast triangle sets along long edge nesting seams


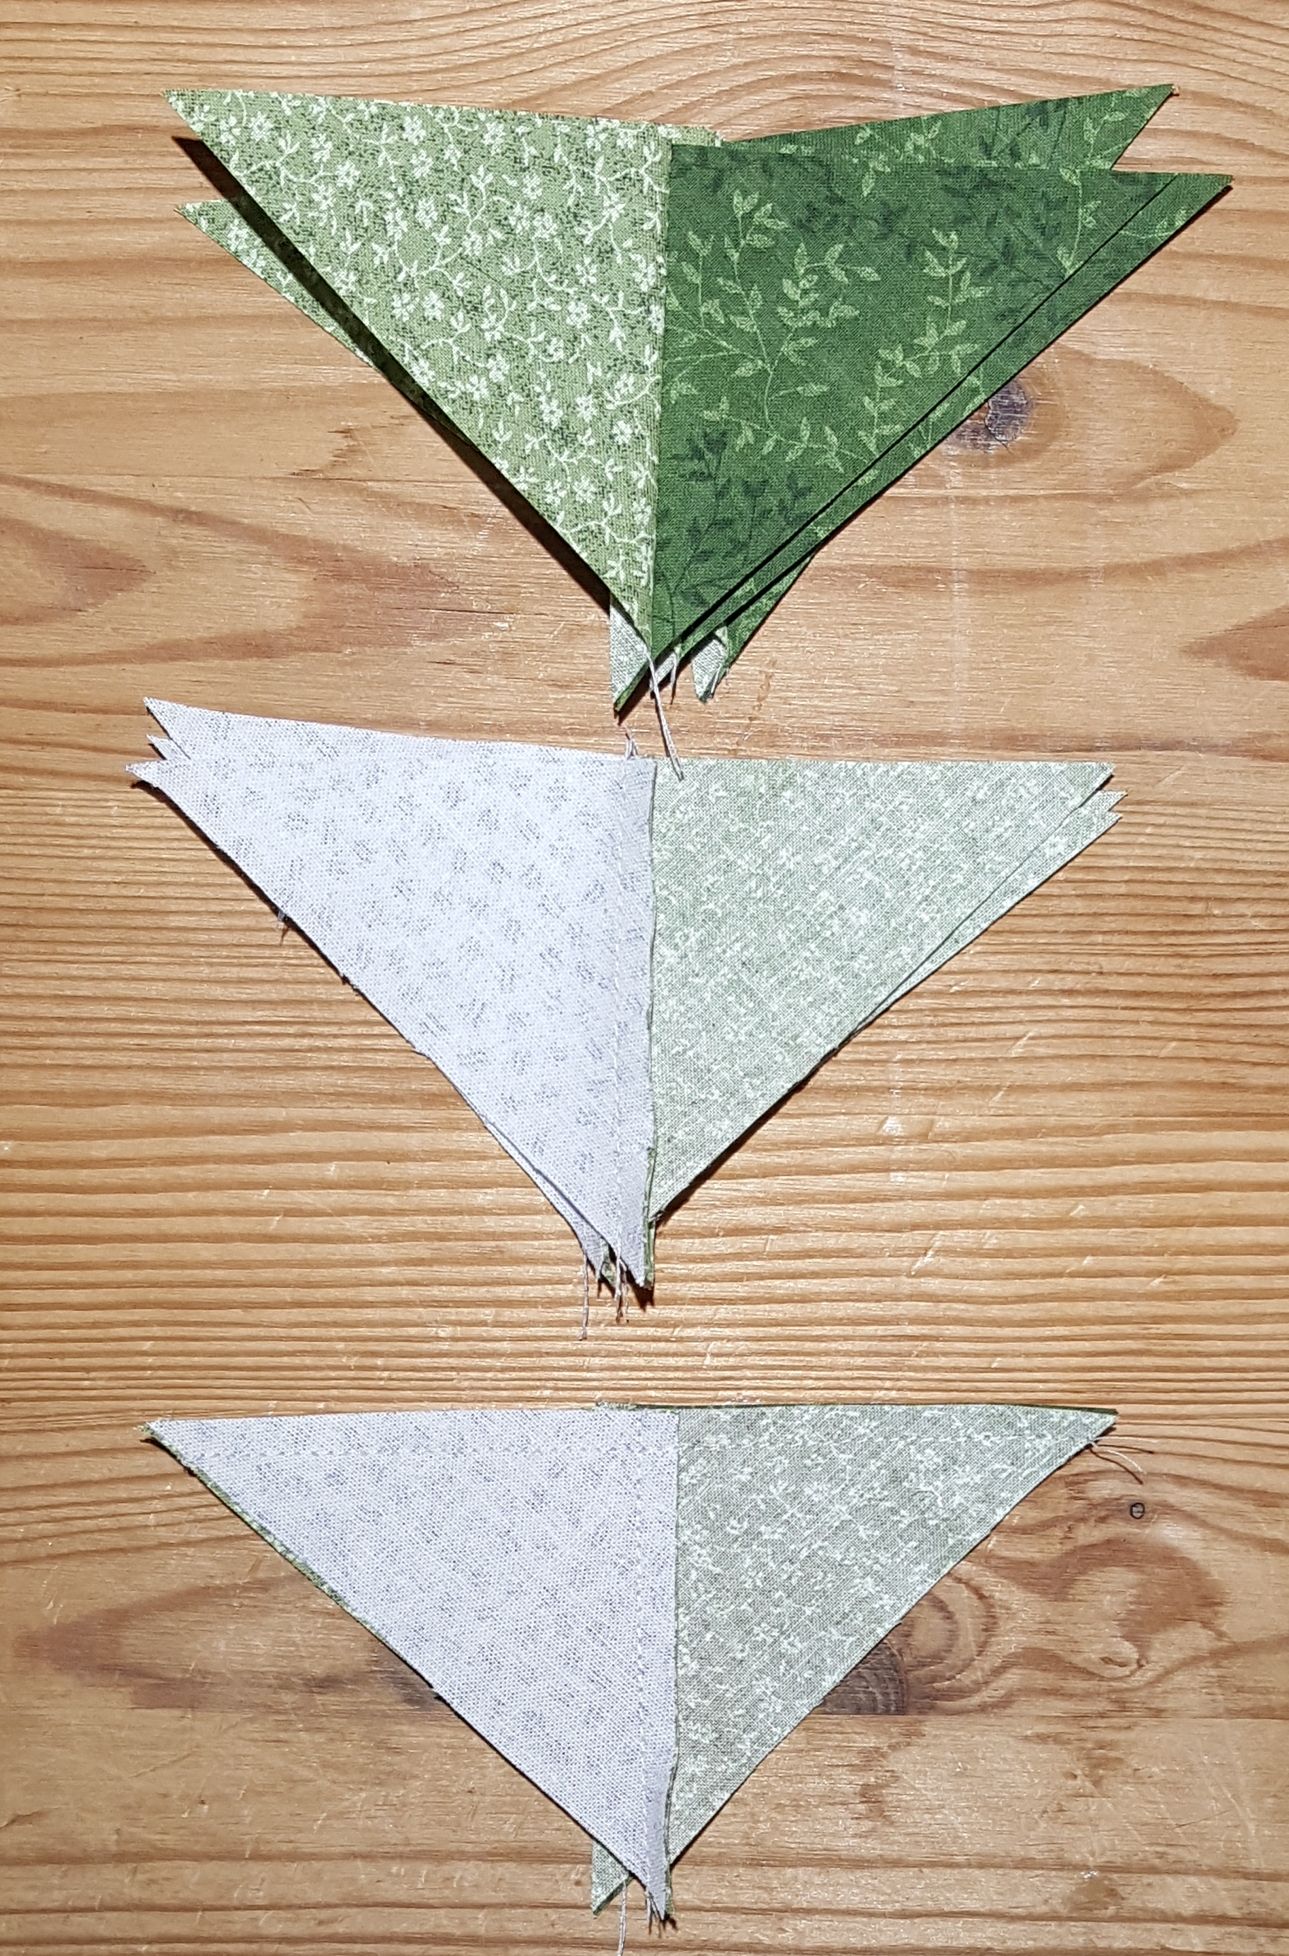
Press seam on sewn triangle pieces for Ohio Star quilt block
Open sewn triangles pieces and press seam toward contrast triangle


Trim dog ears from sewn triangle pieces for Ohio Star quilt block


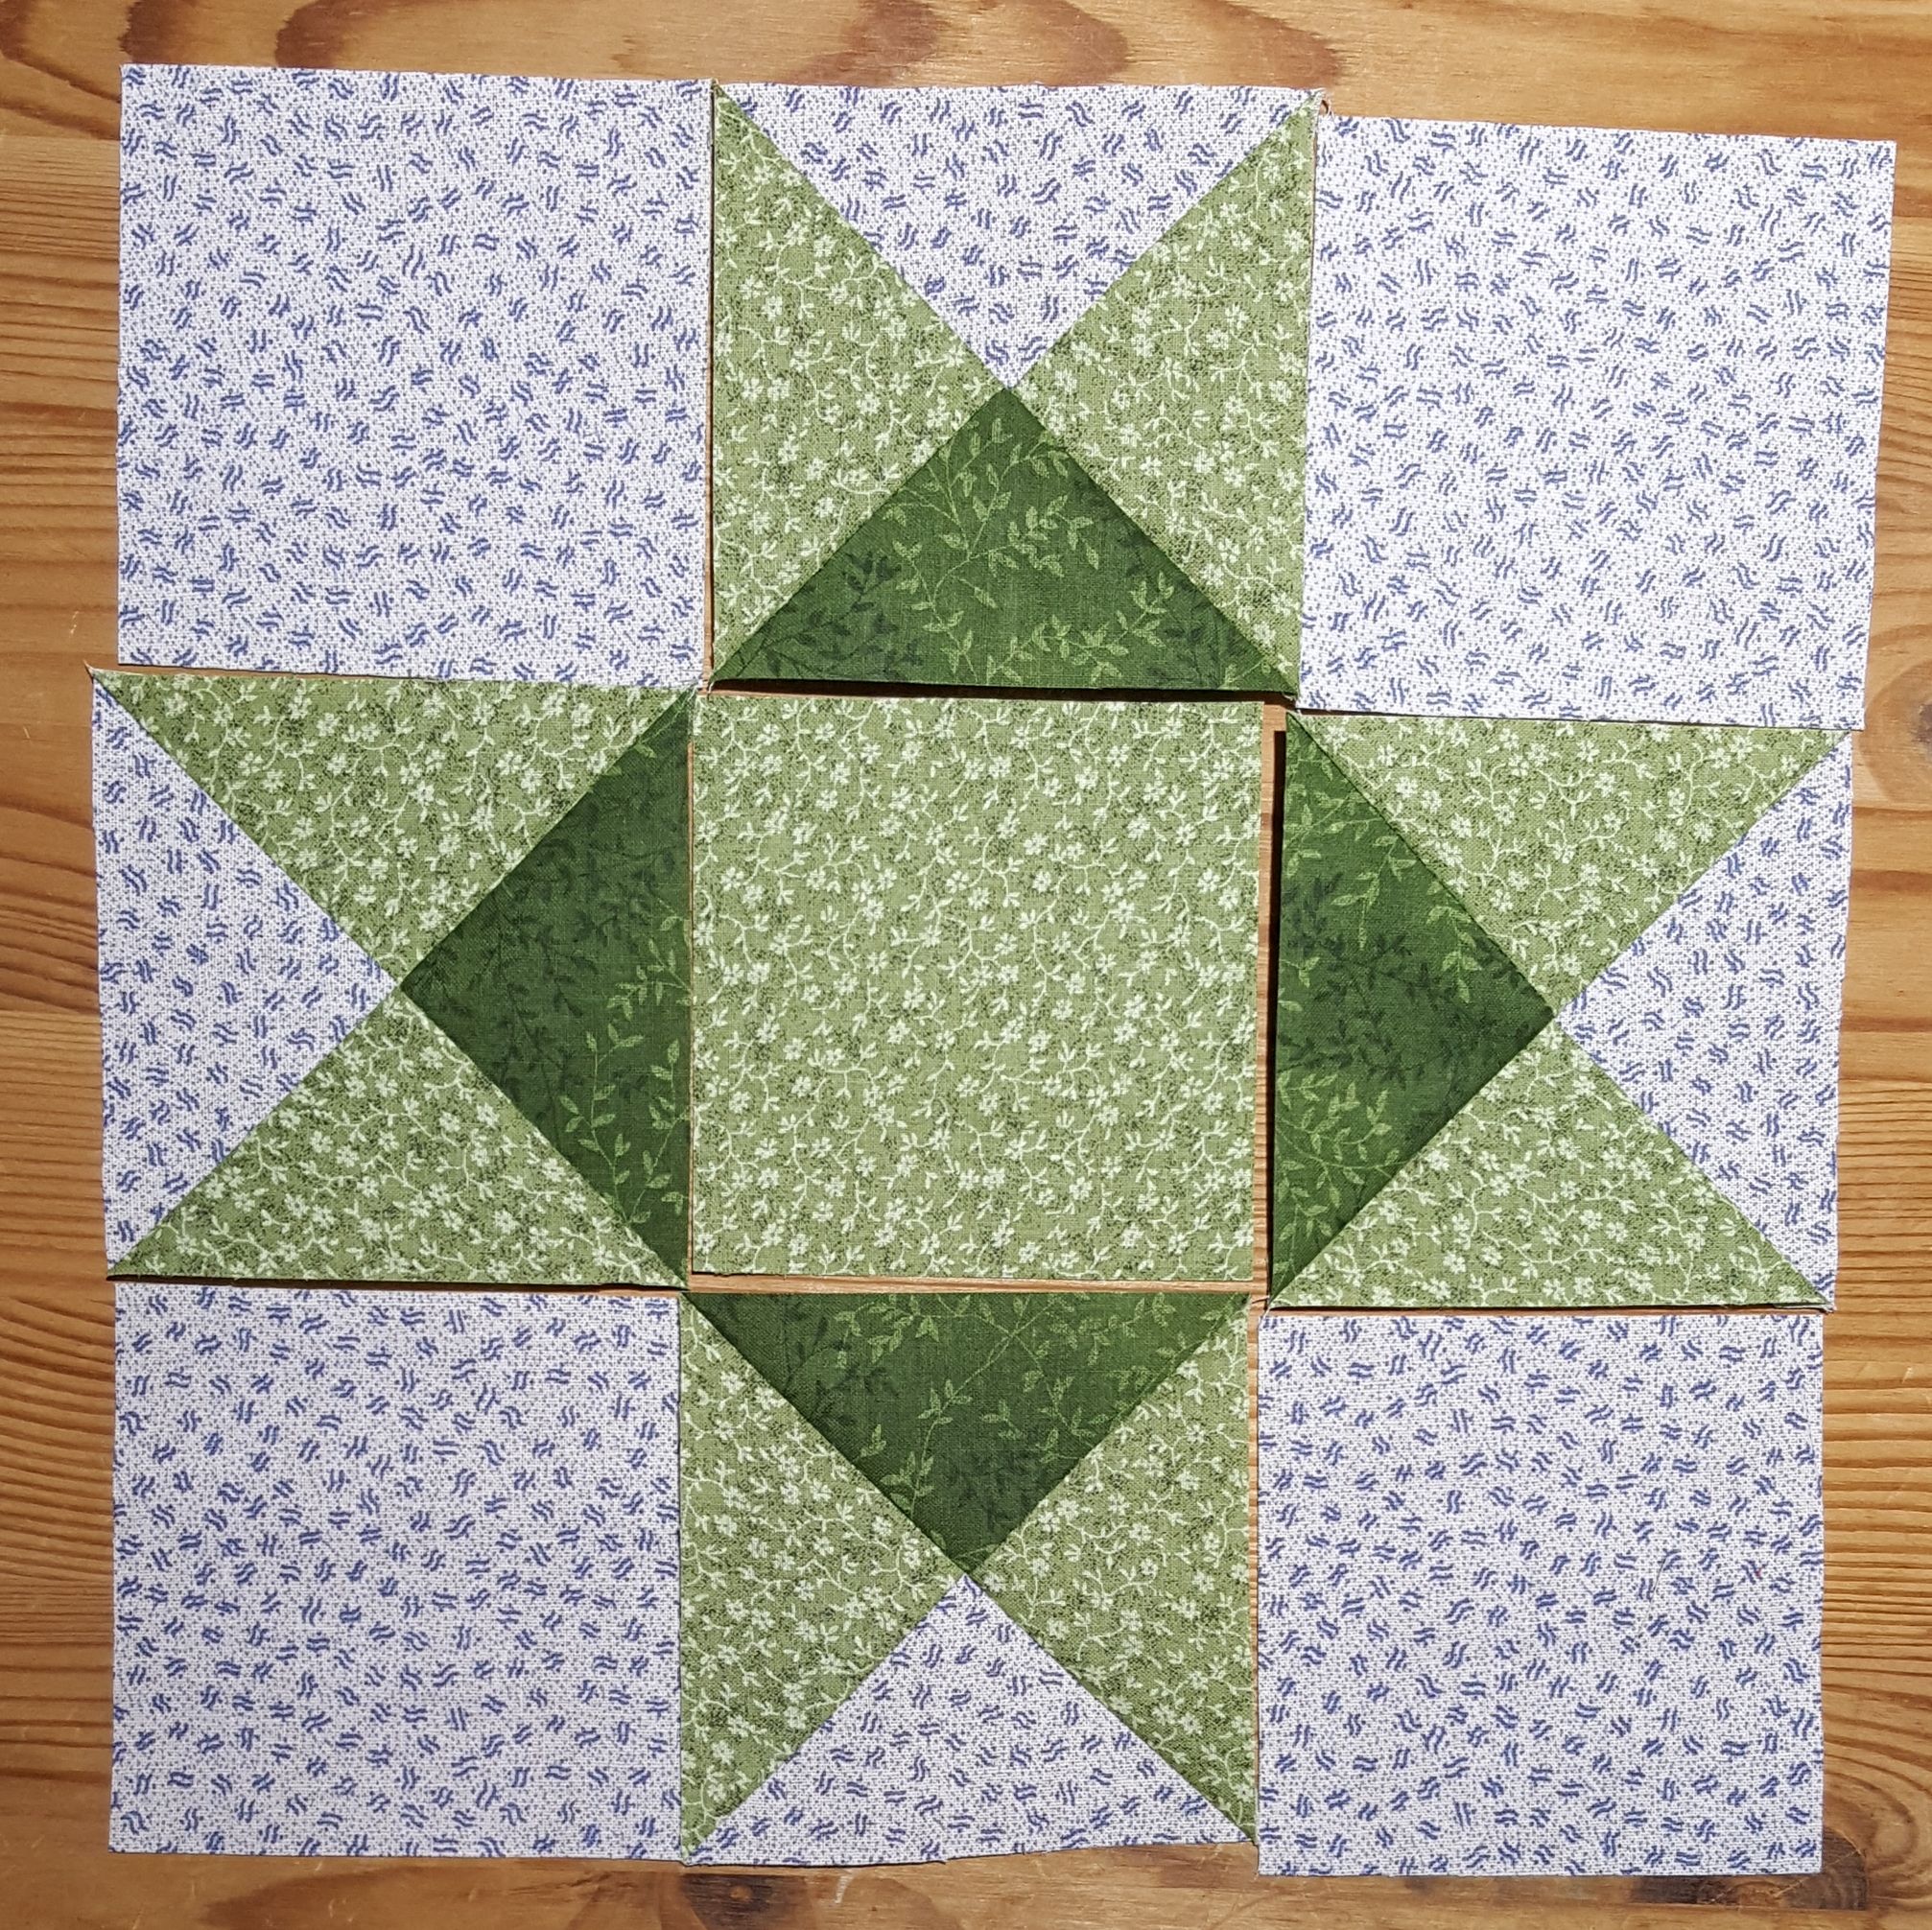
Arrange the sewn triangles to form Ohio Star quilt block
Arrange the sewn triangles with the background squares and the center square to form Ohio Star quilt block. Make sure your contrast triangles border the center square and the background triangles are on the outer edge.


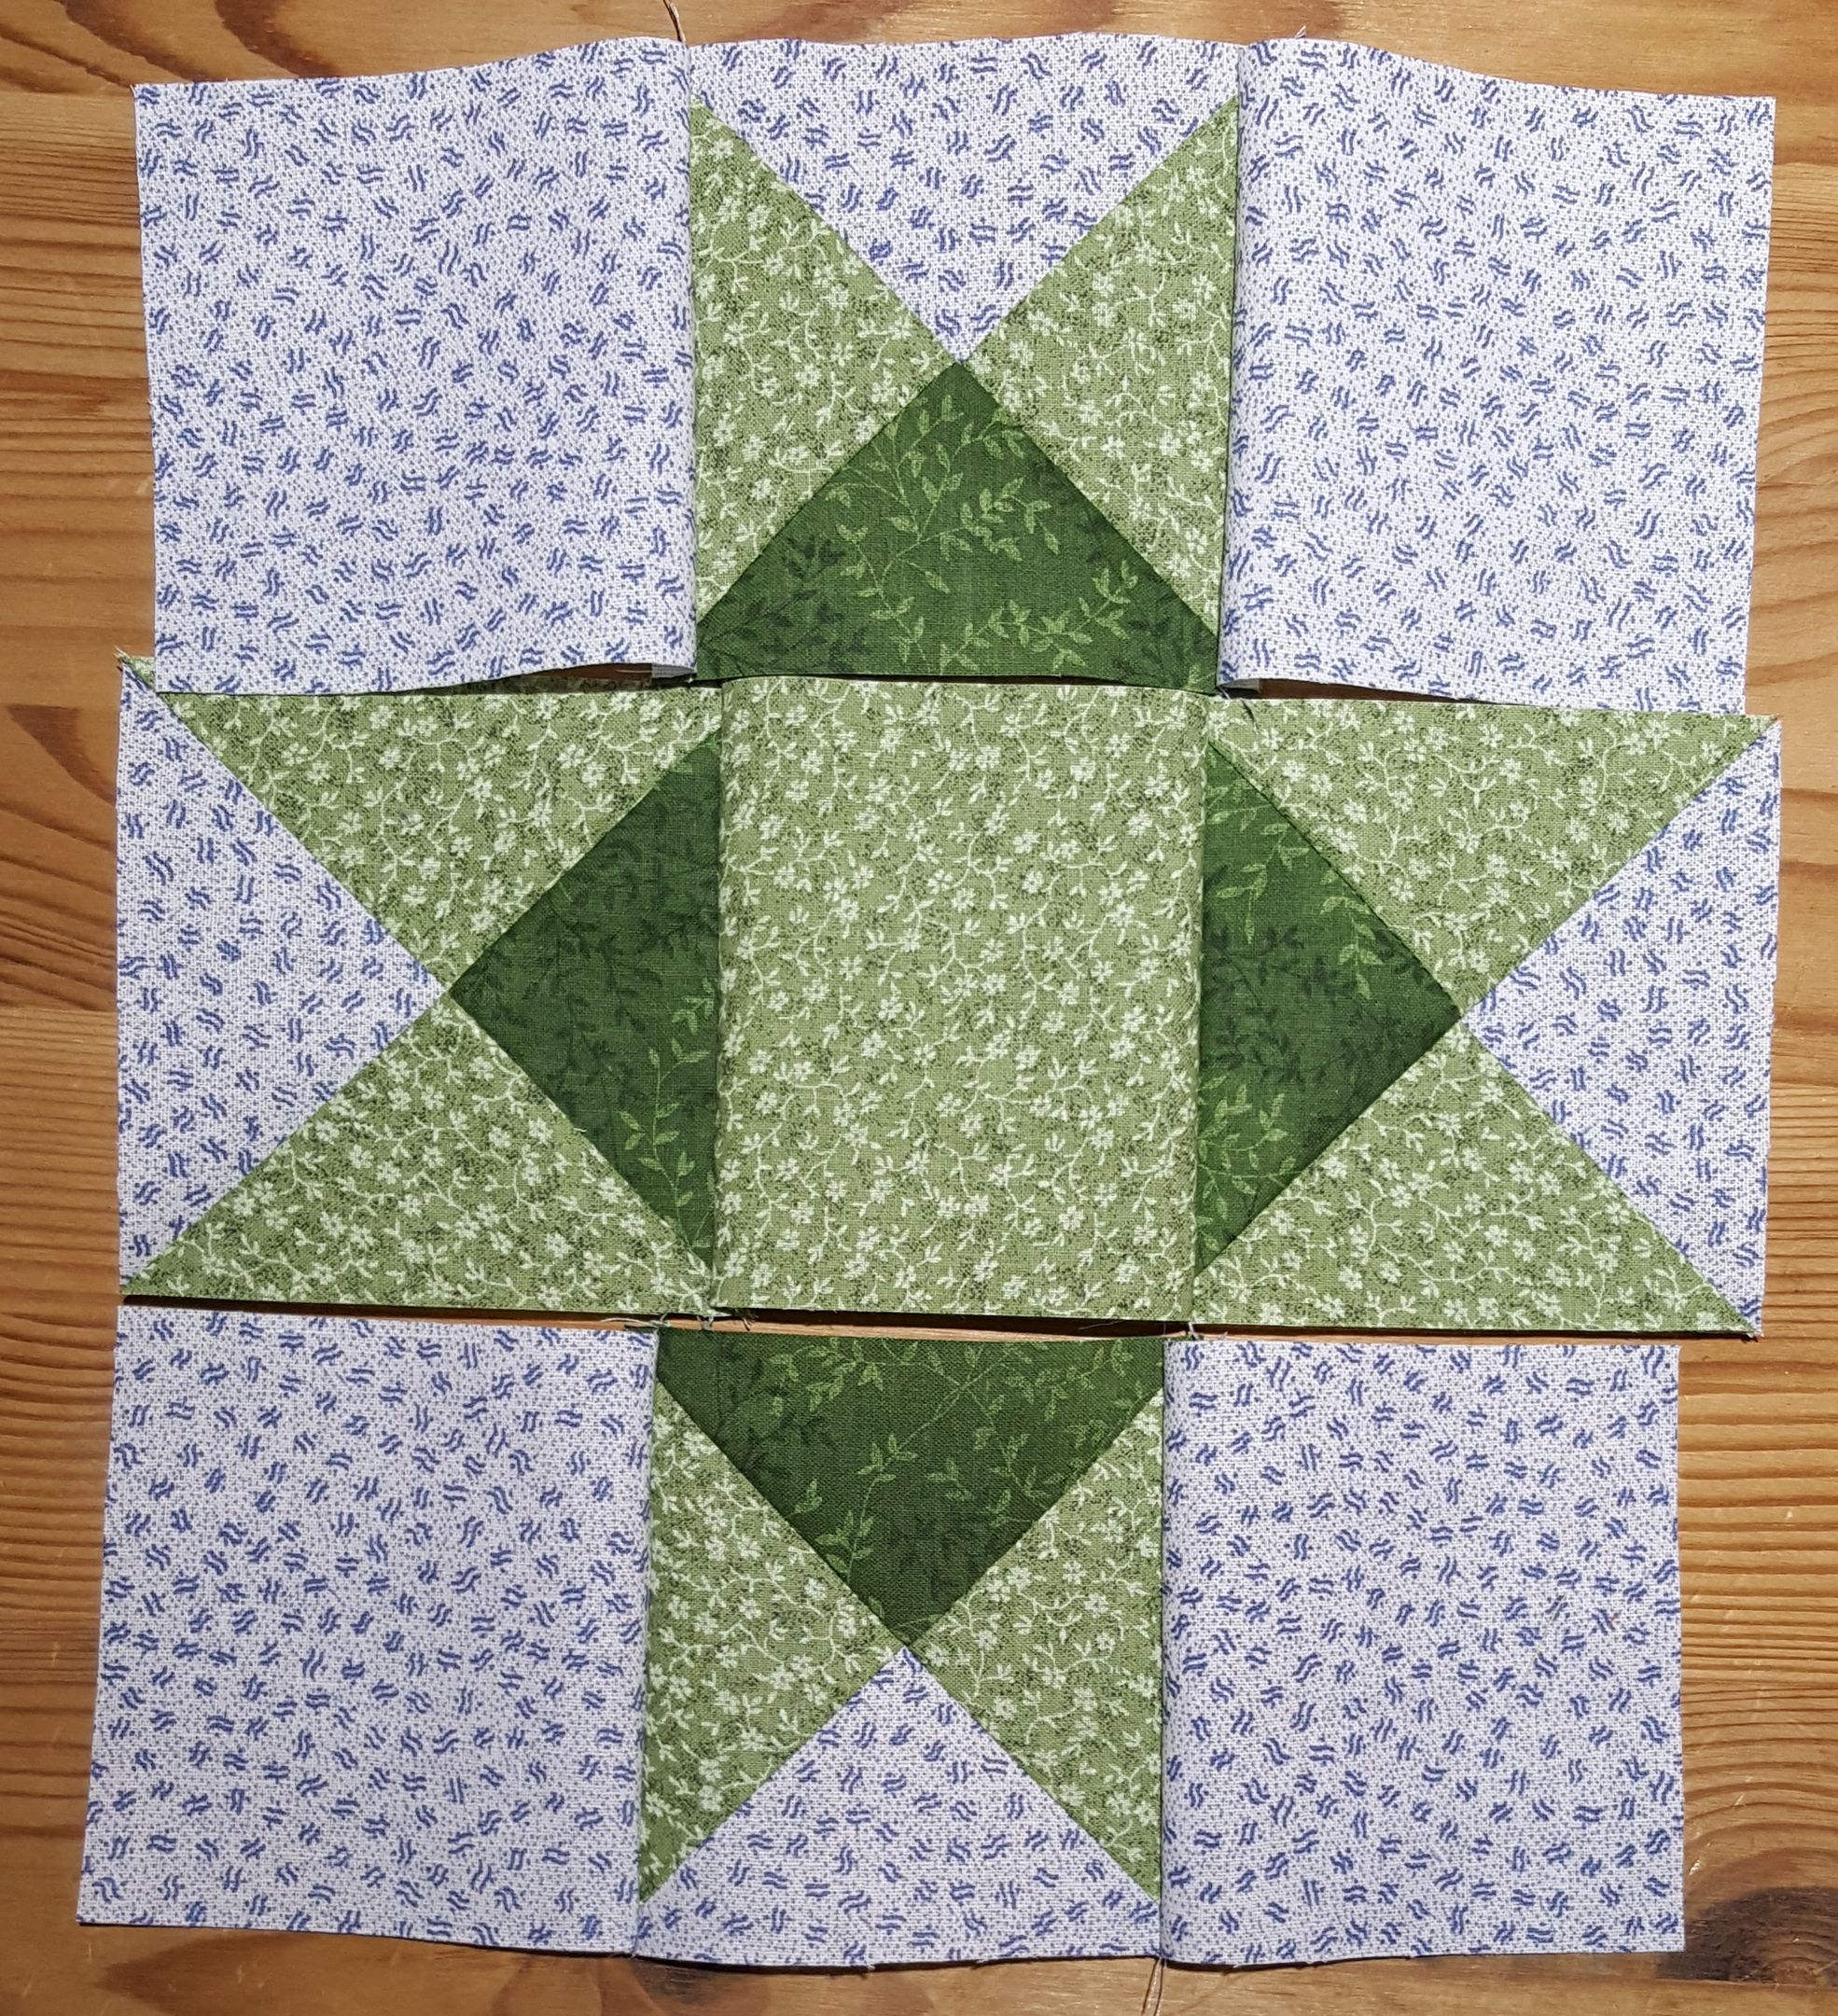
Sew the rows together first for the Ohio Star quilt block
Sew the rows together first for the Ohio Star quilt block. Keep checking to be sure you have the parts in the correct order as you sew.


Pressing seams on Ohio Star quilt block
Press the seams inward for middle row and outward for outside rows for the Ohio Star quilt block


Sew the rows together nesting the seams for the Ohio Star quilt block
Sew the rows together nesting the seams for the Ohio Star quilt block. Make sure you keep your rows in the correct order as you sew that third row onto the block.


Pressing the row seams on the Ohio Star quilt block
Press the row seams outward on the Ohio Star quilt block


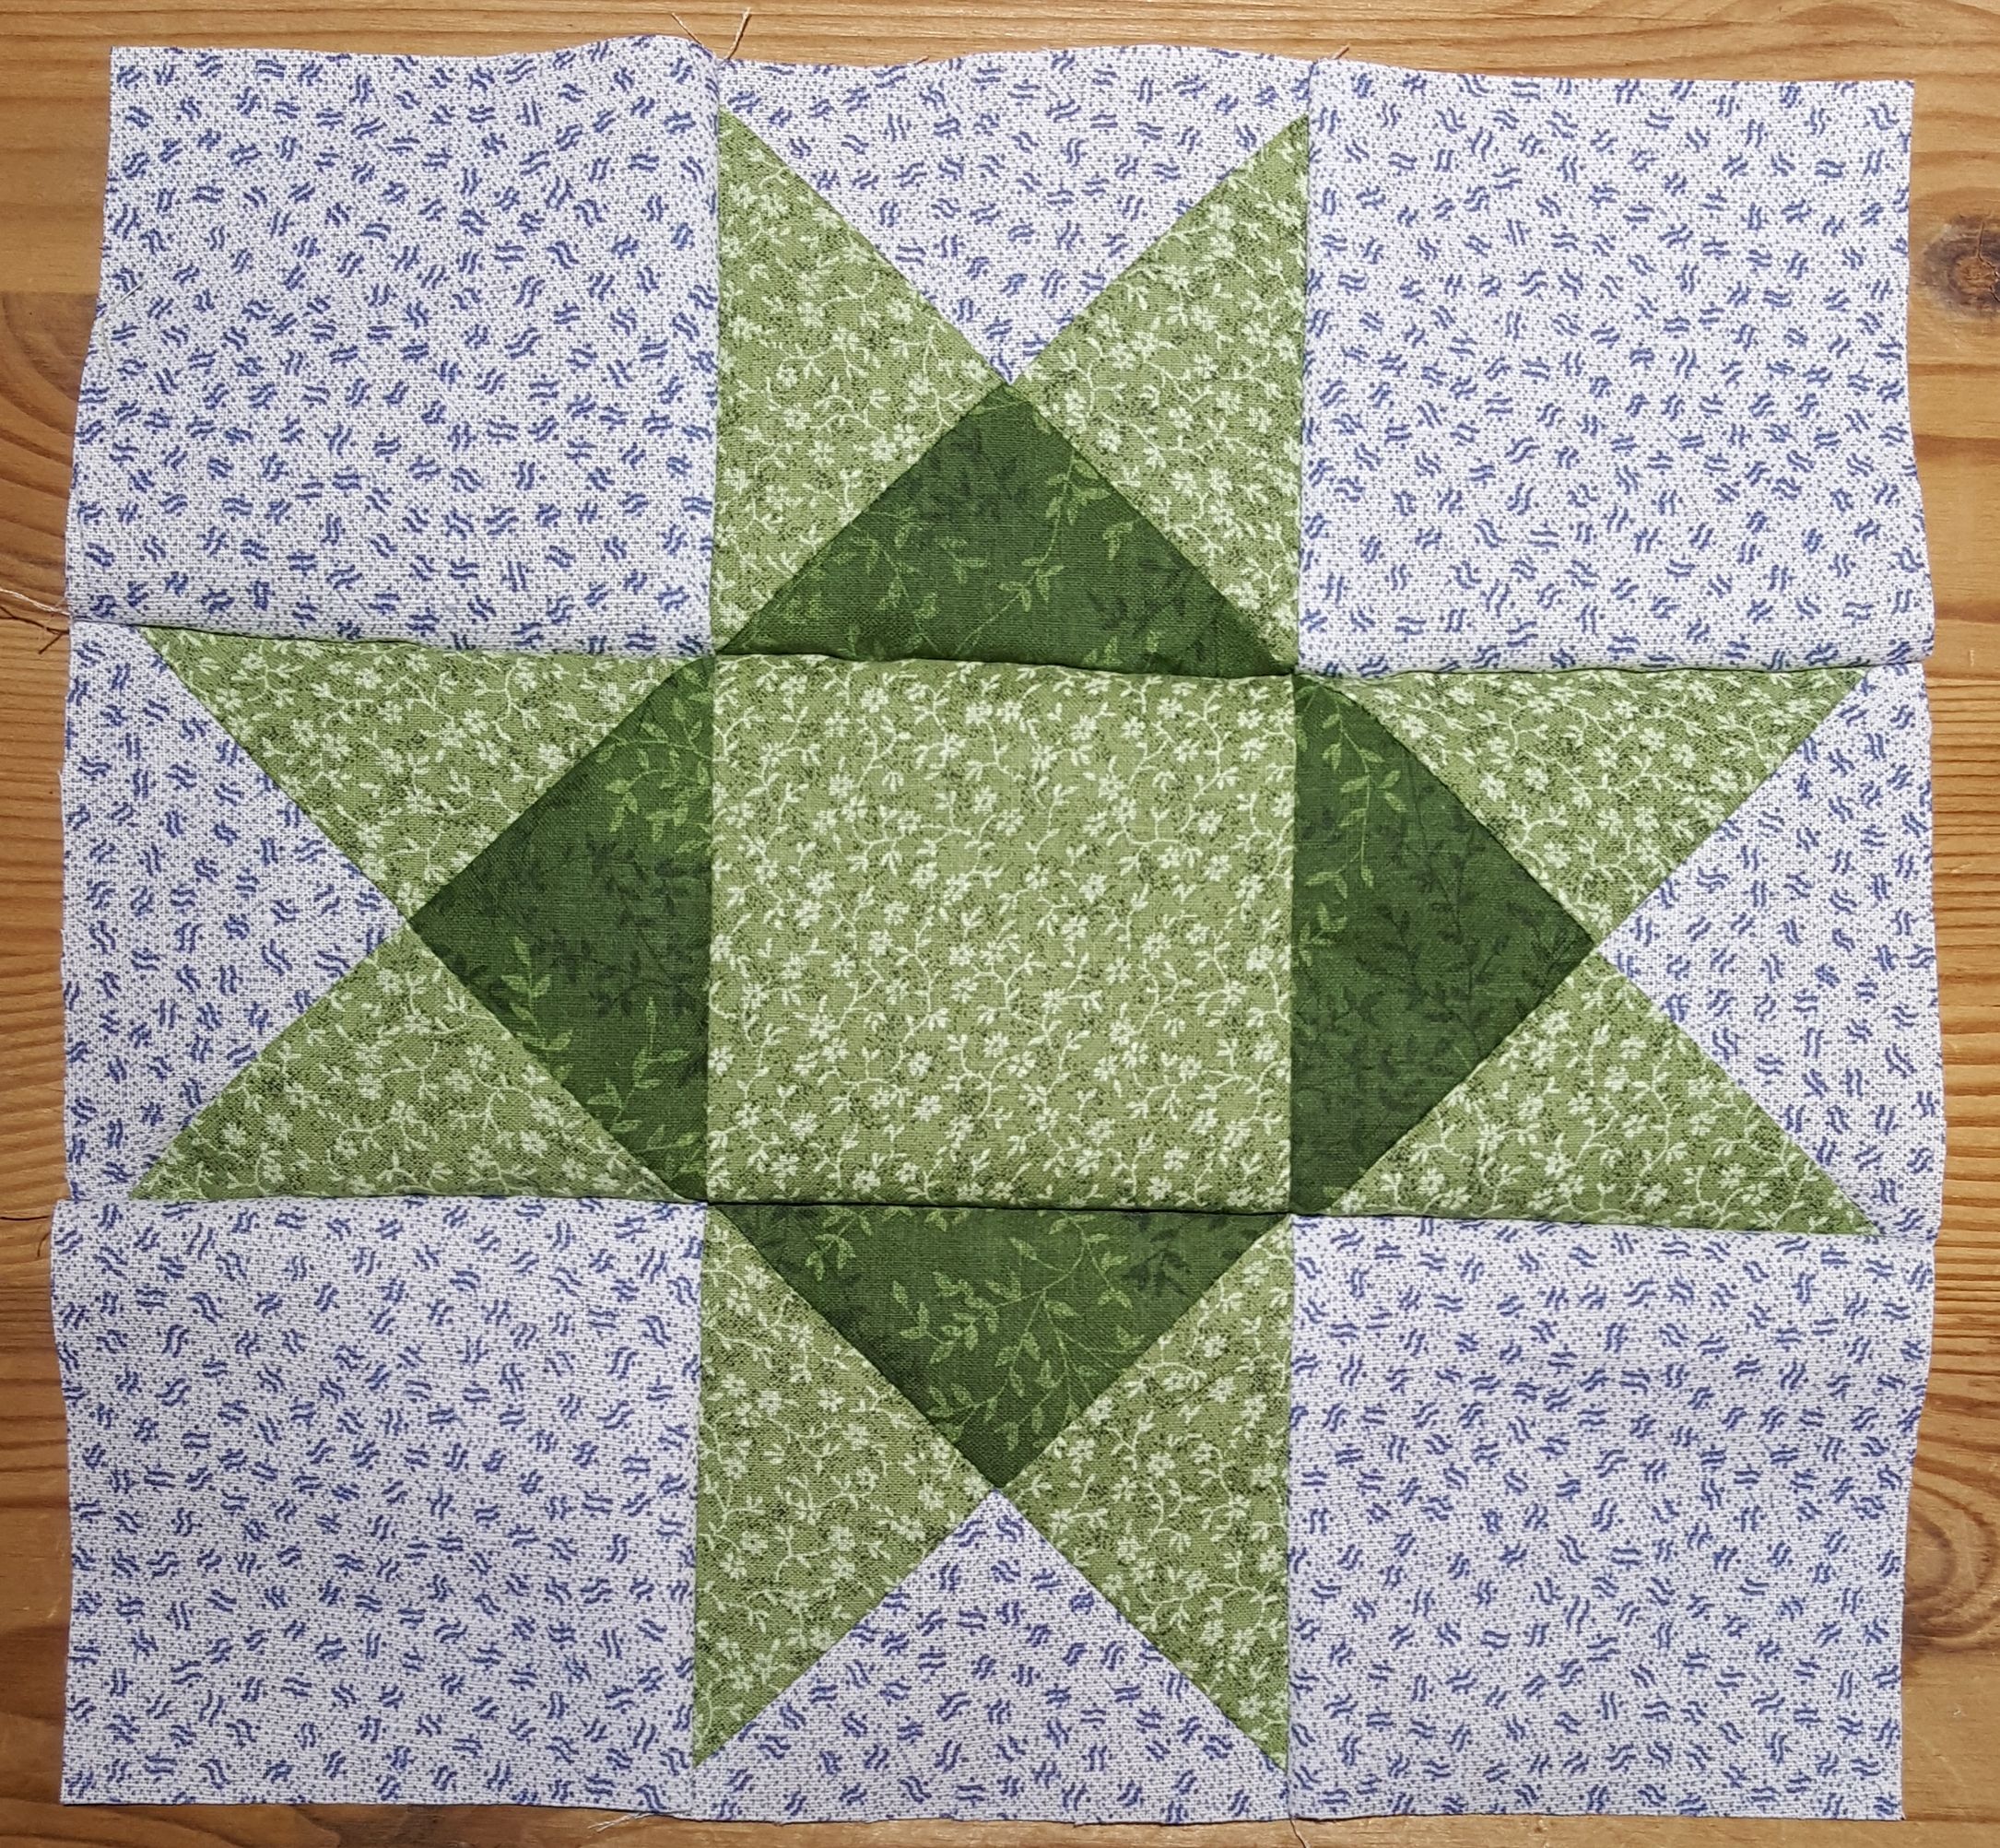
Beautiful 9 inch Ohio Star quilt block
Turn the block over and admire your beautiful 9-inch Ohio Star quilt block

As you can see, my block is not perfectly square. It tends to bow a little at the middle row. I do not trim it because this is caused by the fabric stretching. When I sew the block into the quilt, I just keep the edges of the two pieces I am sewing even with each other and stitch a quarter inch seam. Once the quilt is completely finished and washed, it all looks fine. I use unwashed fabric when I am quilting so the fabric shrinkage outweighs any wonkiness in the blocks themselves and the washing helps bring the fabric back into shape.


Posted on 1 Comment

Hunter’s Star and Eventide Quilt Pieces – Treasures in a Quilter’s Storage Container

Eventide Quilt Blocks found in a storage tub

So I was going through my storage tubs the other day and found one that was a complete surprise. When I saw what was inside, I remembered starting the projects but had forgotten all about them. Here is the tub.


Quilter's Storage Tub
Quilter’s Storage Tub

Here is pictorial of what I found when I opened the tub.

Hunter's Star from scrap fabrics
Hunter’s Star from scrap fabrics


Block parts to more Hunter's Star blocks
Block parts to more Hunter’s Star blocks


Cut pieces for Hunter's Star blocks
Cut pieces for Hunter’s Star blocks


Border pieces to an Eventide quilt top


Ohio Star block and Hourglass block to Eventide Quilt


Hourglass pieces to an Eventide quilt top
Hourglass pieces to an Eventide quilt top with my sketchy directions I wrote from a picture of an Eventide Quilt


Cut pieces for the Ohio Star blocks of an Eventide quilt top

I was very happy when I found this tub as I am in an “Ohio Star” mood and had just completed a scrappy Ohio Star quilt. I wanted to make another one but I am working on Christmas gifts so I put the thought aside. When I saw these neatly cut and stacked pieces for the Eventide quilt which is composed of small and large Ohio Star blocks, I just had to work on it. I spent my entire Saturday sewing and completed all of the blocks and one border length and put those all together to complete most of the top. I only have the other border and side to attach and the top will be done. I will post a picture of the top soon, I promise!

What treasures have you found in your storage tubs?

Posted on Leave a comment

Online Quilt Calculator

Online Quilt Calculator – great for adjusting quilt patterns; calculating blocks needed, number of cornerstones and sashings; and overhang on different bed sizes.

Have you ever found a beautiful quilt pattern that you want to make but the size is wrong? Do you struggle to figure out the number of blocks, sashings, cornerstones that you will need to make a quilt? Do you simply hate math and doing all the figuring and just want to sew? Now the Online Quilt Calculator can help you!

Here is one way it works. You find a pattern you like. Your pattern provides the following information:

Quilt Size: 70” x 80”
Blocks: 42 (8”) blocks

The quilt has 2” sashings with cornerstones. The pattern tells you to cut:

56 (2”) cornerstones
97 (2” x 8”) sashing pieces.

You want to make a quilt that measures 96” x 98” inches using this pattern. Go to the Online Quilt Calculator and enter the following information:

Block Size: 8 (from the pattern)
Desired Quilt Width: 96 (your desired width)
Desired Quilt Length: 98 (your desired length)
Sashing Width: 2 (from the pattern)
Cornerstones: Yes (fromt the pattern)

Click on Calculate. The following results are displayed:

________________________________________
Suggested Blocks Across: 9
Suggested Blocks Down: 10
________________________________________
Total Blocks Needed: 90
Actual Quilt Width: 92
Actual Quilt Length: 102
Block Size: 8
Cornerstones: 110 2-inch
Sashings: 199 2″ x 8″

If you use the suggested blocks, the quilt is 6 inches narrower and 6 inches shorter than you desire. You can adjust the blocks across and blocks down to 10 and 11 respectively and enter these numbers into the Adjust Your Results to see that if you add one block across and one block down, your quilt will be 102” wide and 112” inches long as shown below.

Adjusted Blocks Needed: 110
Adjusted Quilt Width: 102
Adjusted Quilt Length: 112
Block Size: 8
Adjusted Cornerstones: 132 2-inch
Adjusted Sashings: 241 2″ x 8″

Go back to your original input and try adding a border. In this instance, adding two 4-inch borders brings the quilt size to 98″ x 98″. It also reduces the number of blocks, cornerstones, and sashings needed. This is very close to the desired quilt size. Now you can decide whether to go with the 9 across and 10 down to make a quilt 92” x 102” or make it 10 across and 11 down for the larger quilt at 102” x 112” or add a couple of borders to the first option to make your quilt 98″ x 98″.

This is one way to use the Online Quilt Calculator. You can also use it to create any quilt based on block size and desired width and length. Try changing the block size, and add or remove sashing, cornerstones, and borders to see how they affect the number of blocks needed and the quilt size. It is a lot of fun playing around with the numbers and the best part is – you don’t have to do any of the math yourself!

Try out the new Online Quilt Calculator and see for yourself. If you have a moment, drop me a line and let know what you think of it. I am also open to suggestions for improving it and making it more valuable and functional for traditional and non-traditional quilters. Just send me an email through my contact page to let me know your thoughts.

Posted on 1 Comment

Quilt Size Guide

Standard mattresses vary in thickness from 7” to 24”. Older mattresses are thinner while newer pillowtop mattresses are thicker. A 15” overhang would be fine on a bed with an older mattress. However, it would not work as well for a bed with a pillowtop mattress as it would leave about half of the mattress height exposed. When calculating length, take into consideration the distance needed to cover the height of the bed pillows if you wish your quilt to cover the pillows rather than lay under them. About 12 inches is the average except on a toddler bed, where you only need about 4 inches.

Quilt Size Guide
Quilt Size Guide

Formula to Calculate Finished Bed Quilt Size

Quilt Width  = Mattress width + (2 * overhang desired on side)

Quilt Length  = Mattress length + overhang desired on end + allowance for pillow tuck

Posted on Leave a comment

Tools of the Quilting Trade

Some simple quilting tools

I have read much about tools for quilting. A lot of people push expensive tools – rotary cutters, quilting rules, and cutting mats – and high end machines in order to be able to quilt. If you are new to quilting and your machine is 30 years old (or older) and you do not even own a rotary cutter, don’t worry. You can still quilt. When I started quilting, I went to my local department store’s craft section and bought a:

  • Fiskars 3-Inch-by-18-inch Clear Acrylic Quilting Ruler;
  • Fiskars Rotary Cutter;
  • Fiskars Cutting Mat, 12-Inch by 18-Inch.

These simple, inexpensive tools and my 35-year-old Singer got me started on my quilting adventure.  The only stitch you need to do quilting is a straight stitch, so even the most basic machine can be used to make a quilt. Your grandmother’s treadle will work, as well.

I am assuming, since you have a sewing machine, that in addition to the machine, you have:

  • Sewing pins
  • Sewing scissors
  • Thread snippers
  • Stitch ripper
  • Seam guide

With these simple tools, you can get started making quilts. You do not need professional, expensive tools to make pretty, functional quilts. Remember, our grandparents and great-grandparents and our great, great, great, great- (add a few more greats in) grandparents did not have the luxury of any of these tools and did everything by hand. Technically, the only cutting tools you need are a ruler and a pair of scissors. So don’t waste your money buying expensive tools. Spend your money on fabric, instead. 😉

Singer Stylist 534
1976 Singer Stylist 534